

Accept and reject orders
Every new order waits for someone to accept it. Accepting sets the ready time, tells the customer, prints the kitchen ticket and stops the alarm on every screen. If you can’t make it, reject it with a reason: the customer gets a friendly message and a full refund.
Before you start
Section titled “Before you start”- You need permission to accept and reject orders. Owners, admins, managers and staff have it, and so does every paired kitchen tablet.
- Your default prep time comes from Settings → Ordering and collection, one for collection and one for delivery. Busy mode adds its extra minutes on top. See busy mode and pausing.
- Orders are accepted by a person unless you turn on auto-accept. See Auto-accept below.
Accept an order
Section titled “Accept an order”You can accept from three places. They all do the same thing.
-
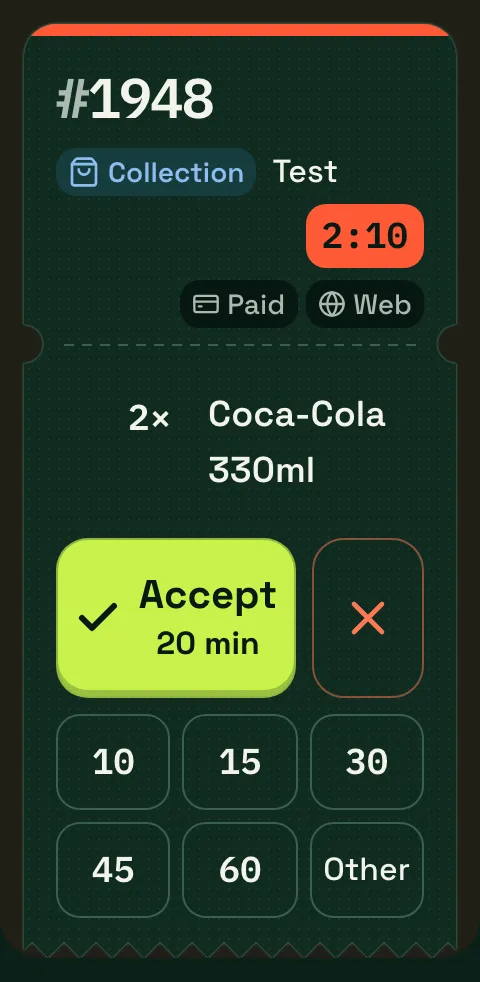
The new-order alarm on a kitchen tablet. Tap Accept · 20 min on the full-screen card. The number is your default prep time.
-
The ticket on the kitchen board. Tap the big Accept button for the default time, or a chip (10, 15, 30, 45, 60) for a different time.
-
The dashboard board. Click Review & accept on the card, then Accept · 20 min in the side sheet, or a time chip. Or select the card and press a.
What happens when you accept:
- The order moves to Accepted on every screen, and the alarm stops everywhere.
- The customer’s tracking page changes to Accepted, ready about 19:45 (or arriving 19:50–20:05 for delivery) and they get an email. A line appears in the order’s message thread: “Accepted · ready about 19:45”.
- The kitchen ticket prints on any printer with an “on accept” print route, and kitchen display tickets fire to their stations.
- The missed-order escalation stops. See alerts and escalation.
If two people tap at the same moment, the first wins. The second sees “Order #1042 was already accepted by Kitchen tablet” and nothing happens twice.
Pick another ready time
Section titled “Pick another ready time”Tap Other on the ticket, or Other time on the alarm card.
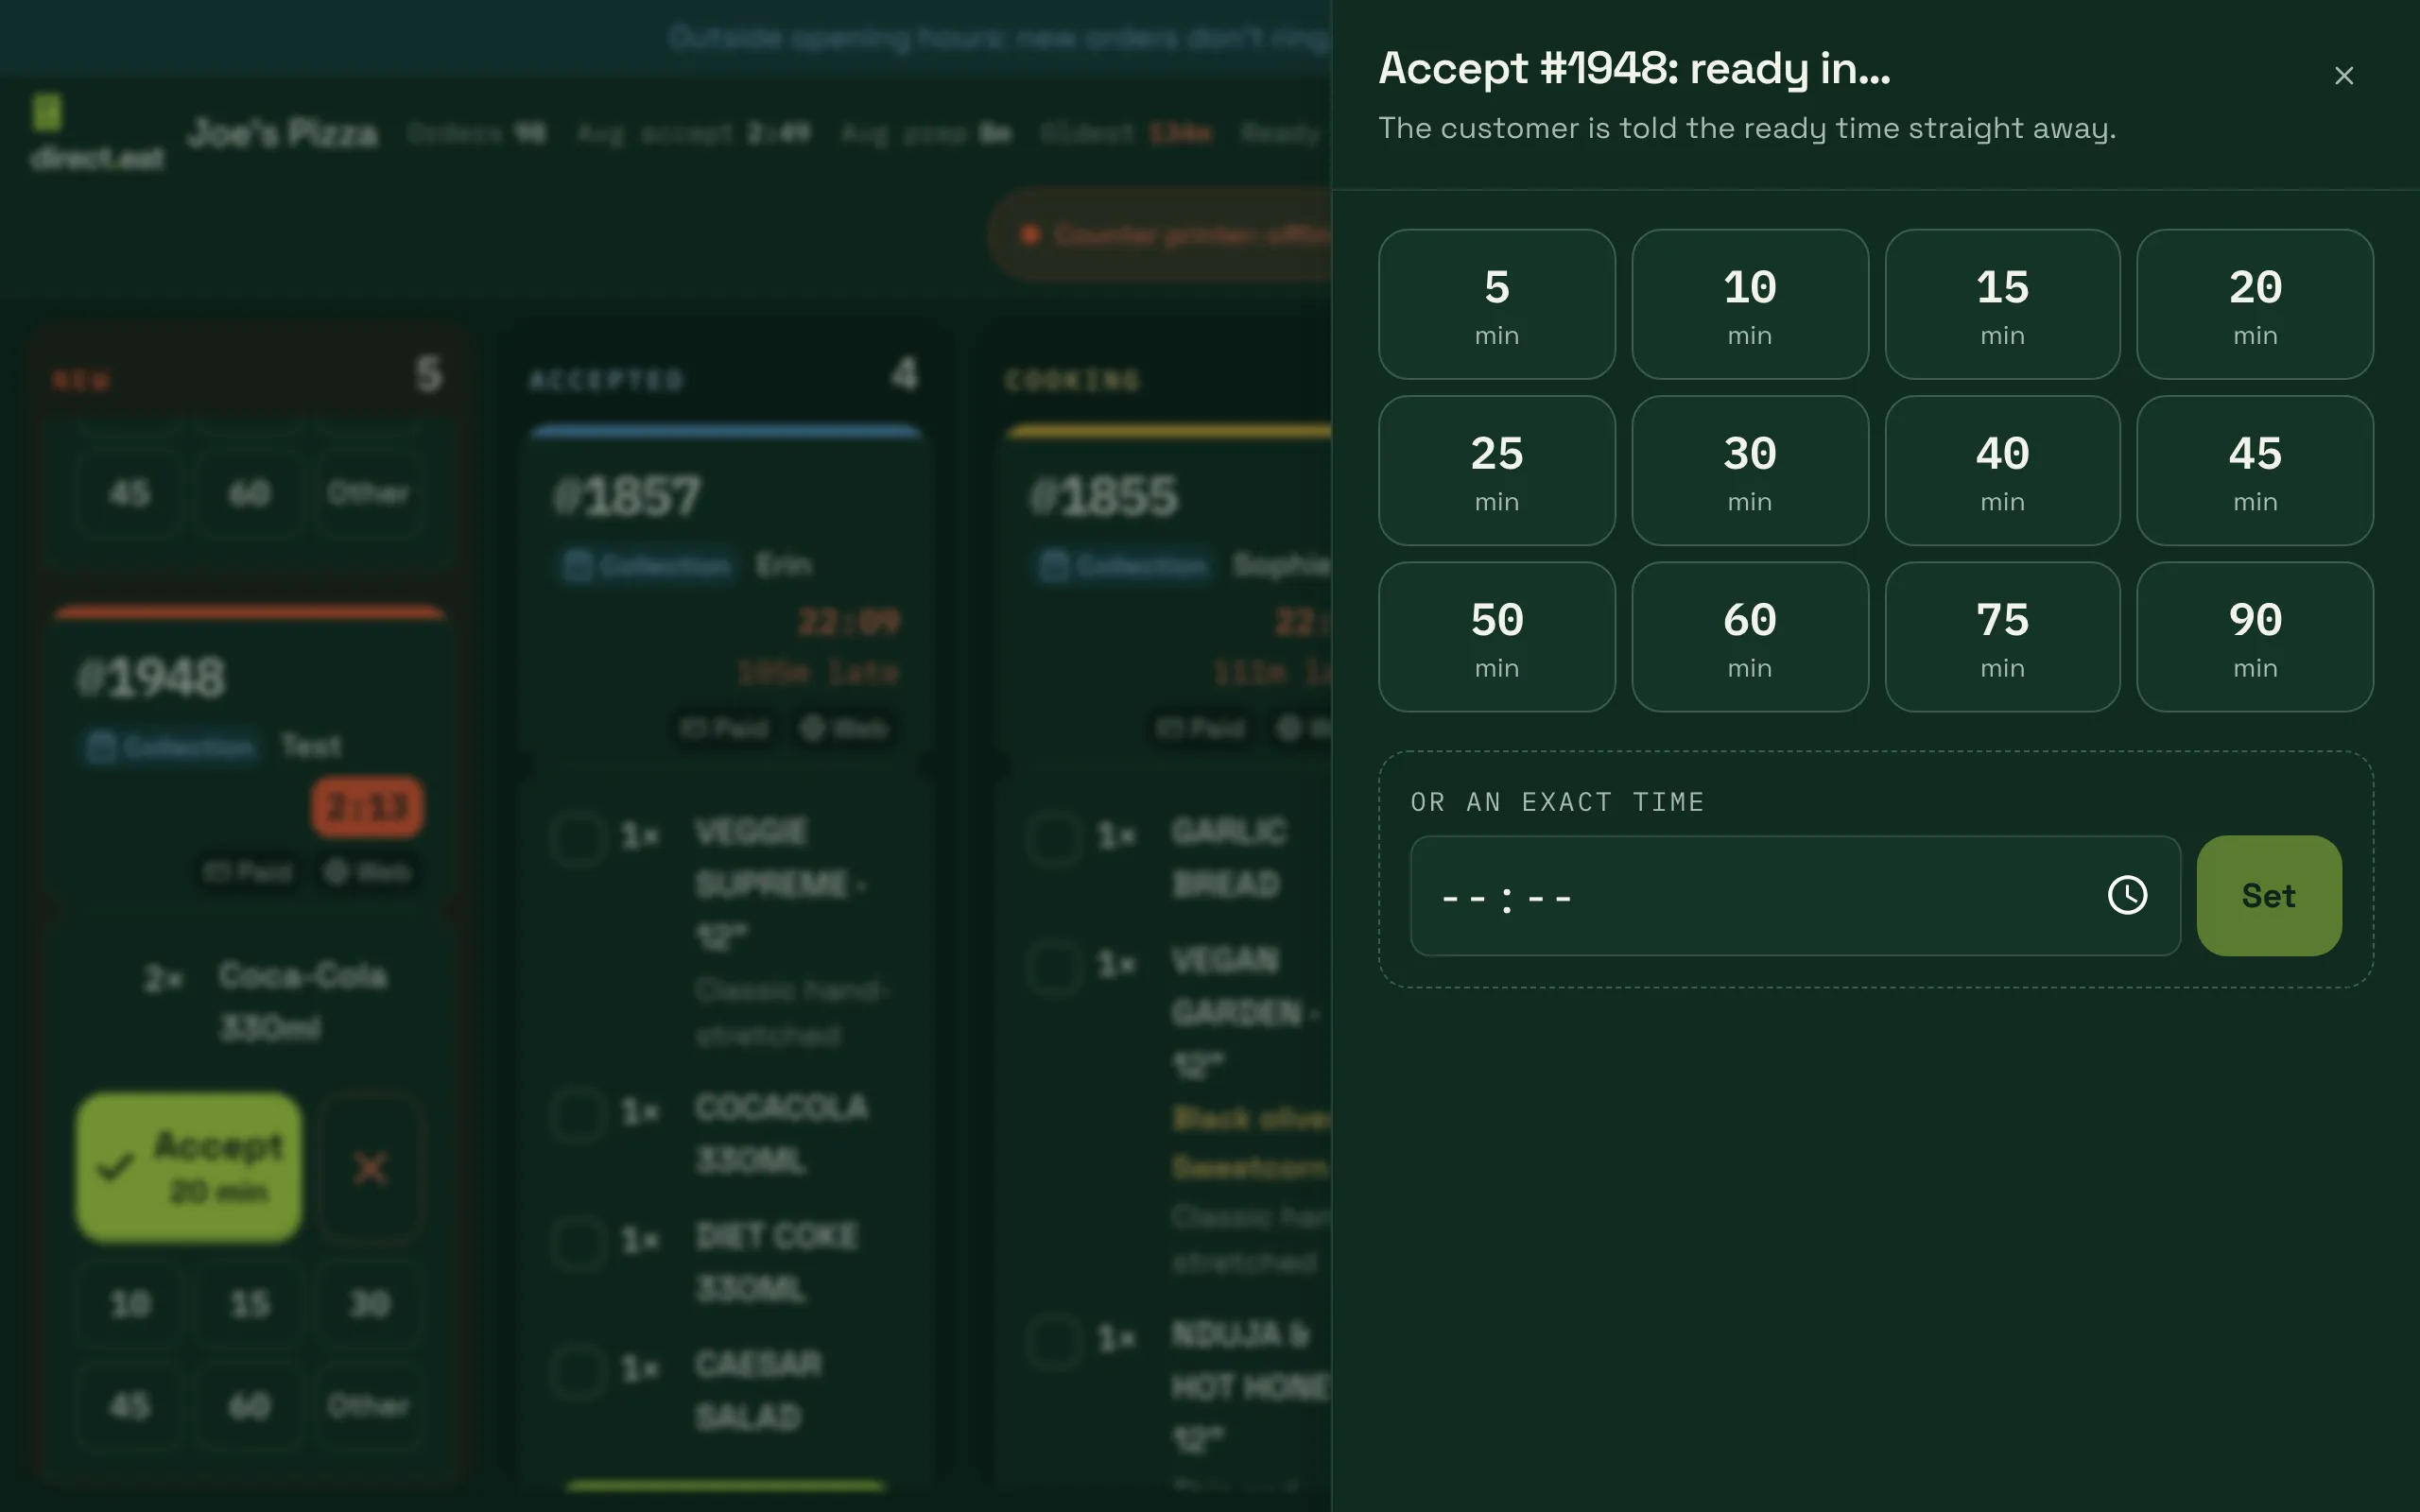
Choose from 5 to 90 minutes, or type an exact time under Or an exact time and tap Set. “The customer is told the ready time straight away.”
In the dashboard side sheet, type the minutes into the mins box and press Set.
Start cooking straight away
Section titled “Start cooking straight away”If your kitchen starts every order the moment it’s accepted, turn on Start cooking when I accept in the tablet’s This screen settings. ASAP orders then go straight to Cooking, so the customer sees progress.
Scheduled orders (pre-orders)
Section titled “Scheduled orders (pre-orders)”Orders for later show a calendar badge with their slot, for example for 12:30, and appear in New as soon as they’re placed. The kitchen ticket for a scheduled order prints at its fire time (the slot time minus prep time) when your print route says so, otherwise when it’s accepted. On the kitchen display, scheduled tickets appear at their fire time and count down until then.
You can accept a pre-order whenever you like: the customer keeps their booked slot as the ready time. The prep time you pick only sets when the kitchen starts it (the slot time minus prep, never earlier than now). For example, tomorrow’s 12:30 order accepted tonight with 25 minutes is still promised for 12:30 and fires at 12:05.
Auto-accept
Section titled “Auto-accept”Auto-accept is off by default. When it’s on, orders that match your rules go straight to Accepted with your usual prep time (or the booked slot for pre-orders), and the kitchen gets a soft chime and an Auto-accepted chip instead of the alarm.
-
Turn it on per way of ordering (collection, delivery or table) in Settings → Ordering and collection → Kitchen safety → Auto-accept orders.
-
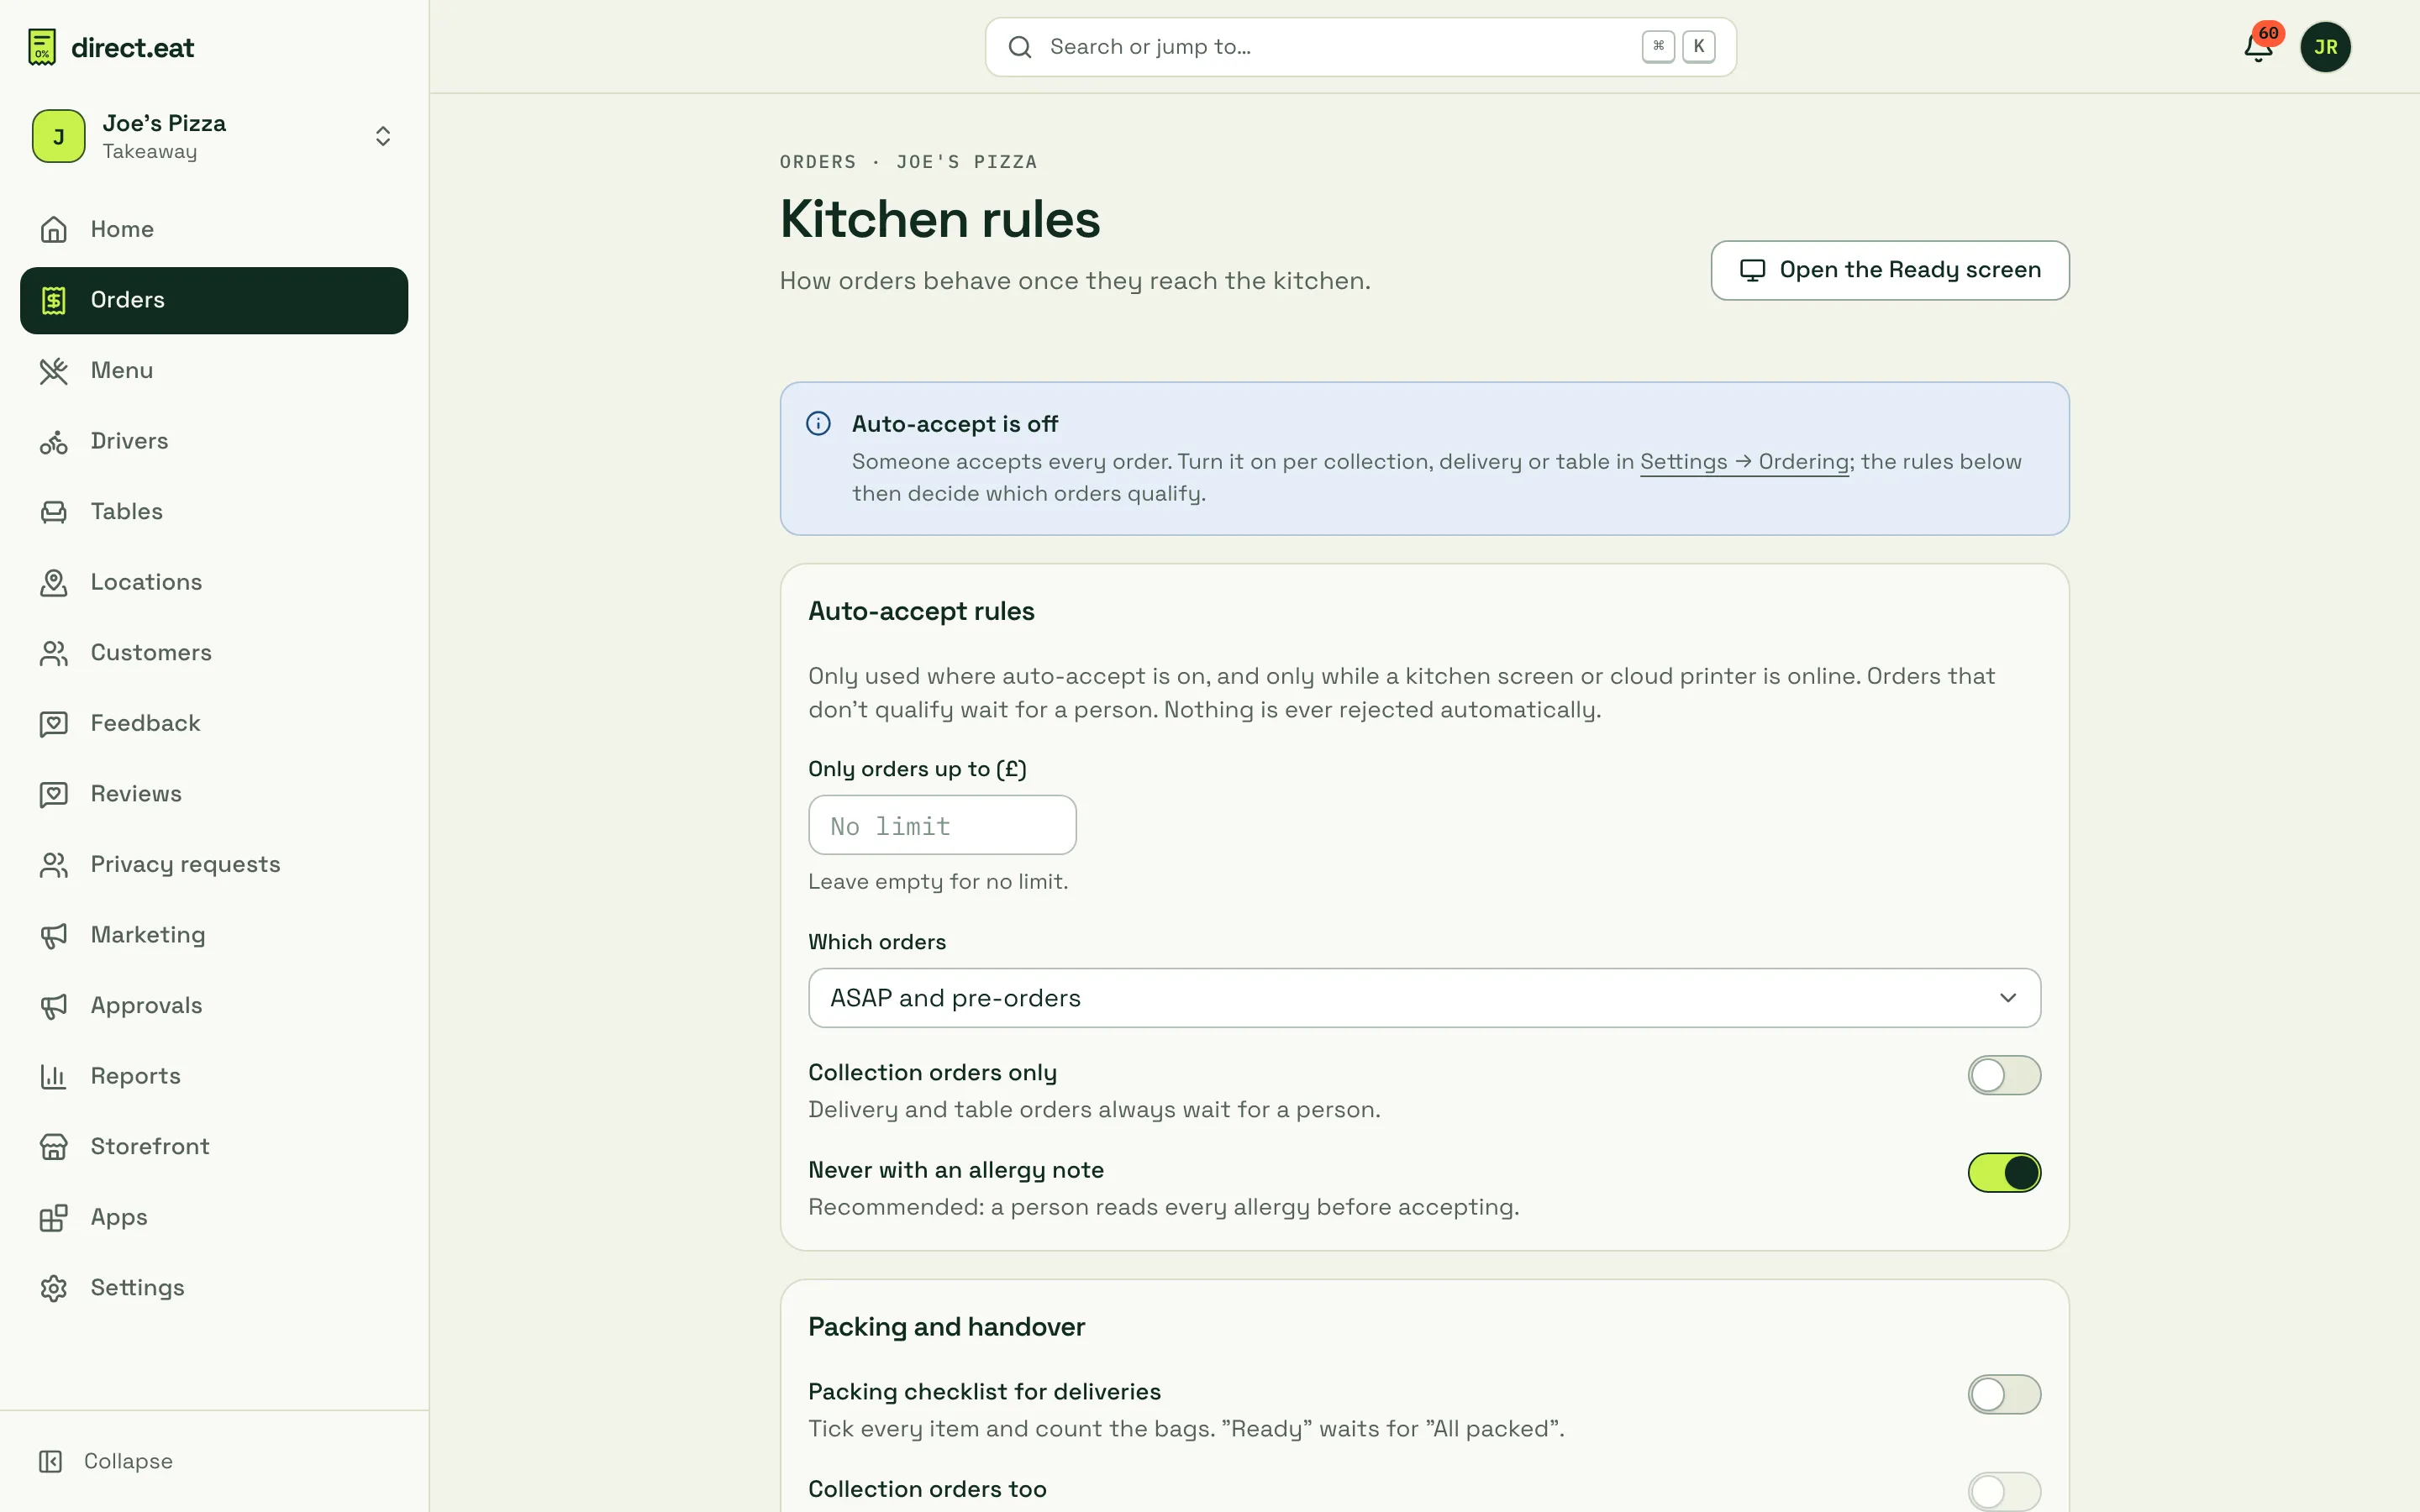
Set the rules in Orders → Kitchen rules → Auto-accept rules: Only orders up to (£), Which orders (ASAP, pre-orders or both), Collection orders only, and Never with an allergy note (on by default, so a person reads every allergy before accepting).
Auto-accept only works while someone will definitely see the order. An order is auto-accepted only if a kitchen screen has checked in within the last 90 seconds with its sound on, or a cloud printer within the last 30 seconds. Otherwise it stays in New, the boards show “Auto-accept paused: no kitchen device online”, and the normal alarm and escalation run. After an auto-accept we check that the ticket printed or a screen received it within 30 seconds, and tell the owner if not. Auto-accept never rejects or cancels an order.
Reject an order
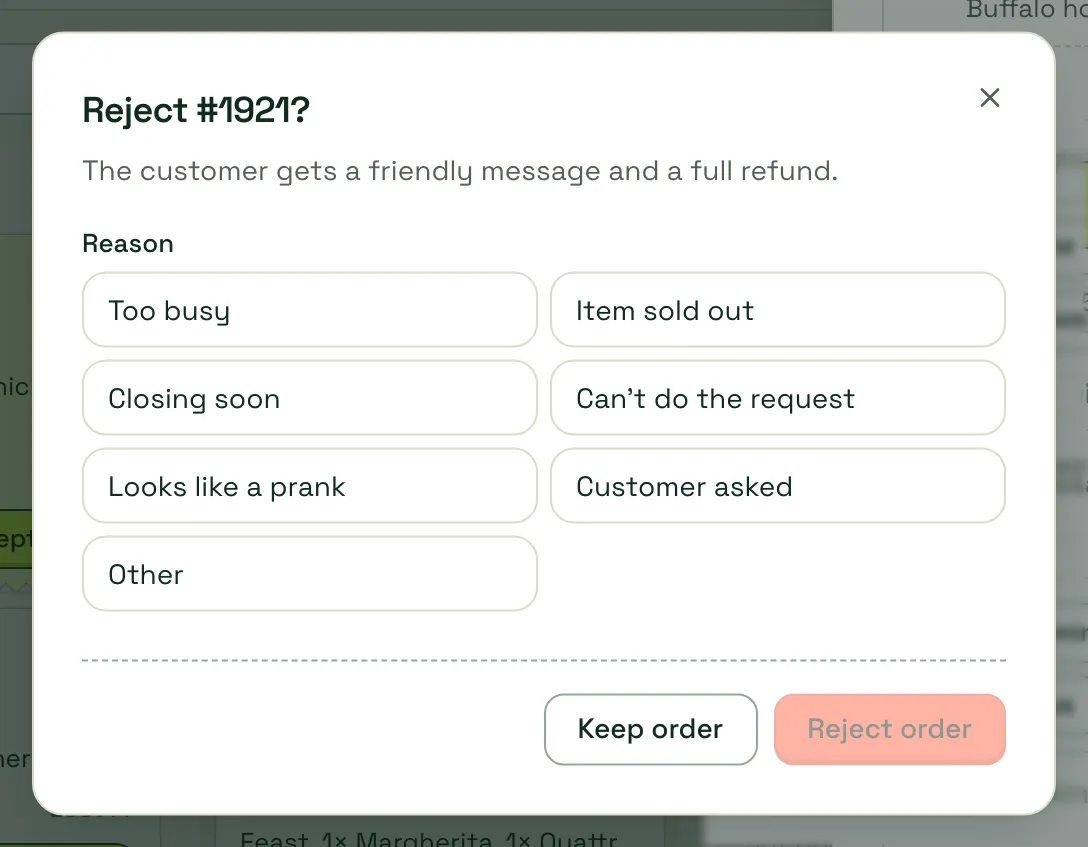
Section titled “Reject an order”Reject only orders you really can’t make. A rejected order is refunded in full automatically.
-
Tap ✕ on the ticket, Reject on the alarm card or the order sheet, or Reject in the dashboard side sheet.
-
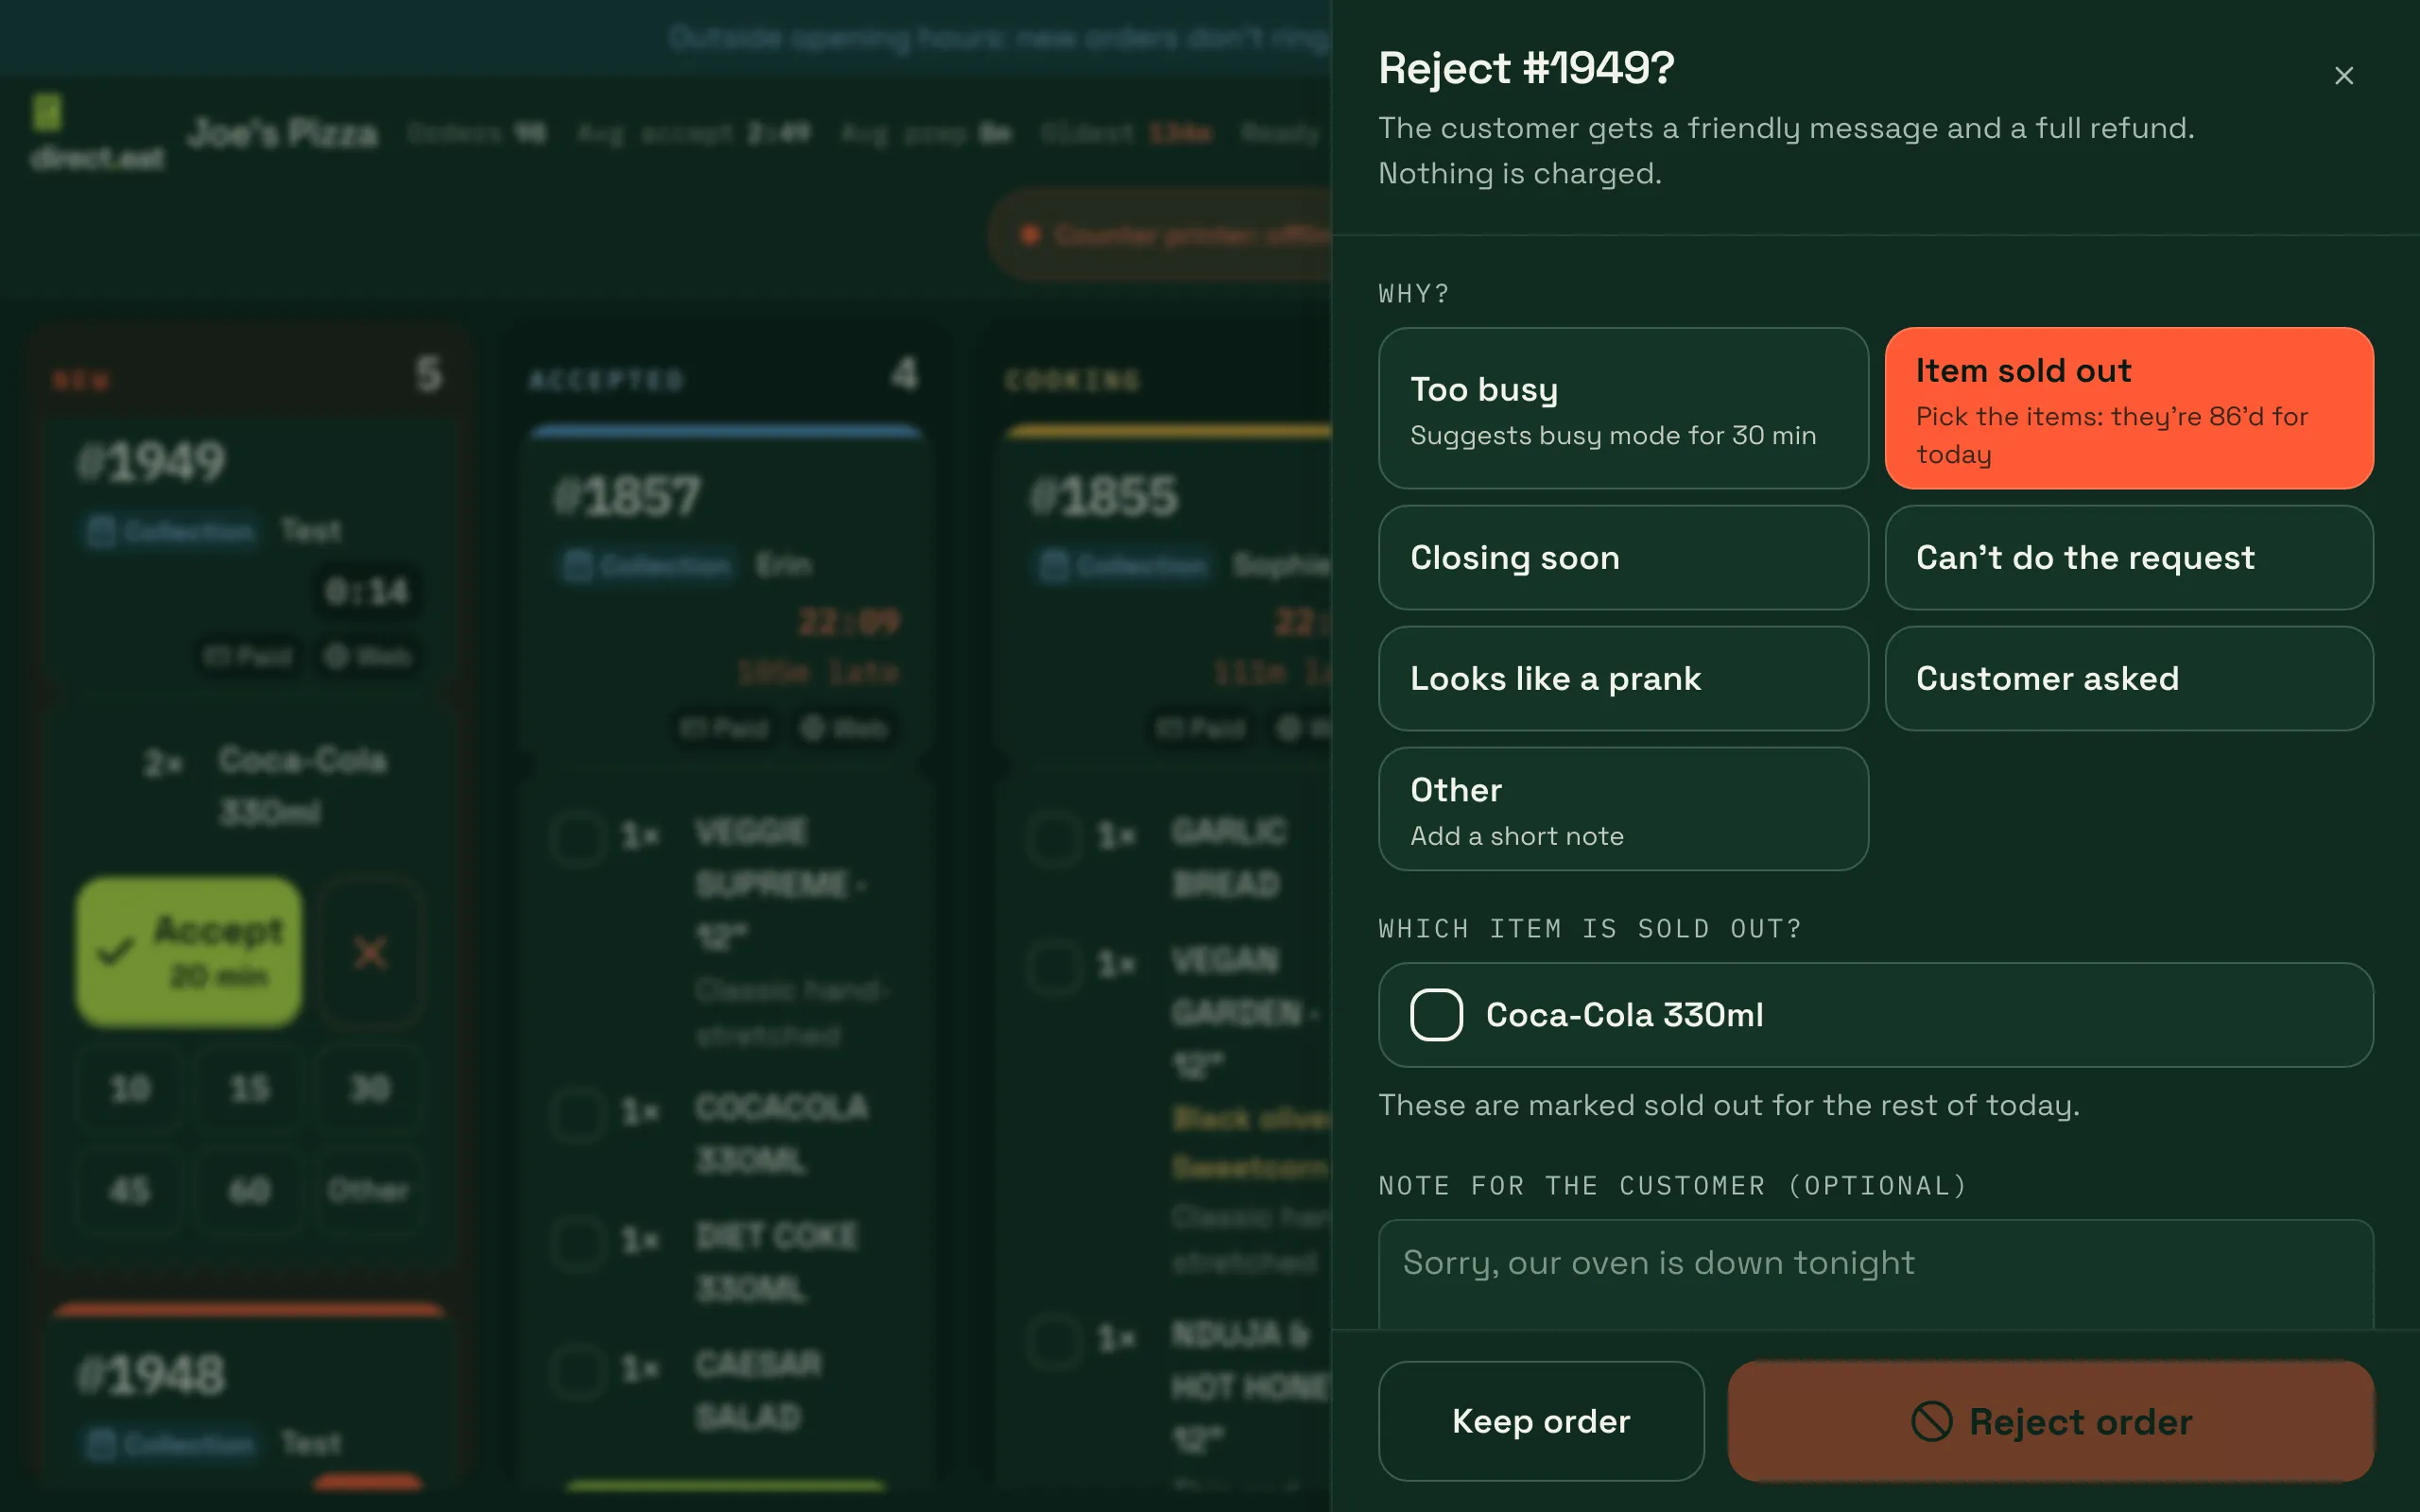
Pick a reason under Why?:
- Too busy
- Item sold out: pick the items. They’re marked sold out (86’d) for the rest of today so nobody else can order them.
- Closing soon
- Can’t do the request
- Looks like a prank
- Customer asked
- Other: add a short note (needed). Notes are up to 140 characters.
-
Check The customer sees preview, then tap Reject order. Keep order closes the sheet without rejecting.
The dashboard has the same dialog:
What the customer sees
Section titled “What the customer sees”The tracking page shows Rejected with a plain message, they get an email, and a line is added to the message thread. The message depends on the reason, for example:
| Reason | The customer sees |
|---|---|
| Too busy | Joe’s Pizza is too busy to take your order right now. |
| Item sold out | Sorry, Garlic Bread has just sold out, so Joe’s Pizza couldn’t take your order. |
| Closing soon | Joe’s Pizza is closing soon and can’t make your order in time. |
| Can’t do the request | Joe’s Pizza can’t make your order as requested. (plus your note) |
| Looks like a prank | Joe’s Pizza was unable to accept this order. |
| Customer asked | Your order has been cancelled as you asked. |
| Other | Joe’s Pizza couldn’t accept your order. (plus your note) |
The full payment is refunded to the customer’s card and the refund shows on the order and on the refunds page.
On shared tablets you can require a staff PIN before anyone can reject.
After accepting
Section titled “After accepting”Move the order on as you go: Start cooking, Ready (or Packed · ready), then Collected, Handed to driver or Delivered. Each step updates the customer’s tracking page. The full list of statuses and which ones notify the customer is in order statuses.
If it’s going to be late, add time so the customer knows.
Related
Section titled “Related”Was this page helpful?