

Edit your menu
The menu editor is where you add dishes, change prices and keep your storefront accurate. Every change saves as you make it, and you can undo any of them.
Before you start: owners, admins and managers can edit the menu. Managers can edit this shop’s items but not items shared across a group of shops. Staff logins only see Availability (to 86 things). See Team and permissions.
Open Menu in the left-hand navigation. The tabs along the top take you to Items, Modifiers, Availability, Allergens, Bulk edit, Preview, History and Import.
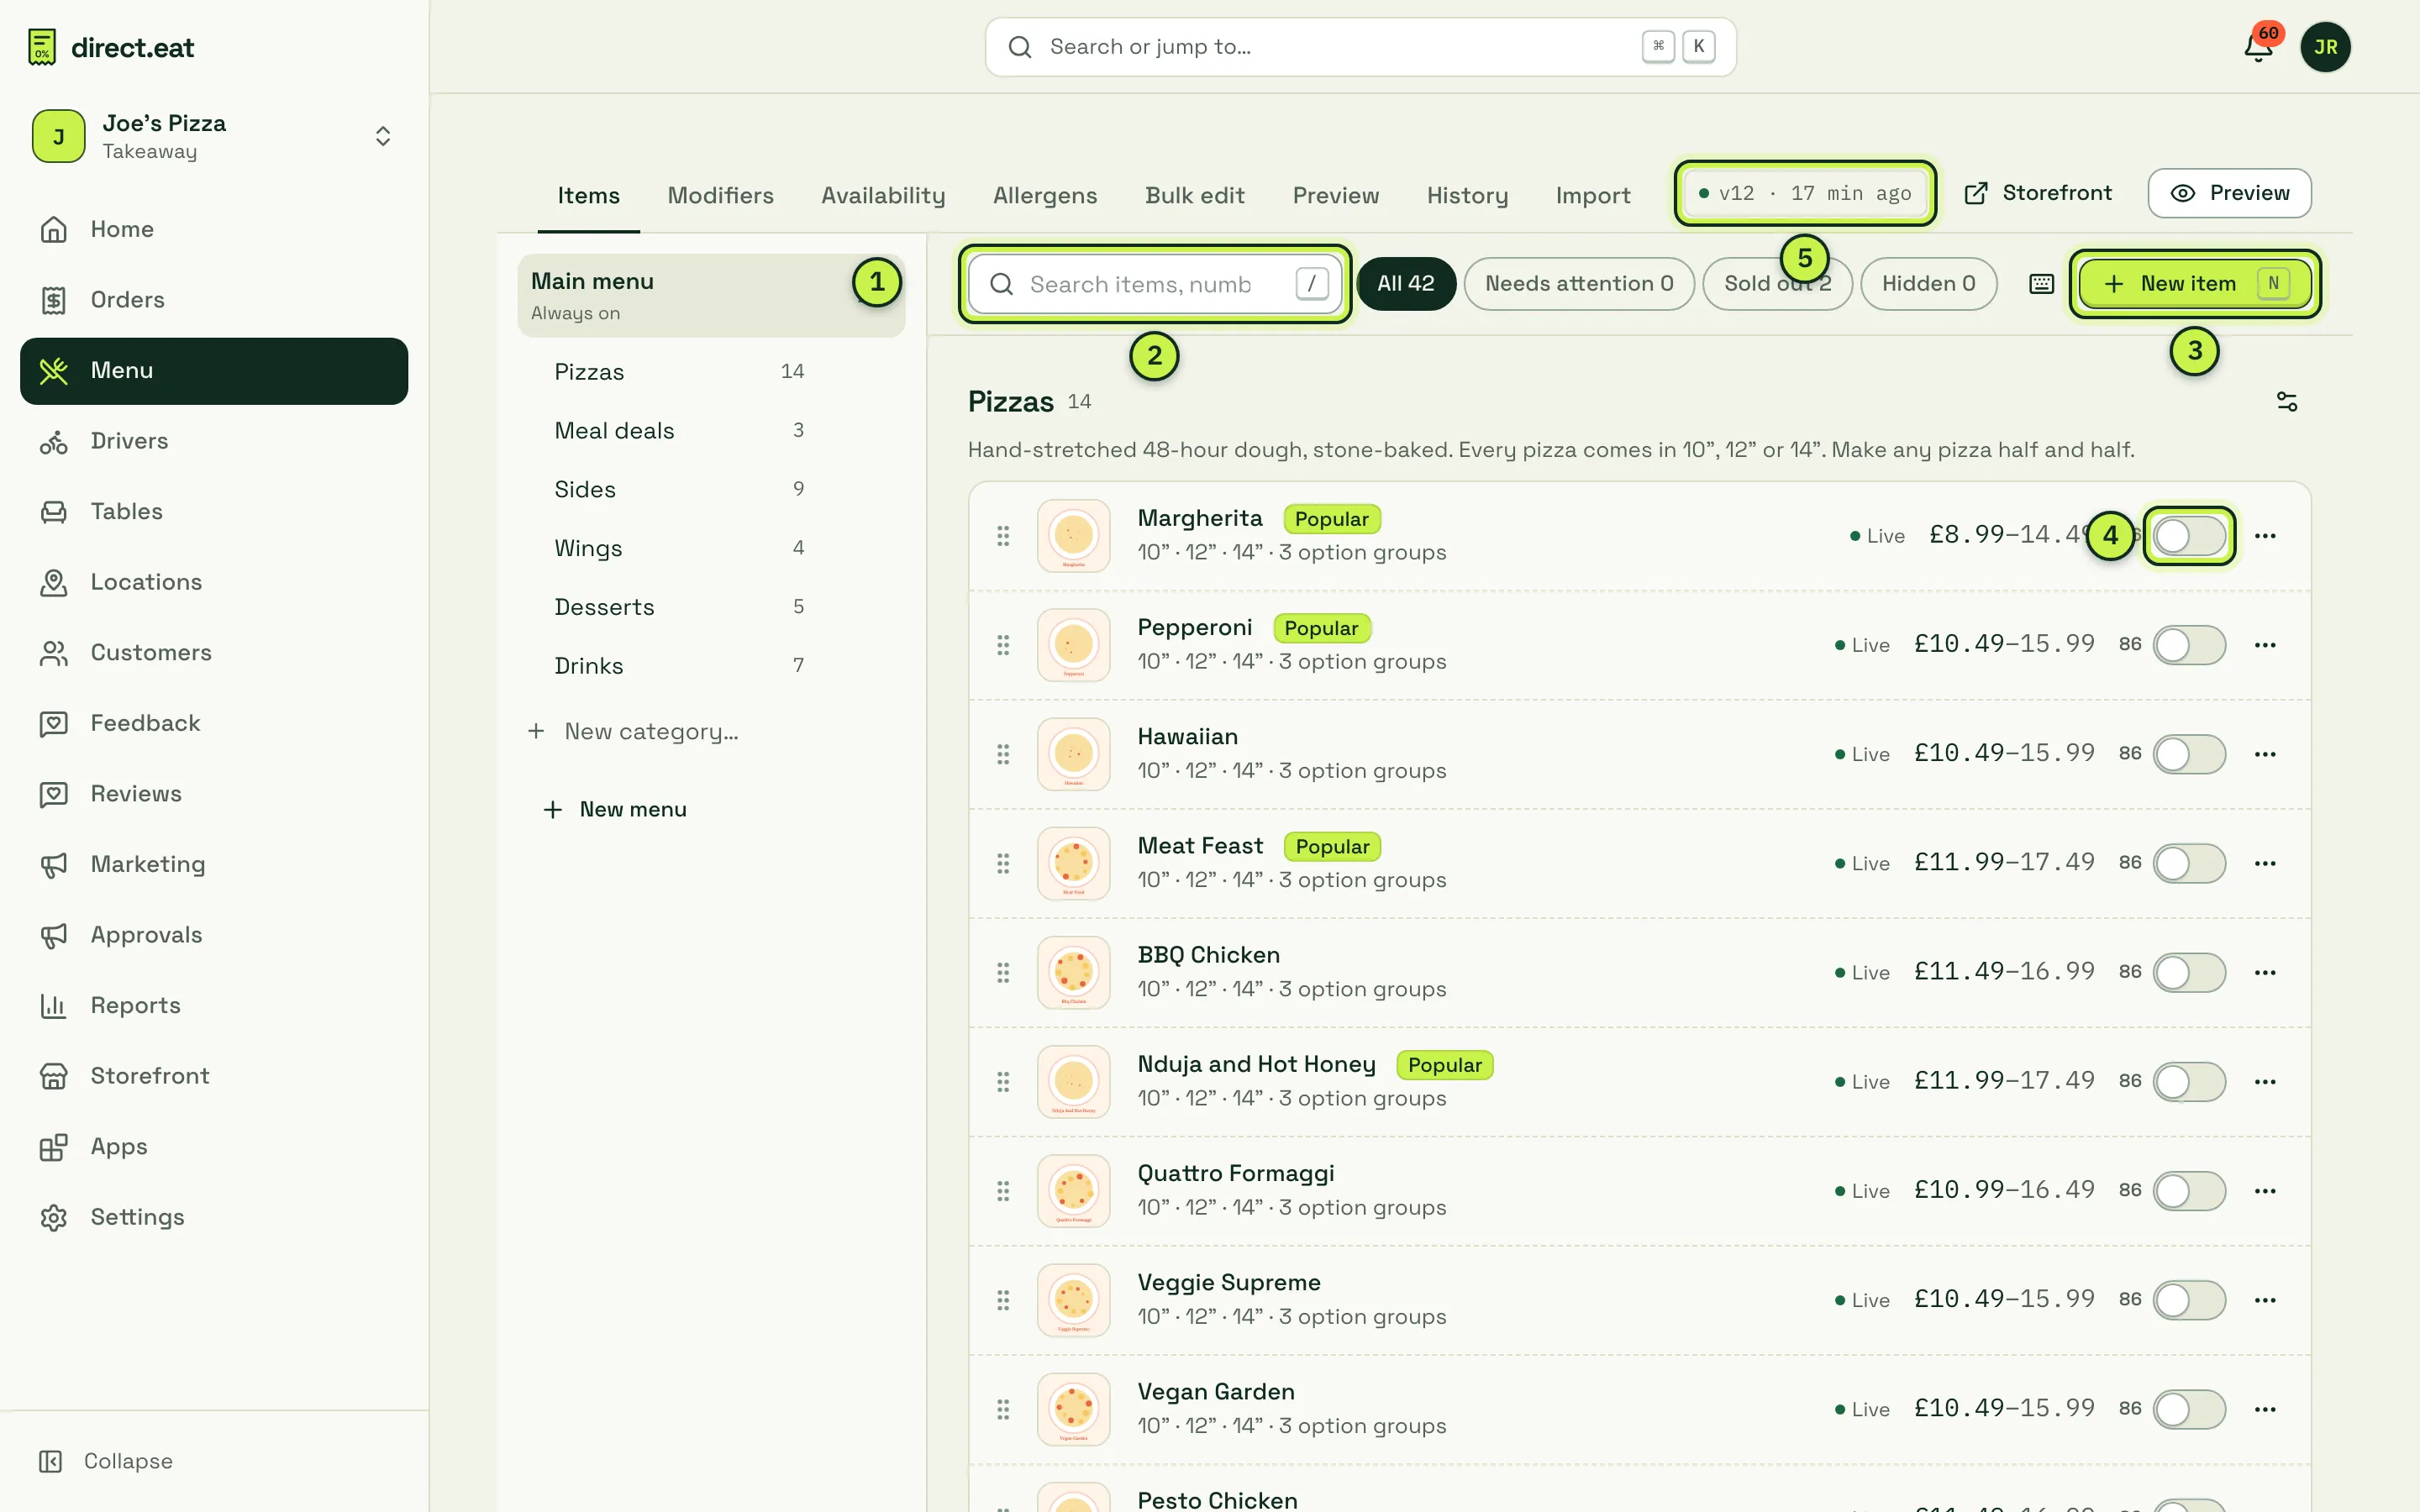
- Menus and categories: each menu (here Main menu, “Always on”) and its categories, with item counts. Click a category to jump to it. Drag to reorder, or use Alt + ↑/↓.
- Search and filters: search names, kitchen names, item numbers and prices. Filter to Needs attention, Sold out or Hidden. Press
/to jump to search. - New item: adds an item to the category you’re looking at (shortcut
N). - 86 switch: marks an item sold out for today in one tap. See 86 items and stock.
- Version and publish state: the live menu version and when it was published.
How the menu is organised
Section titled “How the menu is organised”- Menus hold categories, and categories hold items. You can have more than one. Add another (for example a lunch menu) with New menu and give it its own times.
- An item can appear in more than one category without being copied. Change the price once and it changes everywhere. Set this in the item’s Where it appears section (“Also show in…”).
- Items not in any category sit in a Not in a category section, so nothing gets lost.
Add a category
Section titled “Add a category”- In the rail, click New category…, type the name and press Enter.
- Click the sliders icon next to the category heading to add a description (shown to diners under the heading), hide it, or give it its own times.
- Drag the category up or down in the rail to change the order diners see.
Add items fast
Section titled “Add items fast”At the bottom of every category there’s a quick-add row. Type the name, Tab to the price, press Enter, and the item is added. You can fill in the rest later.
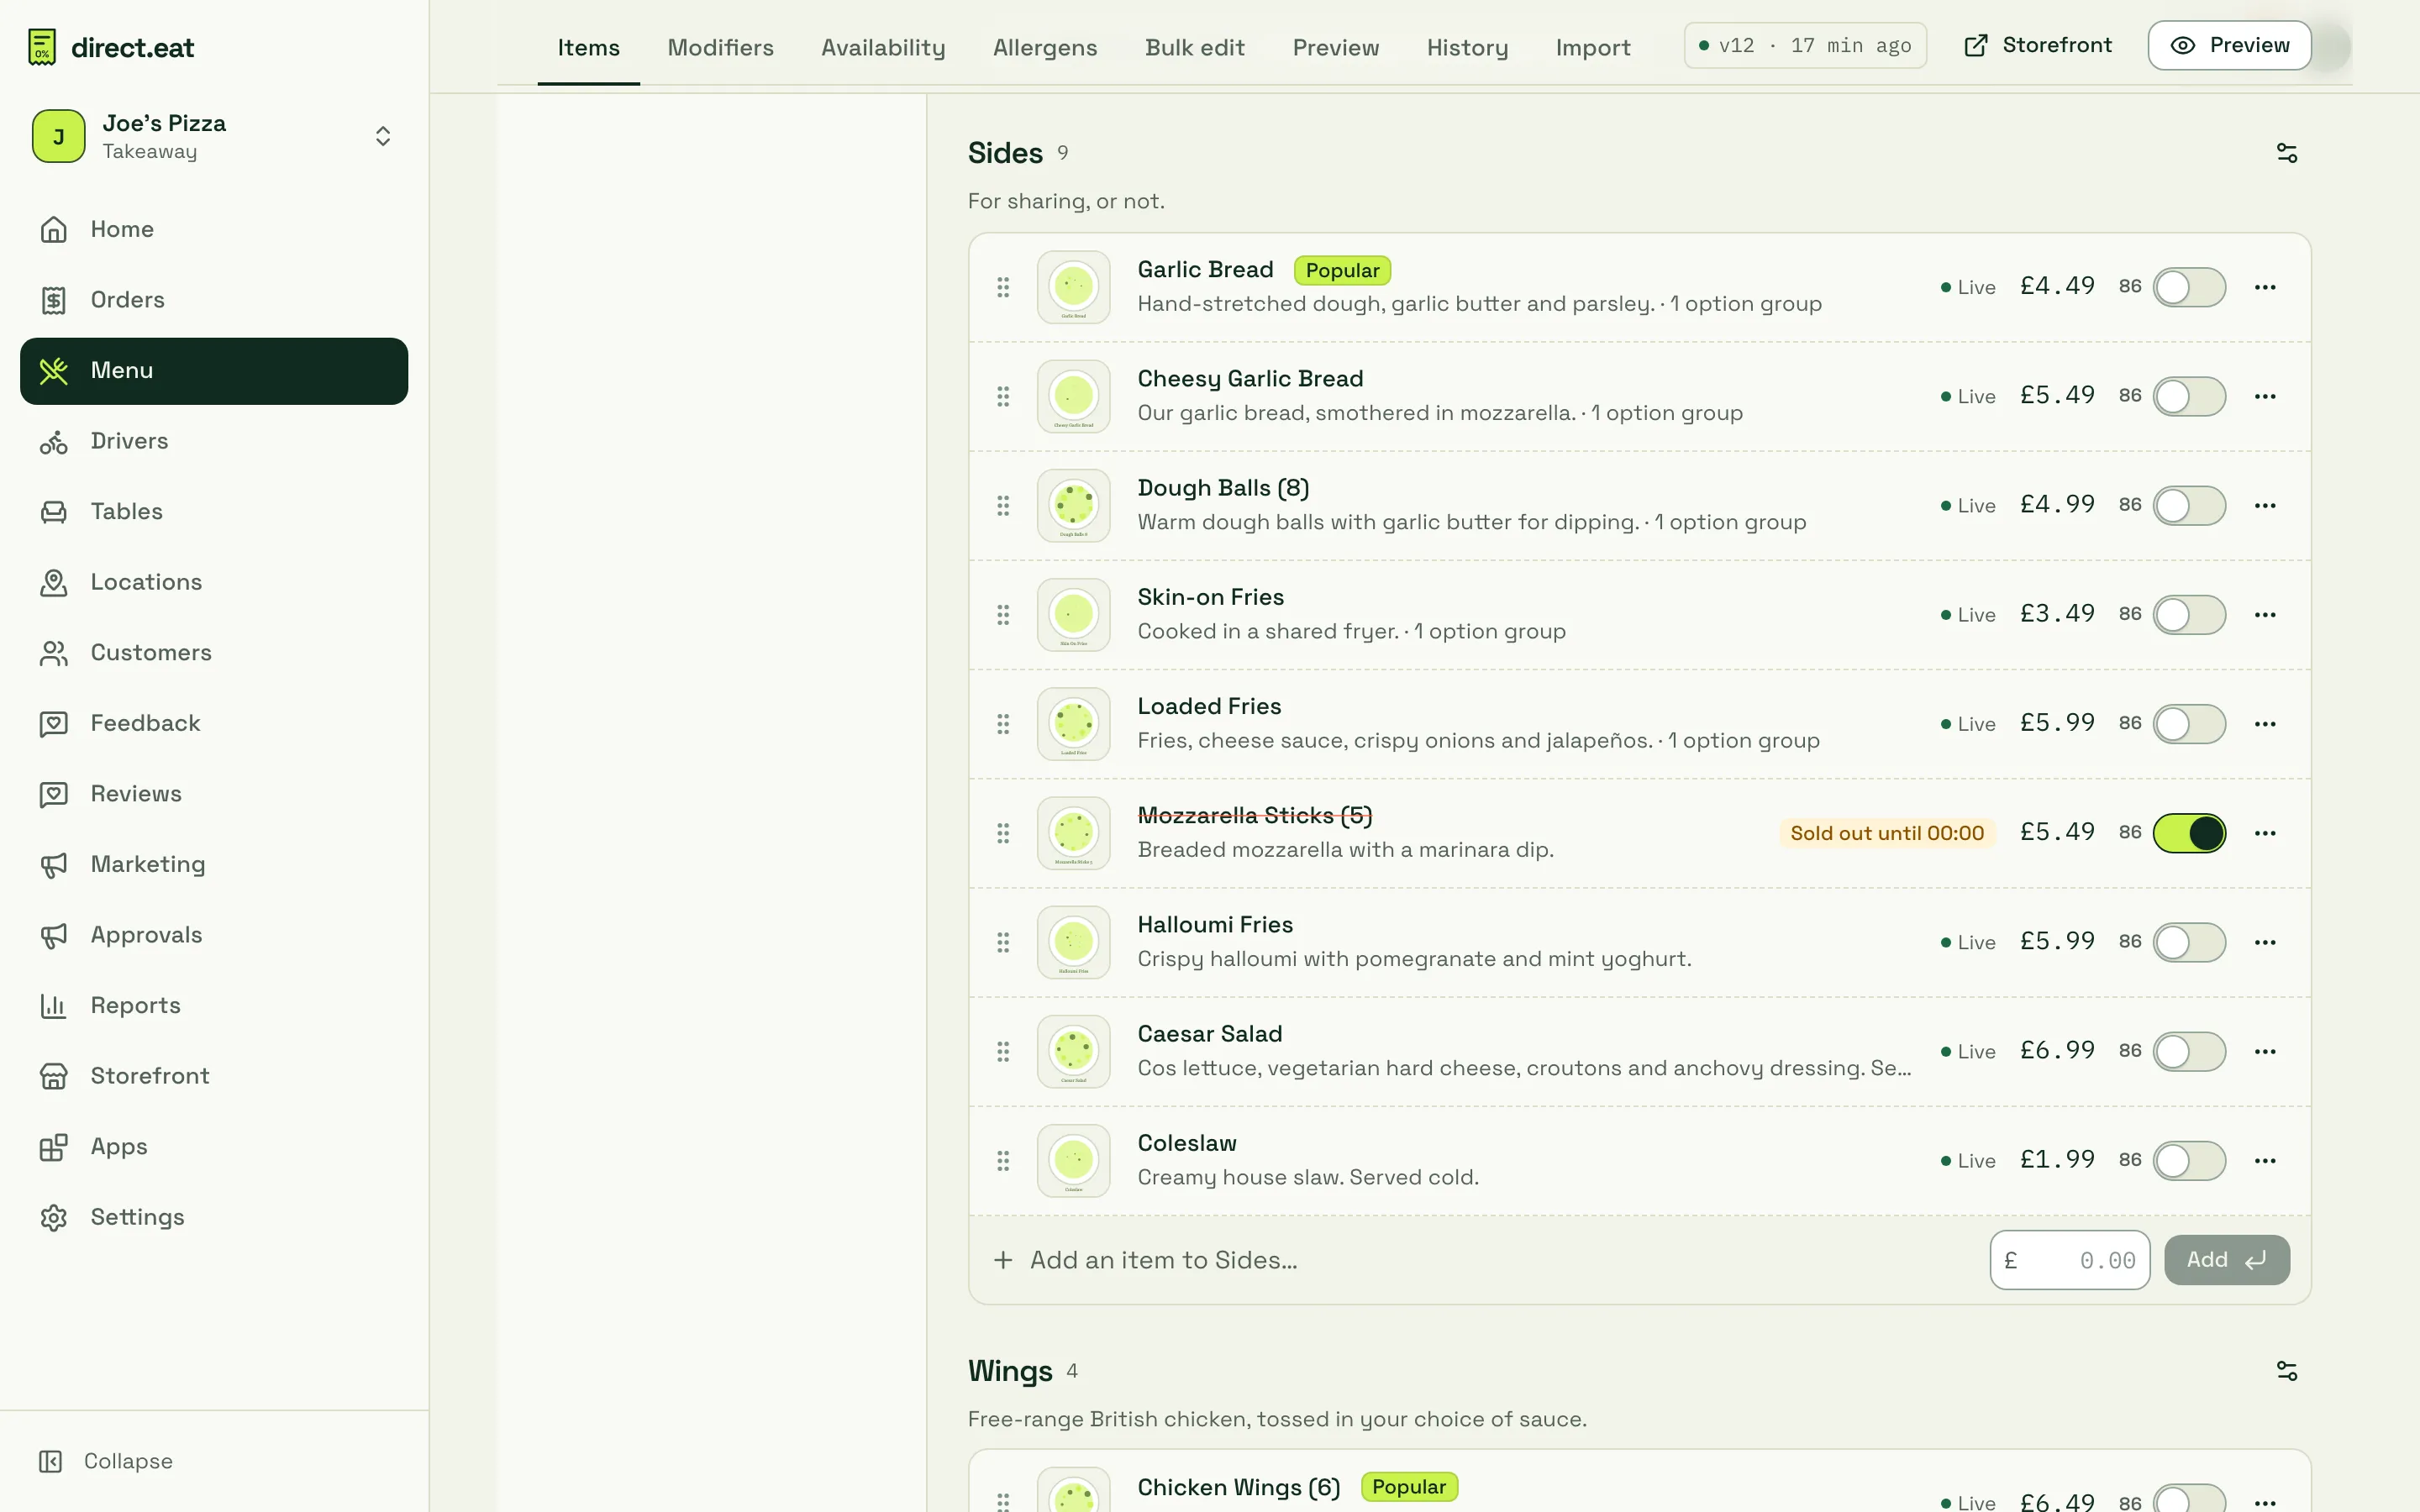
To edit a name or price in place, click the name to rename it, or press R (rename) or E (edit price) on the selected row. Press ? to see every keyboard shortcut.
| Key | What it does |
|---|---|
/ |
Search |
N |
New item in the current category |
↑ ↓ or J K |
Move between items |
| Enter | Open the item editor |
E |
Edit price |
R |
Rename |
S |
Sold out today on or off |
D |
Duplicate as new item |
| Alt + ↑ ↓ | Reorder |
| ⌘Z or Ctrl+Z | Undo last change |
| Alt + drag | Copy into another category instead of moving |
The item editor
Section titled “The item editor”Click an item’s price (or select it and press Enter) to open the item editor. It slides in from the right. Each section opens and closes, and the summary on a closed section tells you what’s set.
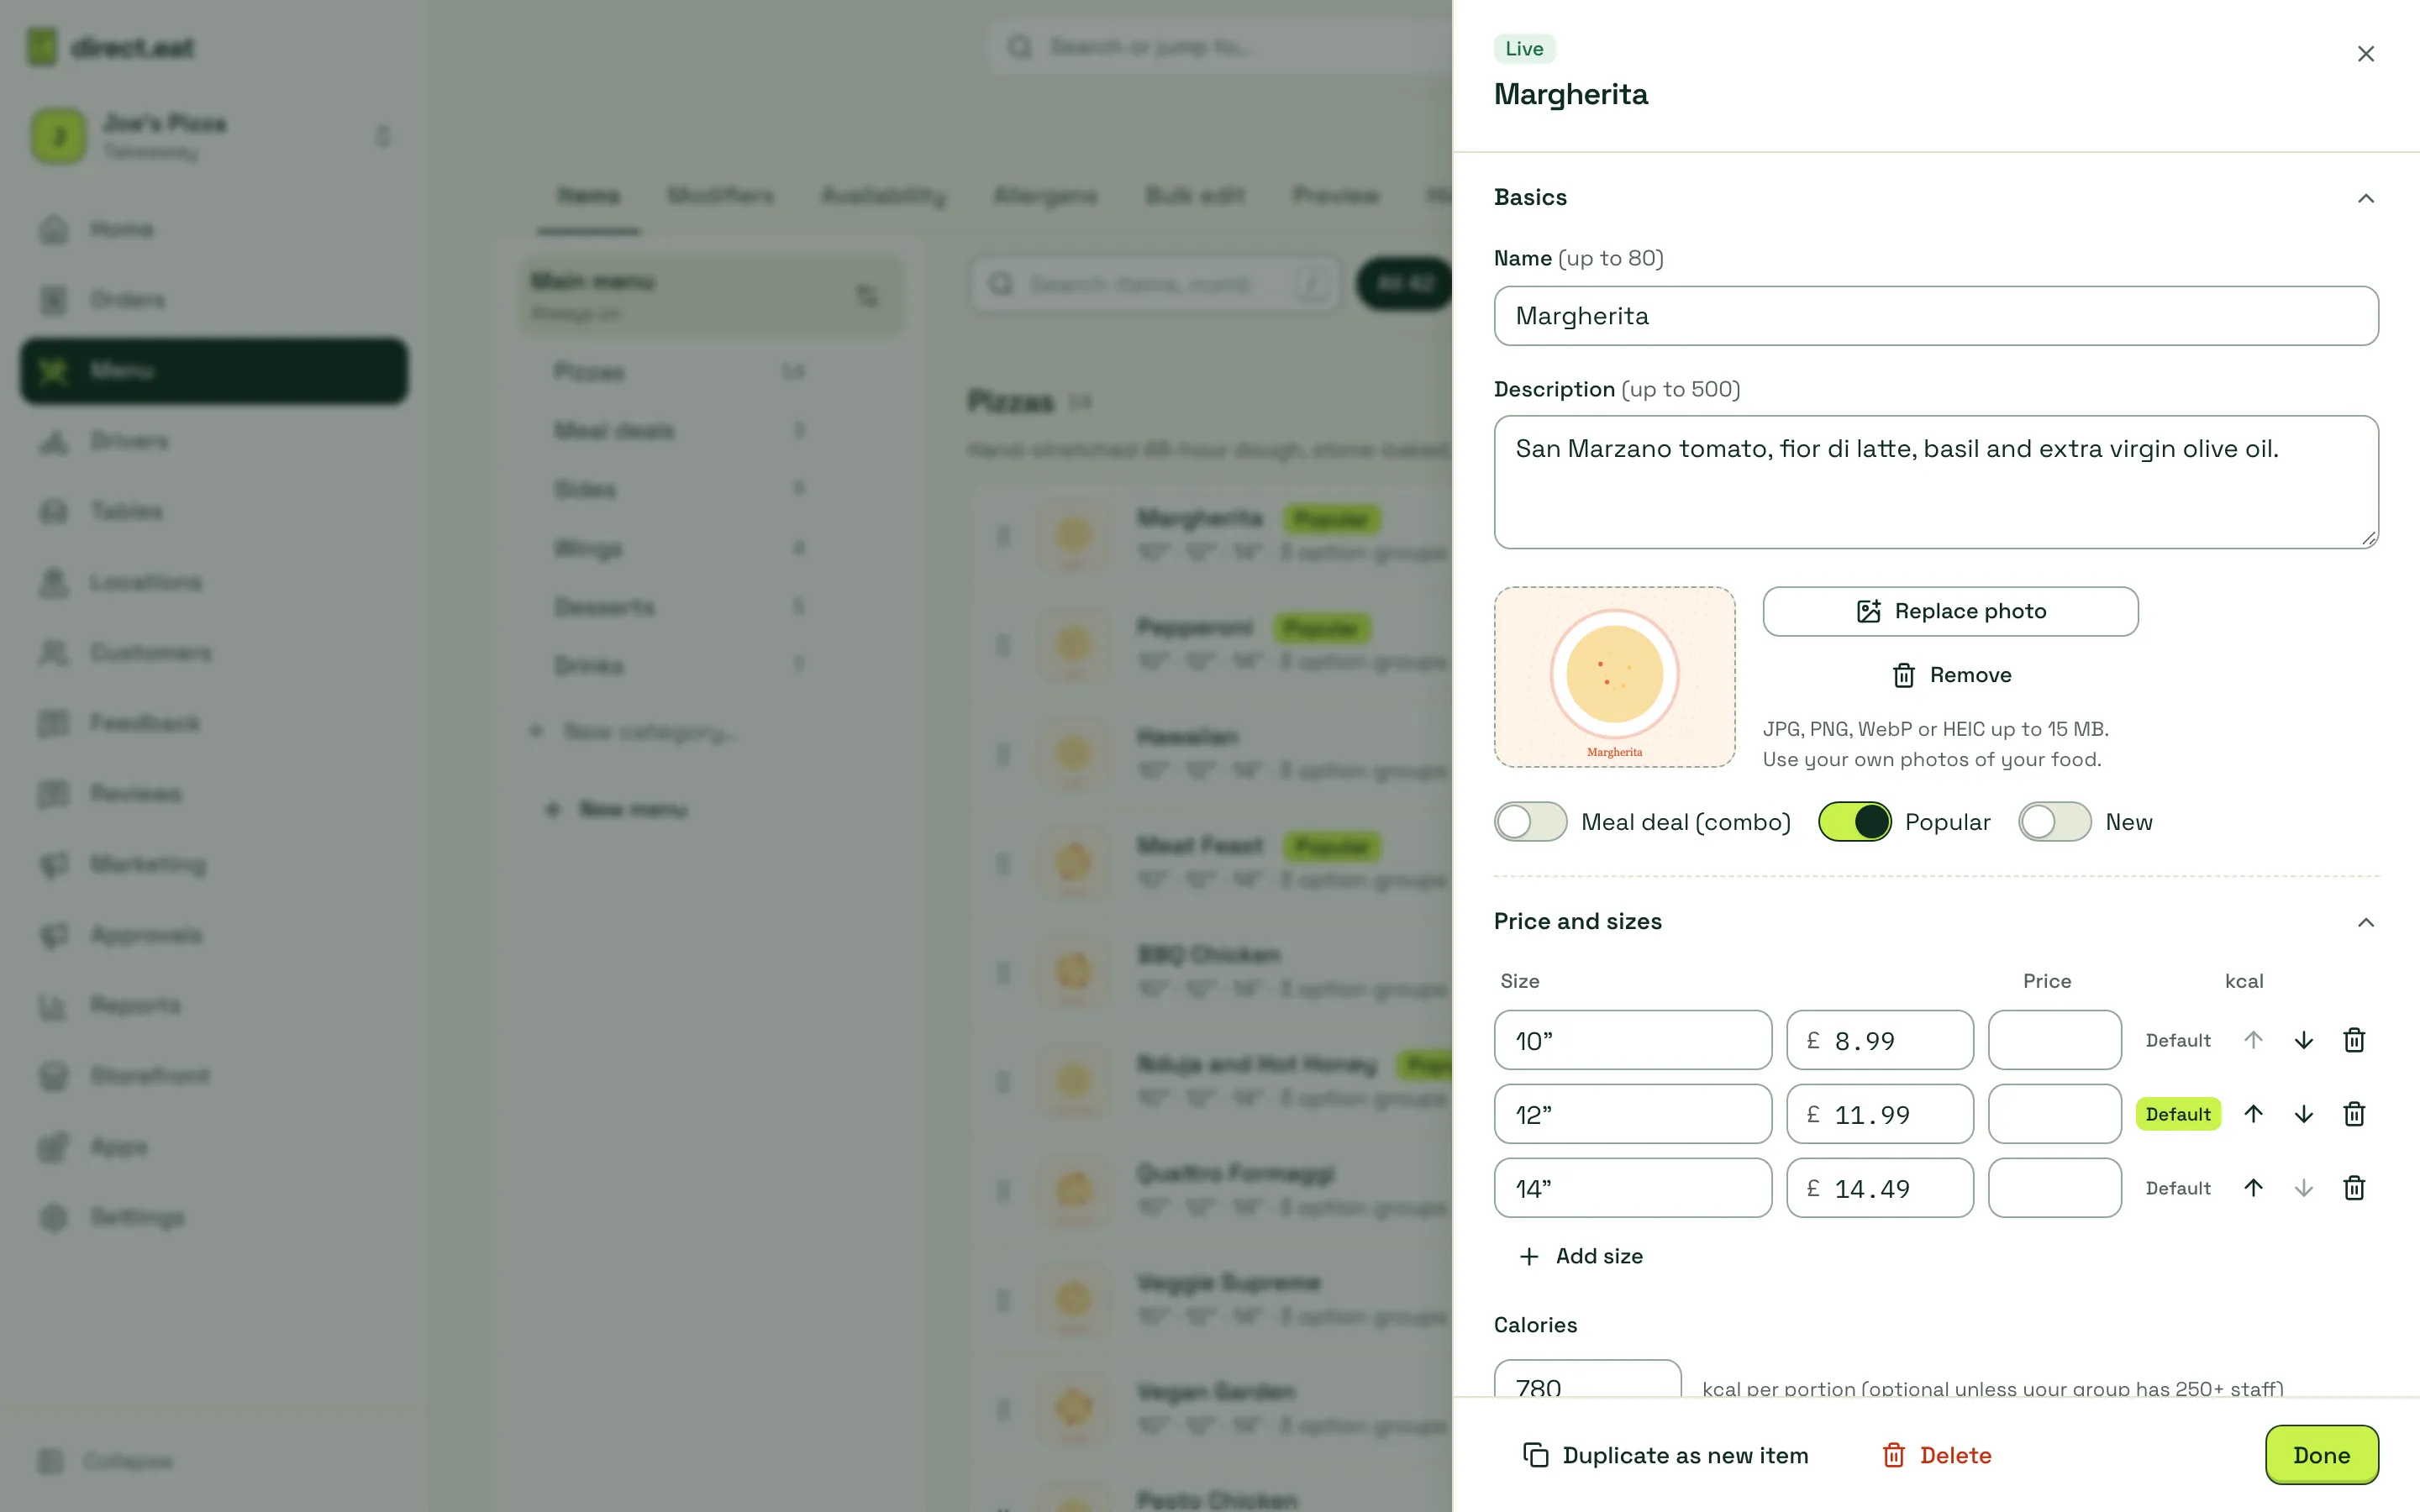
Basics: name, description and photo
Section titled “Basics: name, description and photo”- Name (up to 80 characters) and Description (up to 500). Say what’s in it and how it’s made: diners use this to decide, and it helps with allergies.
- Photo: Upload photo takes a JPG, PNG, WebP or HEIC up to 15 MB, or opens the camera on a phone. You can crop to 4:3 or square. Location data is removed from the photo before it’s saved. Use your own photos of your food. HEIC photos only open in browsers that support them (Safari); otherwise set your phone camera to “Most compatible”.
- Popular and New add a badge on the storefront. Meal deal (combo) turns the item into a deal with slots (see Modifiers and meal deals).
Price and sizes
Section titled “Price and sizes”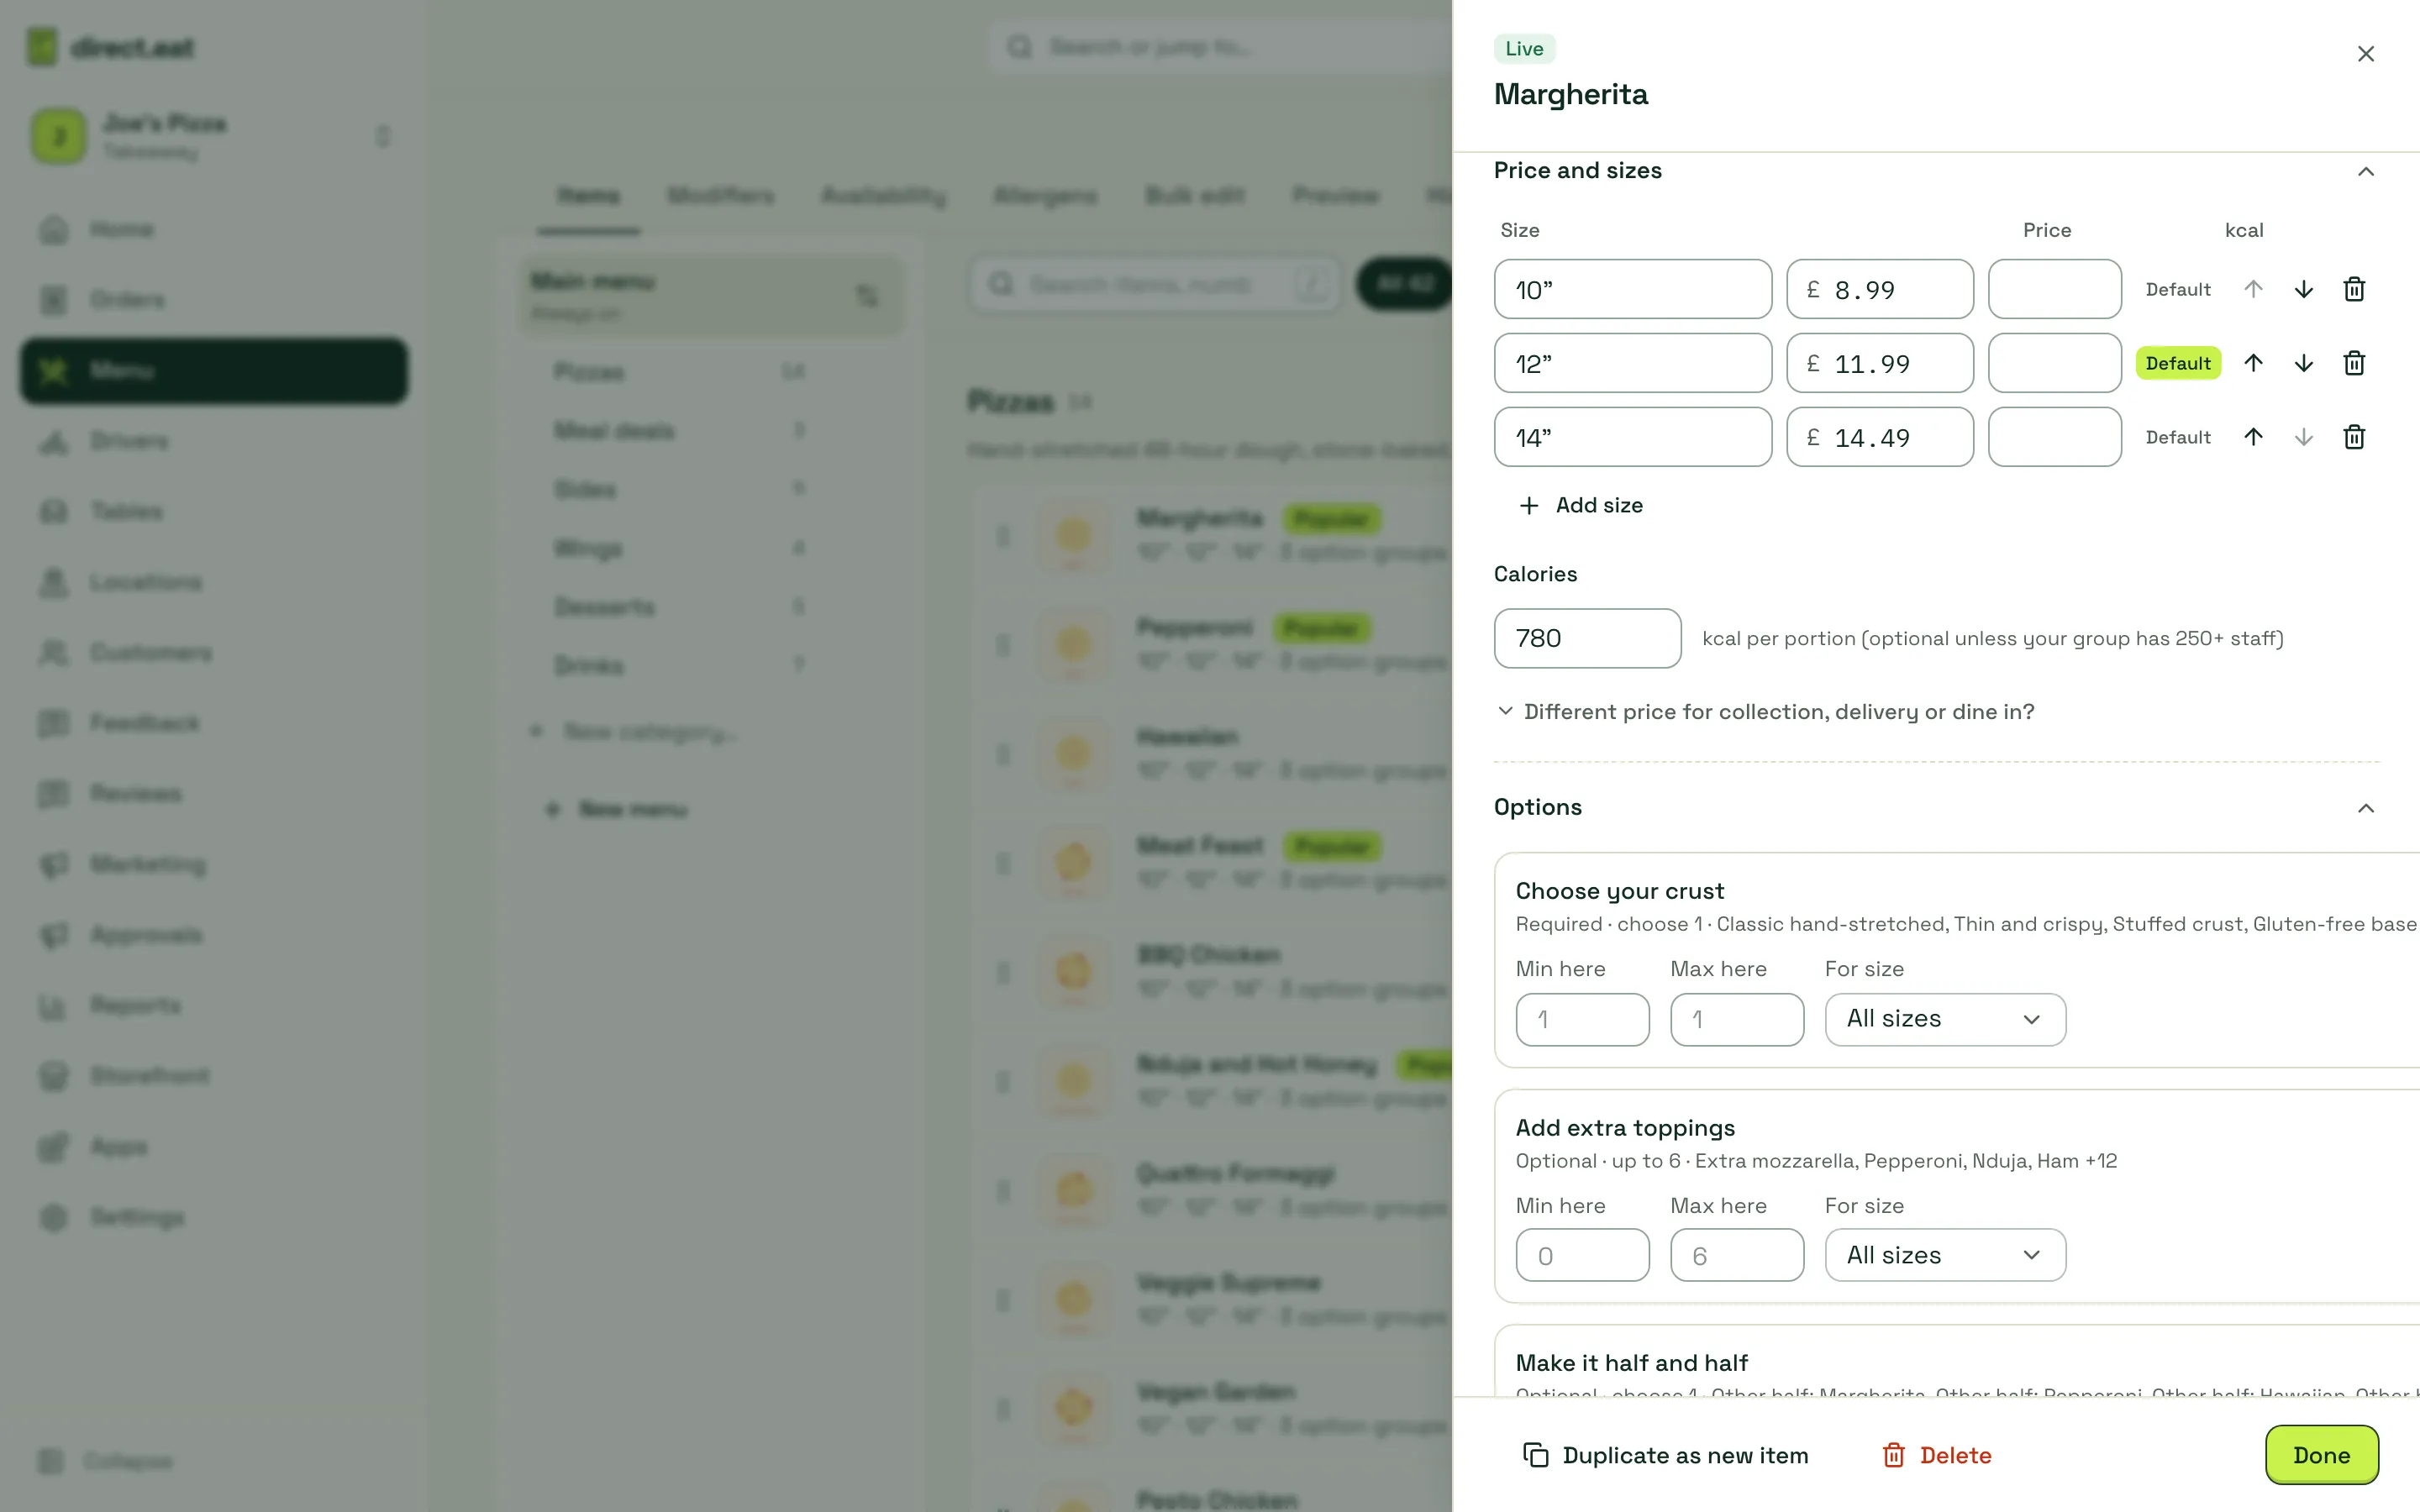
- One price, or Add size for up to 10 sizes (10”, 12”, 14”, Regular and Large). Each size has its own price and calories. Mark one as Default so it’s pre-selected for diners. Use the arrows to reorder.
- Calories are per portion. They’re optional unless your business has 250 or more staff.
- Prices can be different for collection, delivery and dine-in. Set these in the bulk editor, where the Collection, Delivery and Dine in columns show “same” until you change them.
Options
Section titled “Options”Attach shared option groups (crust, extra toppings, dips) to the item, and set the minimum and maximum for this item or a single size. Groups are created and edited in Modifiers. See Modifiers and meal deals.
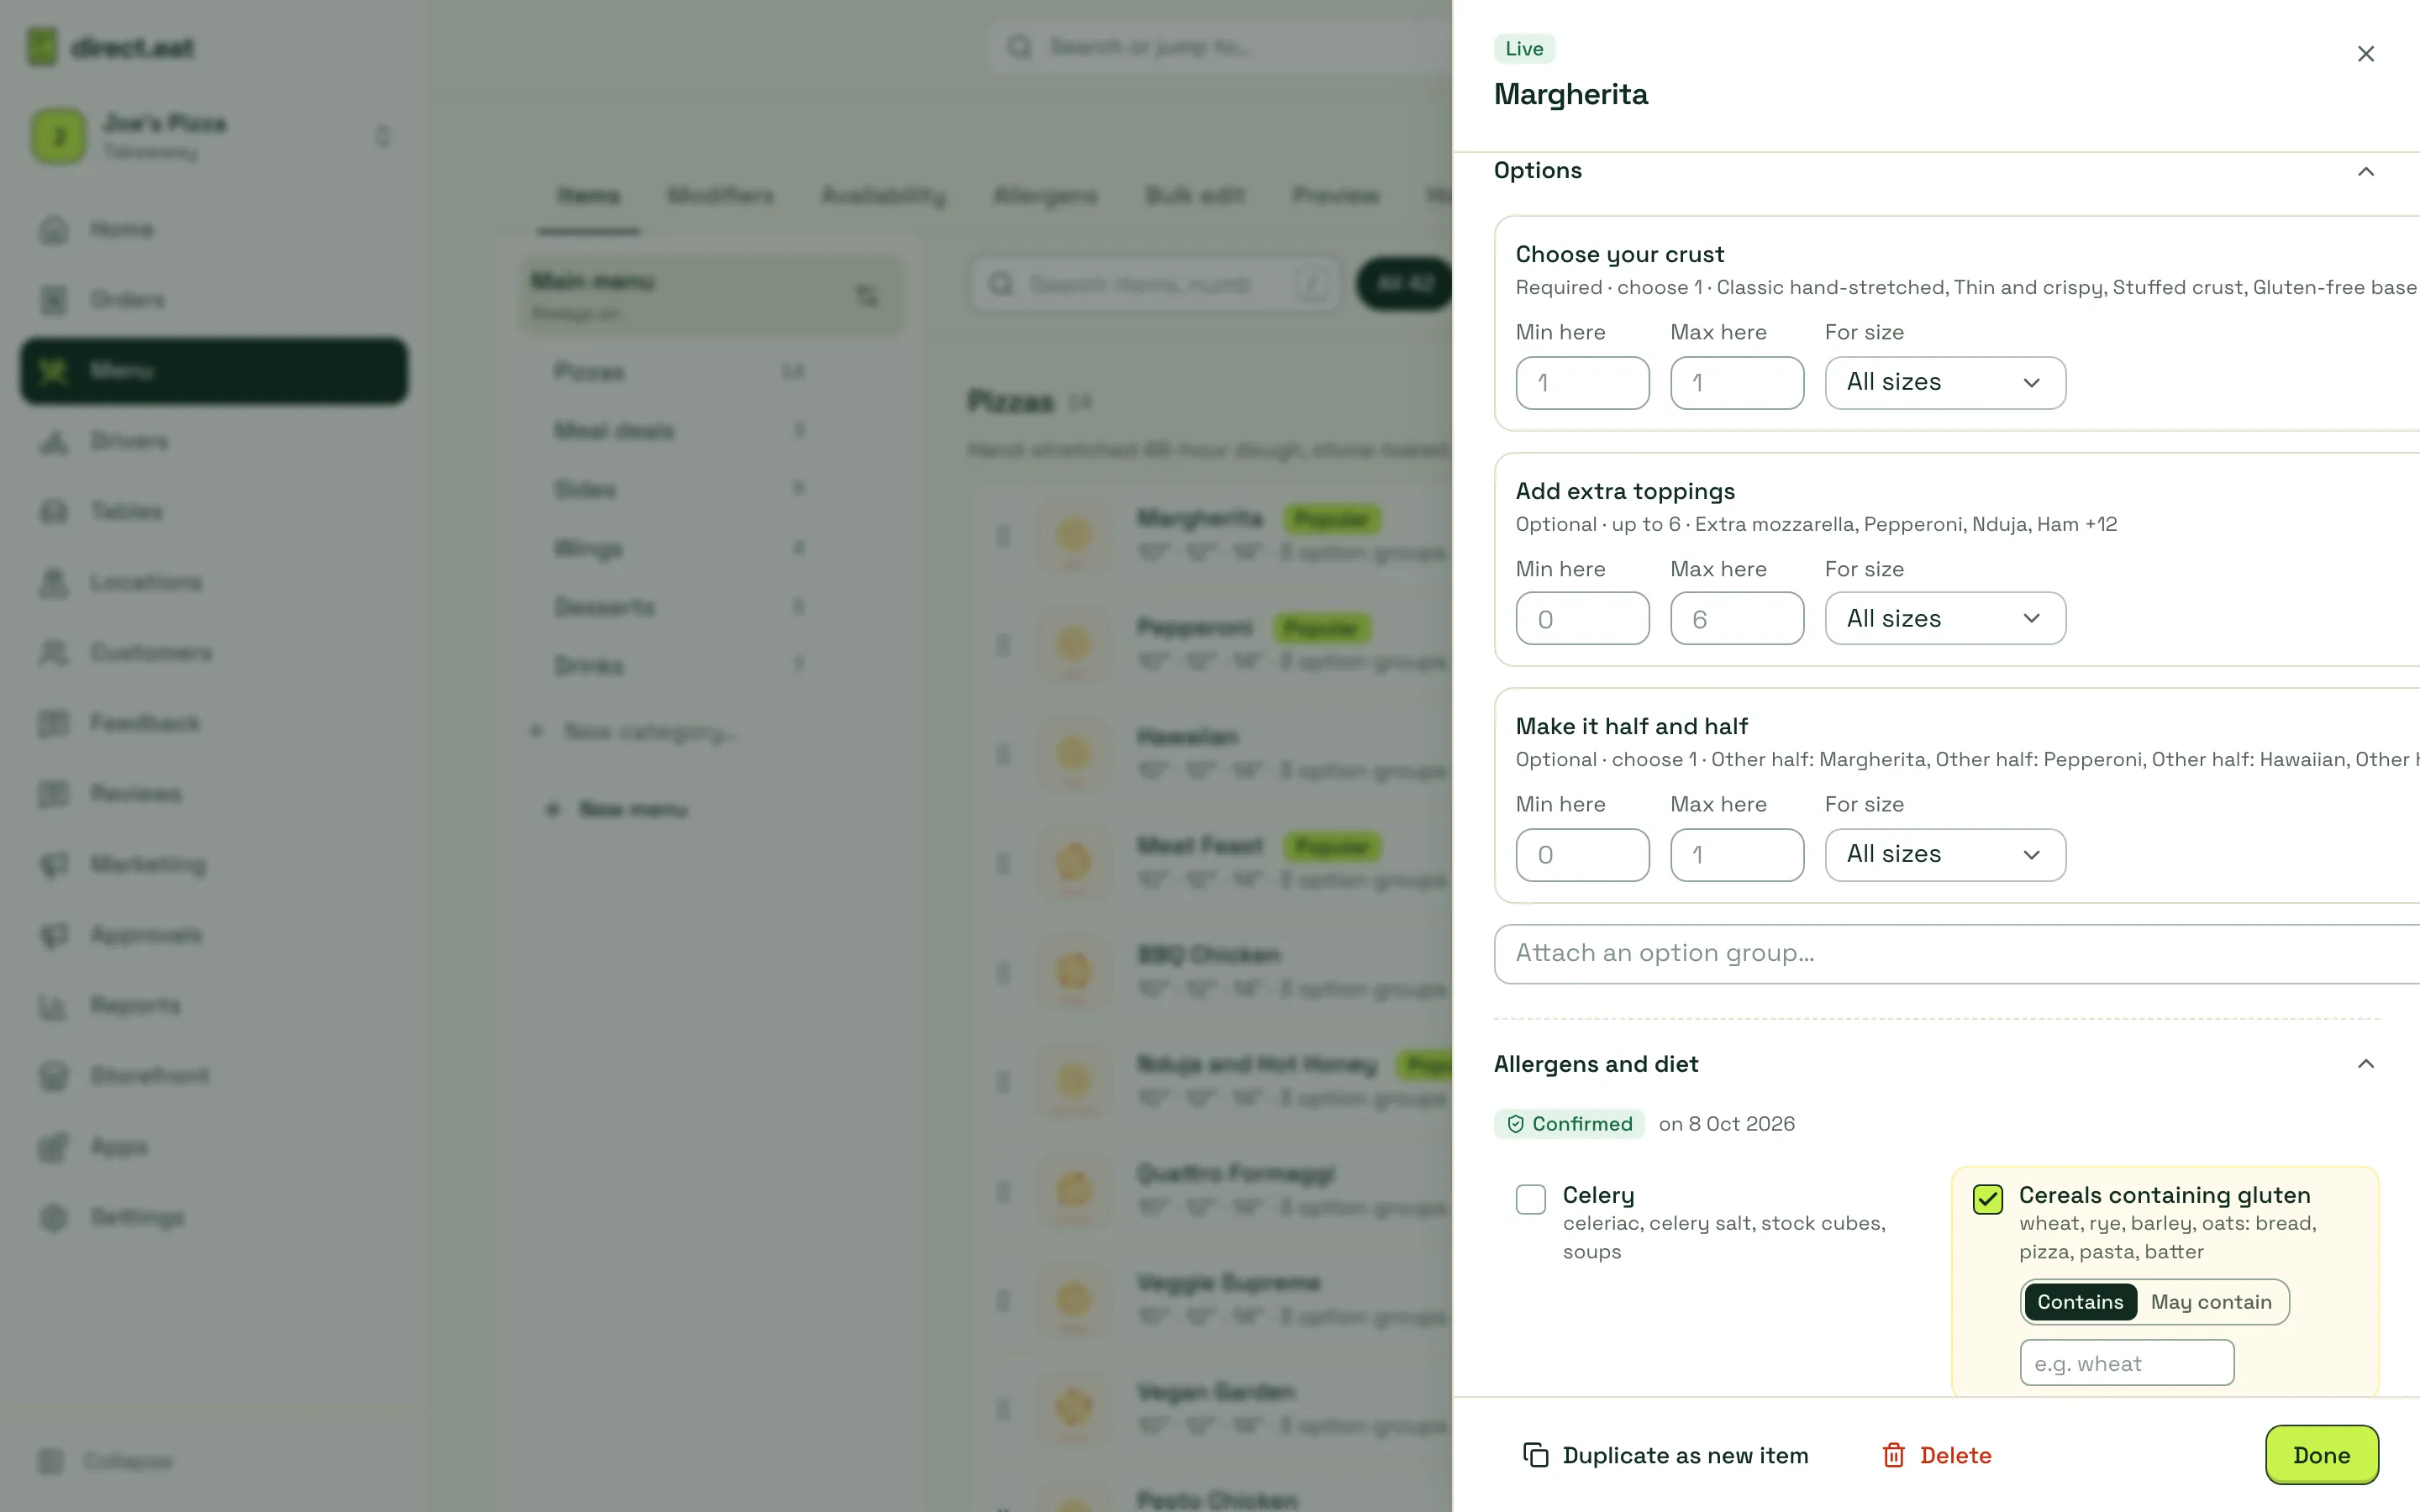
Allergens and diet
Section titled “Allergens and diet”Every item needs its allergens confirmed before it shows on your storefront. This has its own guide: Allergens and dietary tags.
Availability
Section titled “Availability”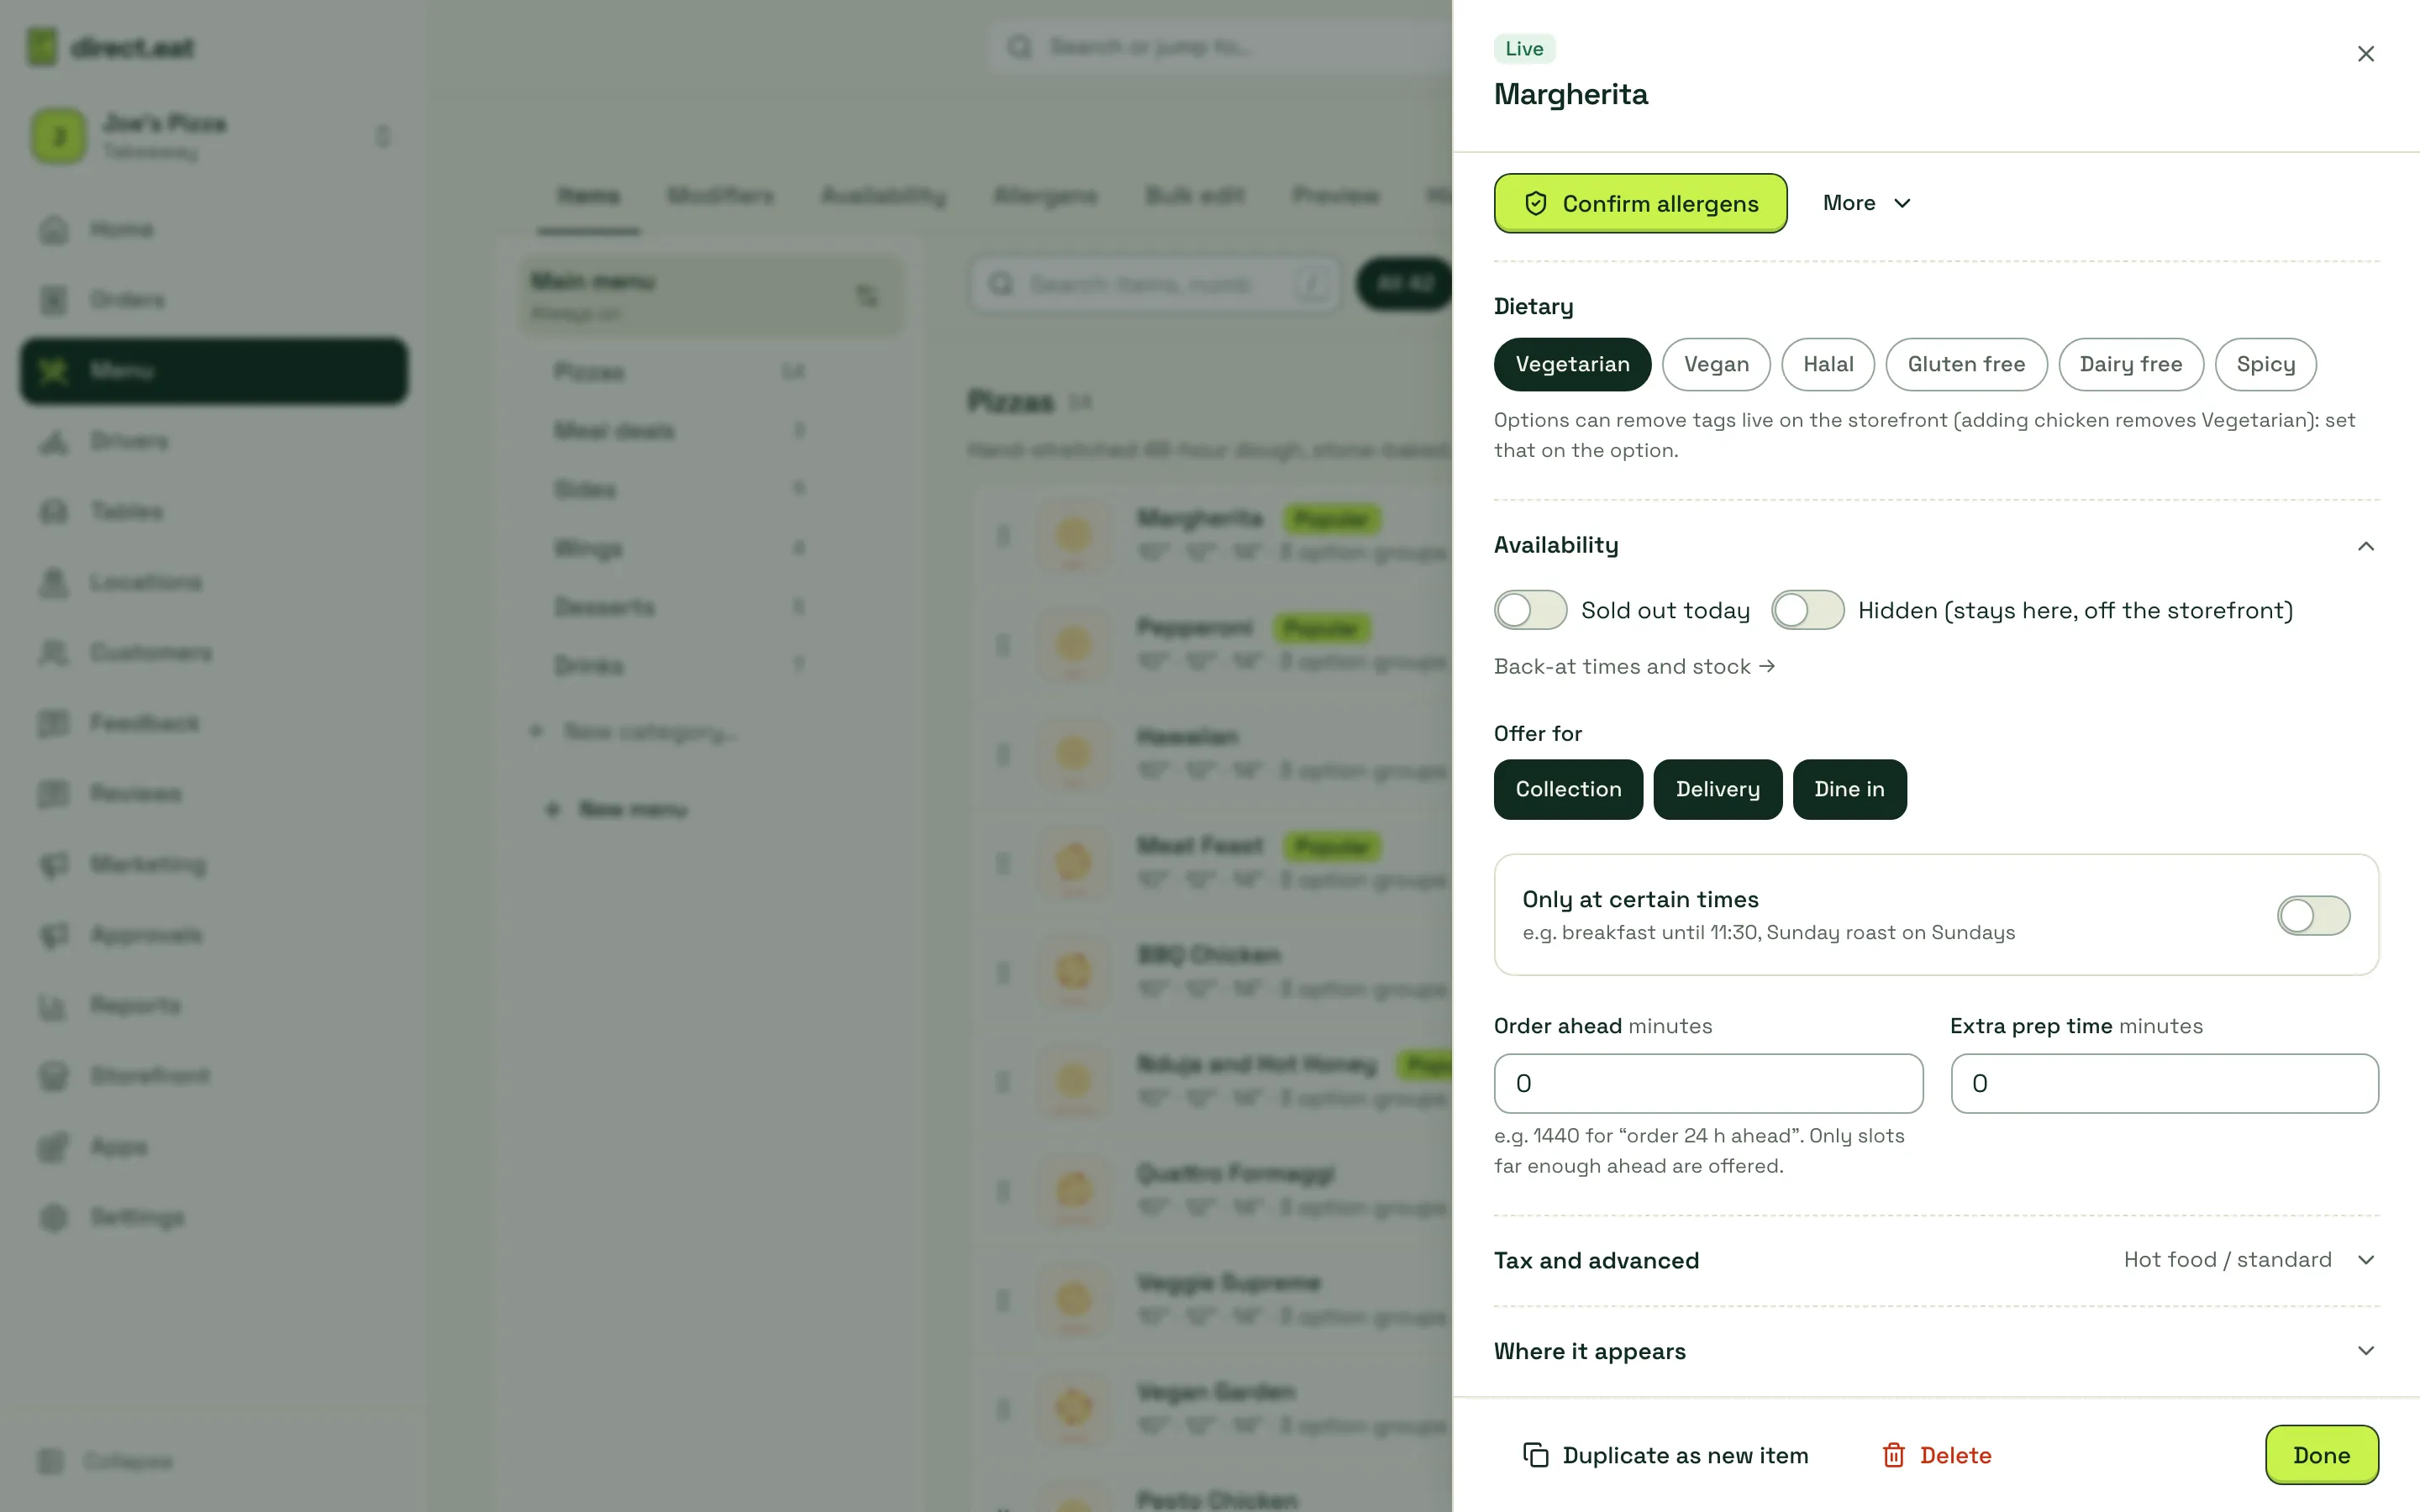
- Sold out today and Hidden (stays here, off the storefront).
- Offer for: collection, delivery and dine-in. An item needs at least one.
- Only at certain times: for example breakfast until 11:30 or a Sunday roast on Sundays.
- Order ahead (minutes): for items that need notice. 1440 means “order 24 hours ahead”; only slots far enough ahead are offered.
- Extra prep time (minutes): added to the ready time when this item is in the basket.
More on this in 86 items and stock.
Tax and advanced: VAT category
Section titled “Tax and advanced: VAT category”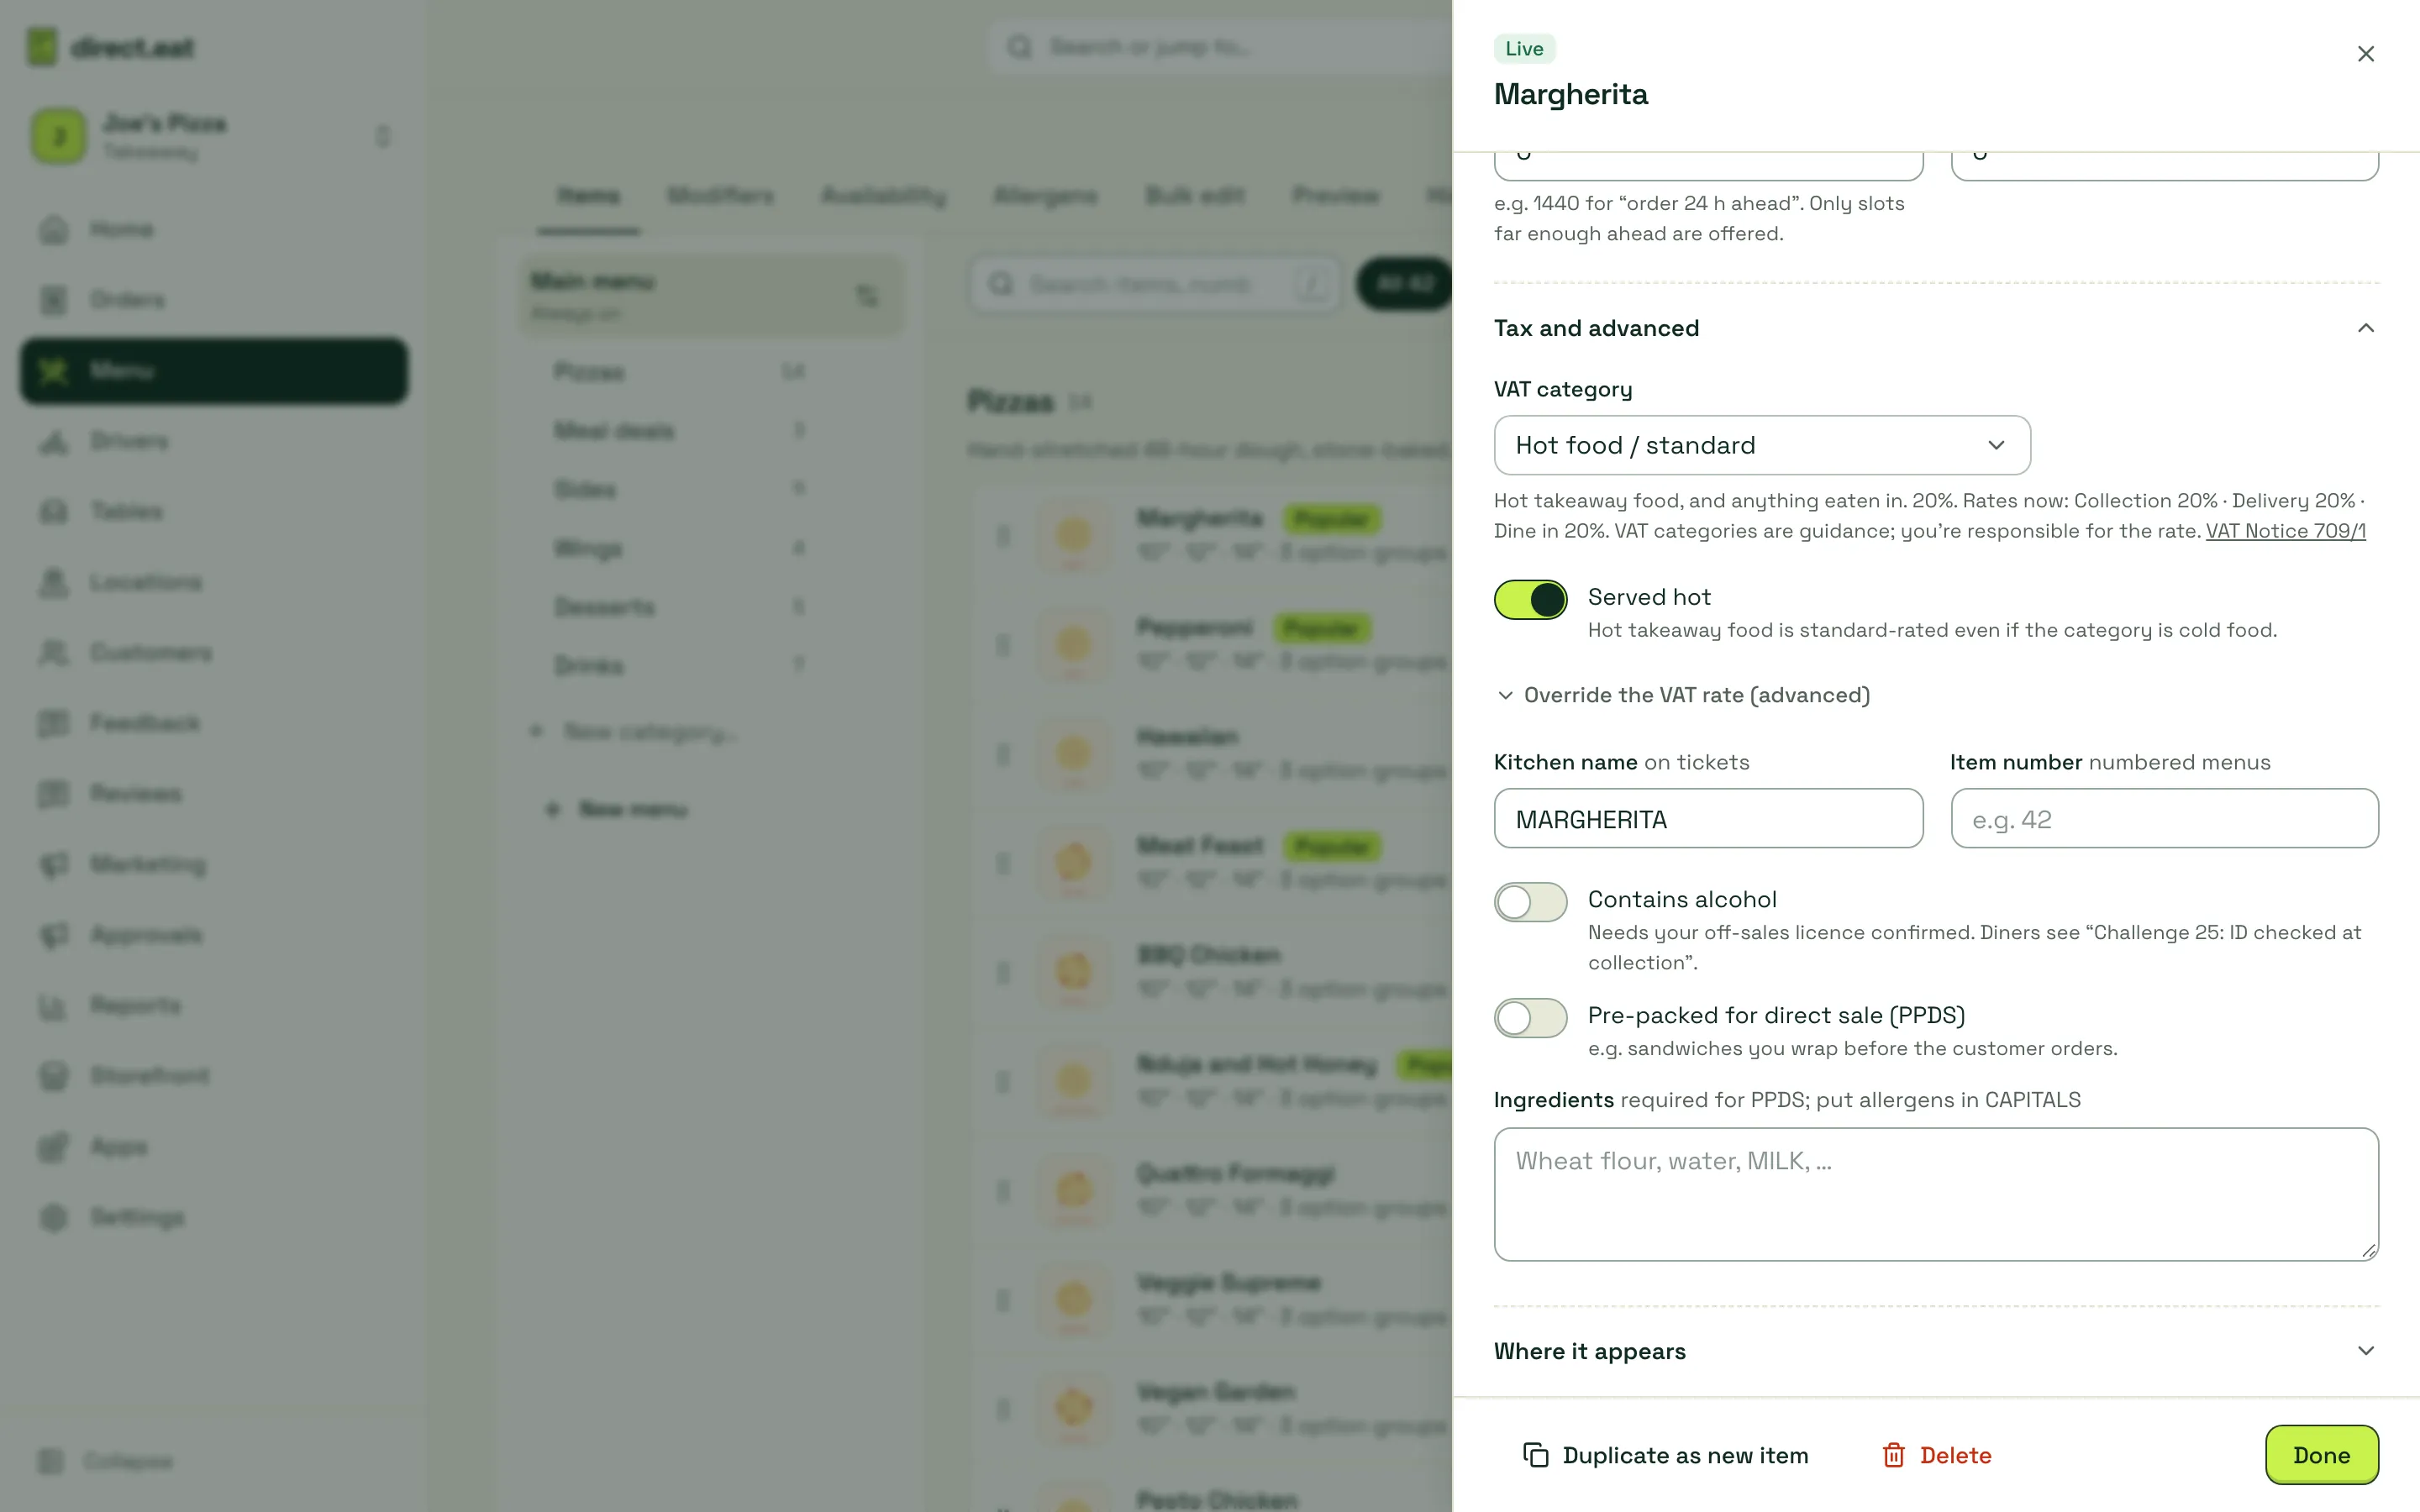
- VAT category: Hot food / standard, Cold food, Soft drinks, sweets, crisps, Hot drinks or Alcohol. The editor shows the rate that applies for collection, delivery and dine-in. The categories are guidance: you’re responsible for the rate (HMRC VAT Notice 709/1). Served hot keeps hot takeaway food at the standard rate even if the category is cold food. Override the VAT rate (advanced) sets a different rate per order type, with a warning.
- Kitchen name: a short name printed on tickets (for example MARGHERITA).
- Item number: for numbered menus (“42”). Searchable in the editor.
- Contains alcohol: needs your off-sales licence confirmed in Shop details. Diners see “Challenge 25: ID checked at collection”.
- Pre-packed for direct sale (PPDS): for food you wrap before the customer orders, such as sandwiches. Natasha’s Law needs the full ingredients list, with allergens in CAPITALS, before you can switch this on.
Where it appears
Section titled “Where it appears”Shows every menu and category the item is in. Add more with Also show in…. At the bottom of the editor, Duplicate as new item makes an independent copy and Delete removes the item.
Menus with their own times
Section titled “Menus with their own times”Click the sliders icon next to a menu’s name to open its settings:
- Menu is on: turn off to take the whole menu off your storefront.
- When is this menu on?: add schedules, for example a lunch menu on weekdays 12:00 to 15:00.
- Draft mode: see below.
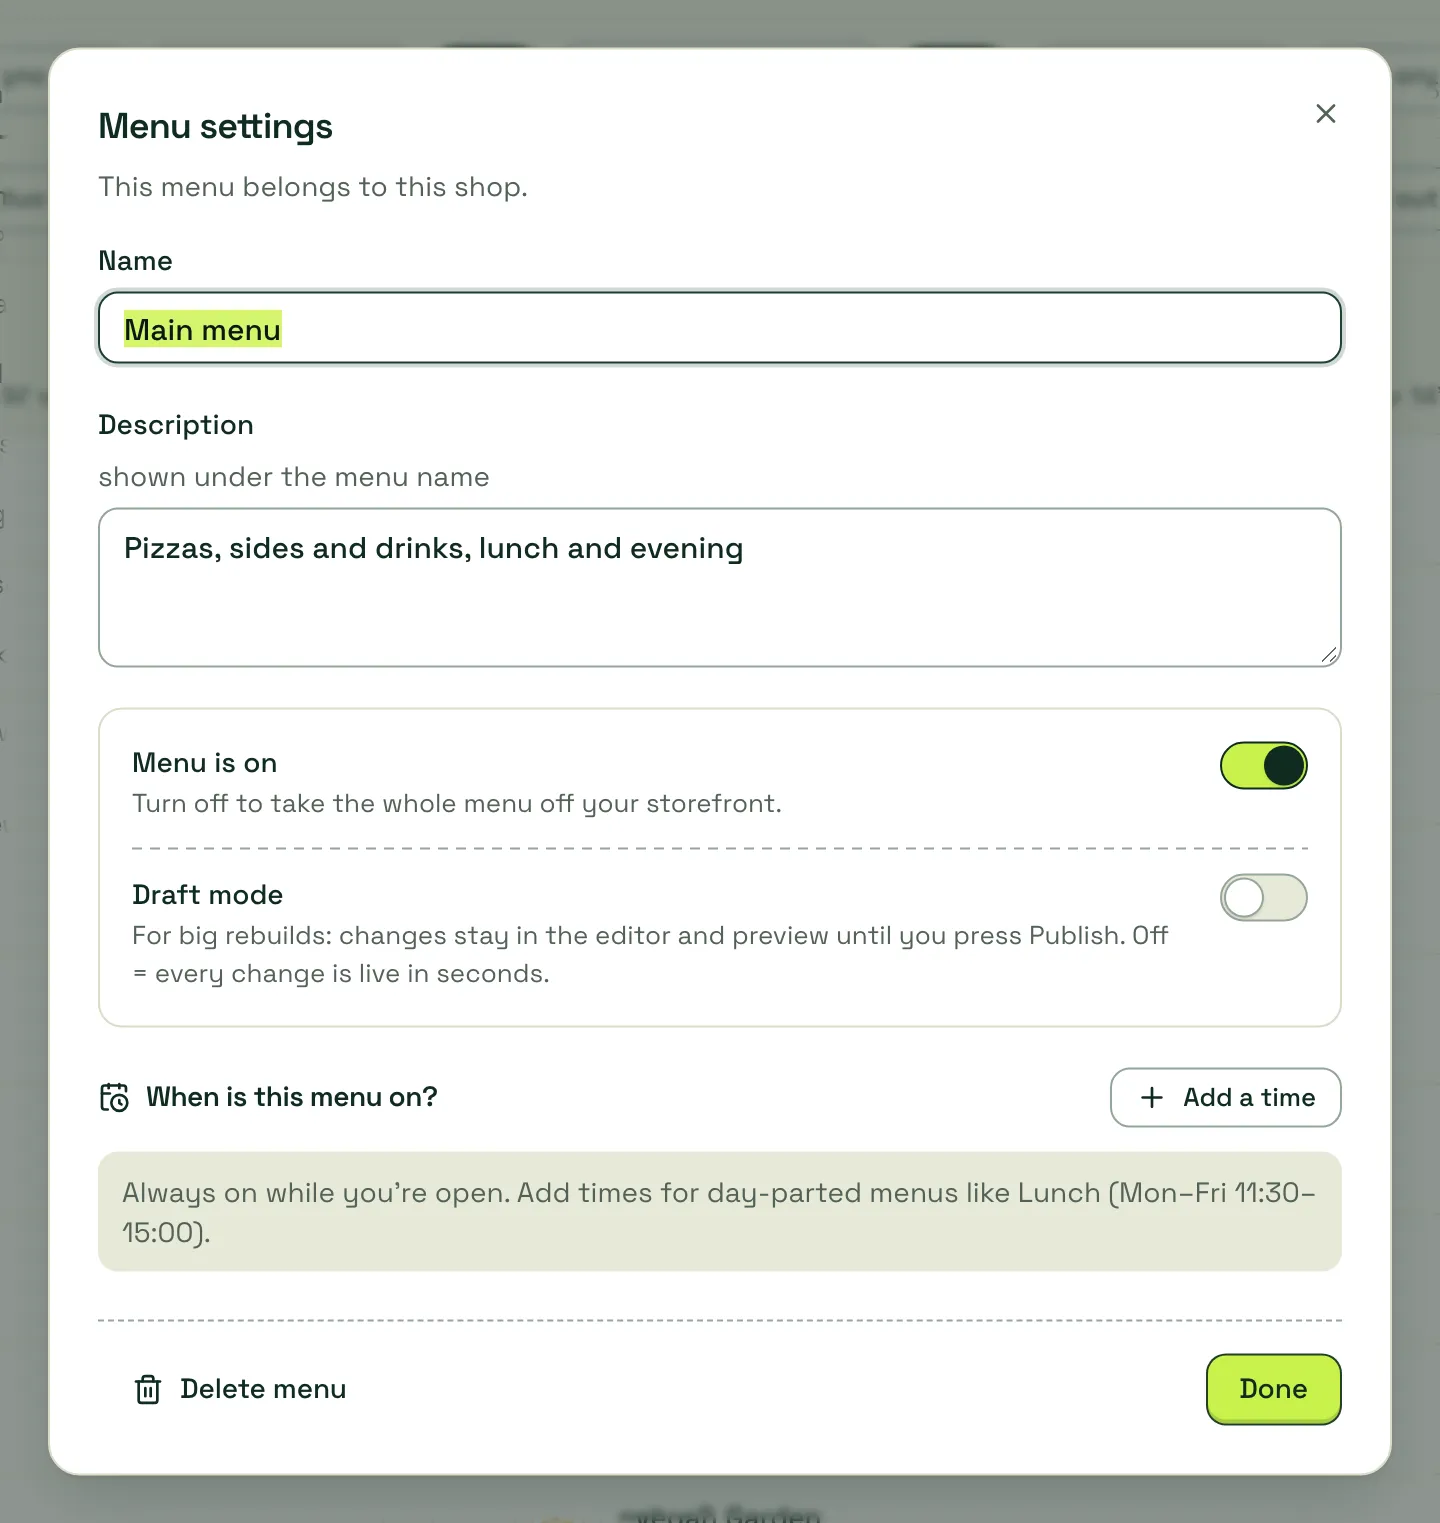
Delete menu is at the bottom of the same dialog.
Saving, publishing and undo
Section titled “Saving, publishing and undo”- Every change saves straight away. You’ll see “Saving…” then “Saved” next to the version number.
- It publishes automatically. With draft mode off (the default), each saved change is published to your storefront.
- Undo appears for 10 seconds after every change, and ⌘Z (Mac) or Ctrl+Z (Windows) undoes your last change. History lets you undo any change, however old.
Draft mode for big rebuilds
Section titled “Draft mode for big rebuilds”If you’re rebuilding the menu and don’t want diners to see it half done, turn on Draft mode in the menu’s settings. Changes then stay in the editor and Preview until you press Publish. The Publish your menu dialog shows how many changes go live and lets you add a note for your team.
- Use Preview to see the menu exactly as a diner would at a given date, time and order type, including hidden items and time windows. See Bulk edit, history and preview.
- The editor works on a phone at 360 px wide, which is enough to 86 something, change a price, hide an item or add one with a photo.
- Moving from another system? Import your menu instead of typing it in.
Related
Section titled “Related”Was this page helpful?