

Multi-location
One organisation can run several shops. Each shop has its own storefront and web address, menu, hours, prep times, kitchen devices, Stripe account and order board. Your team, your customer list and your subscription are shared across all of them.
Before you start
Section titled “Before you start”- Extra shops need the Growth plan and above and cost £29 a month each (£34.80 inc VAT). Starter covers one shop.
- Only owners and admins can add locations, set up master menus, the group ordering page and transfers.
- Managers and staff see only the shops they’re assigned to.
Switch between shops
Section titled “Switch between shops”Click the shop name at the top of the sidebar to open the shop switcher. It lists every shop you can use, grouped by organisation. If you belong to more than one organisation, they’re all listed here.
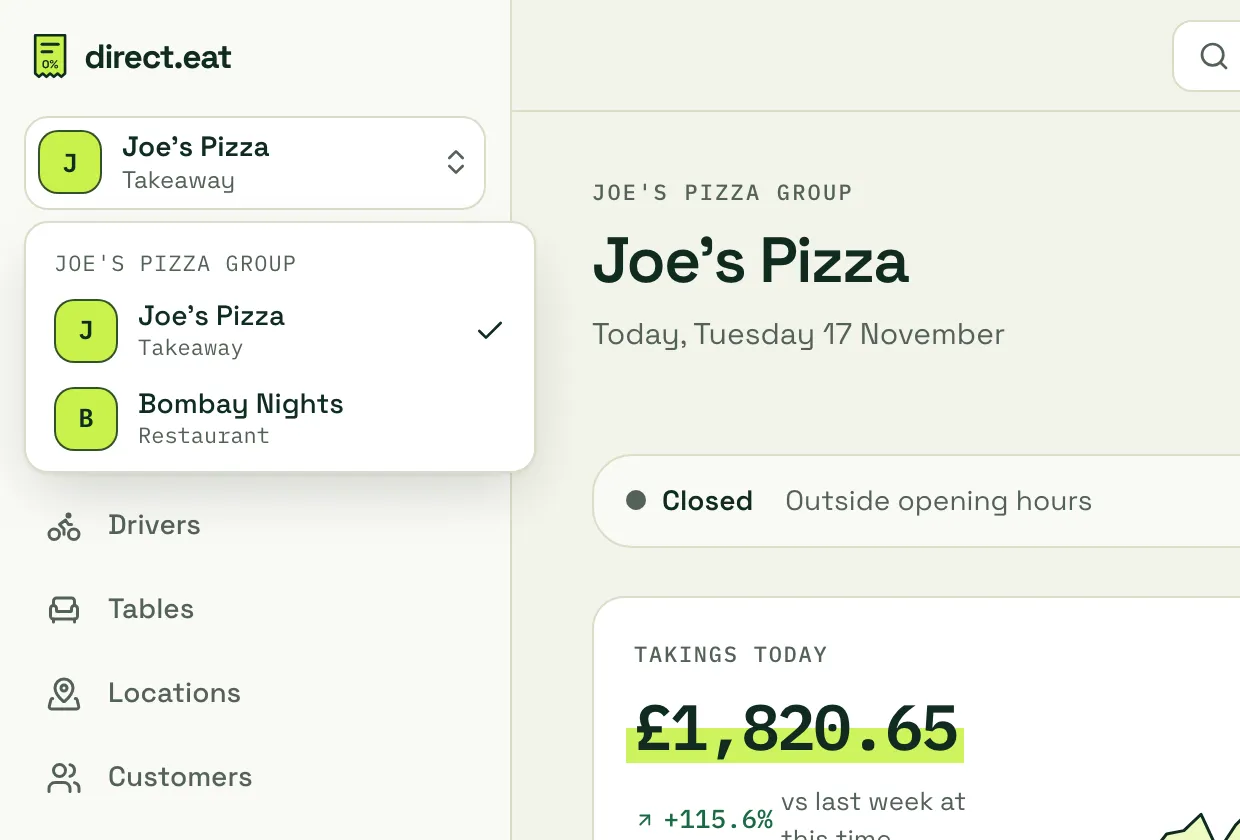
Everything in the dashboard (orders, menu, reports, settings) is for the shop you’ve picked. Pages that belong to the whole organisation, like Team, Plan and billing, Approvals and API and webhooks, show the organisation name at the top instead.
The Locations overview
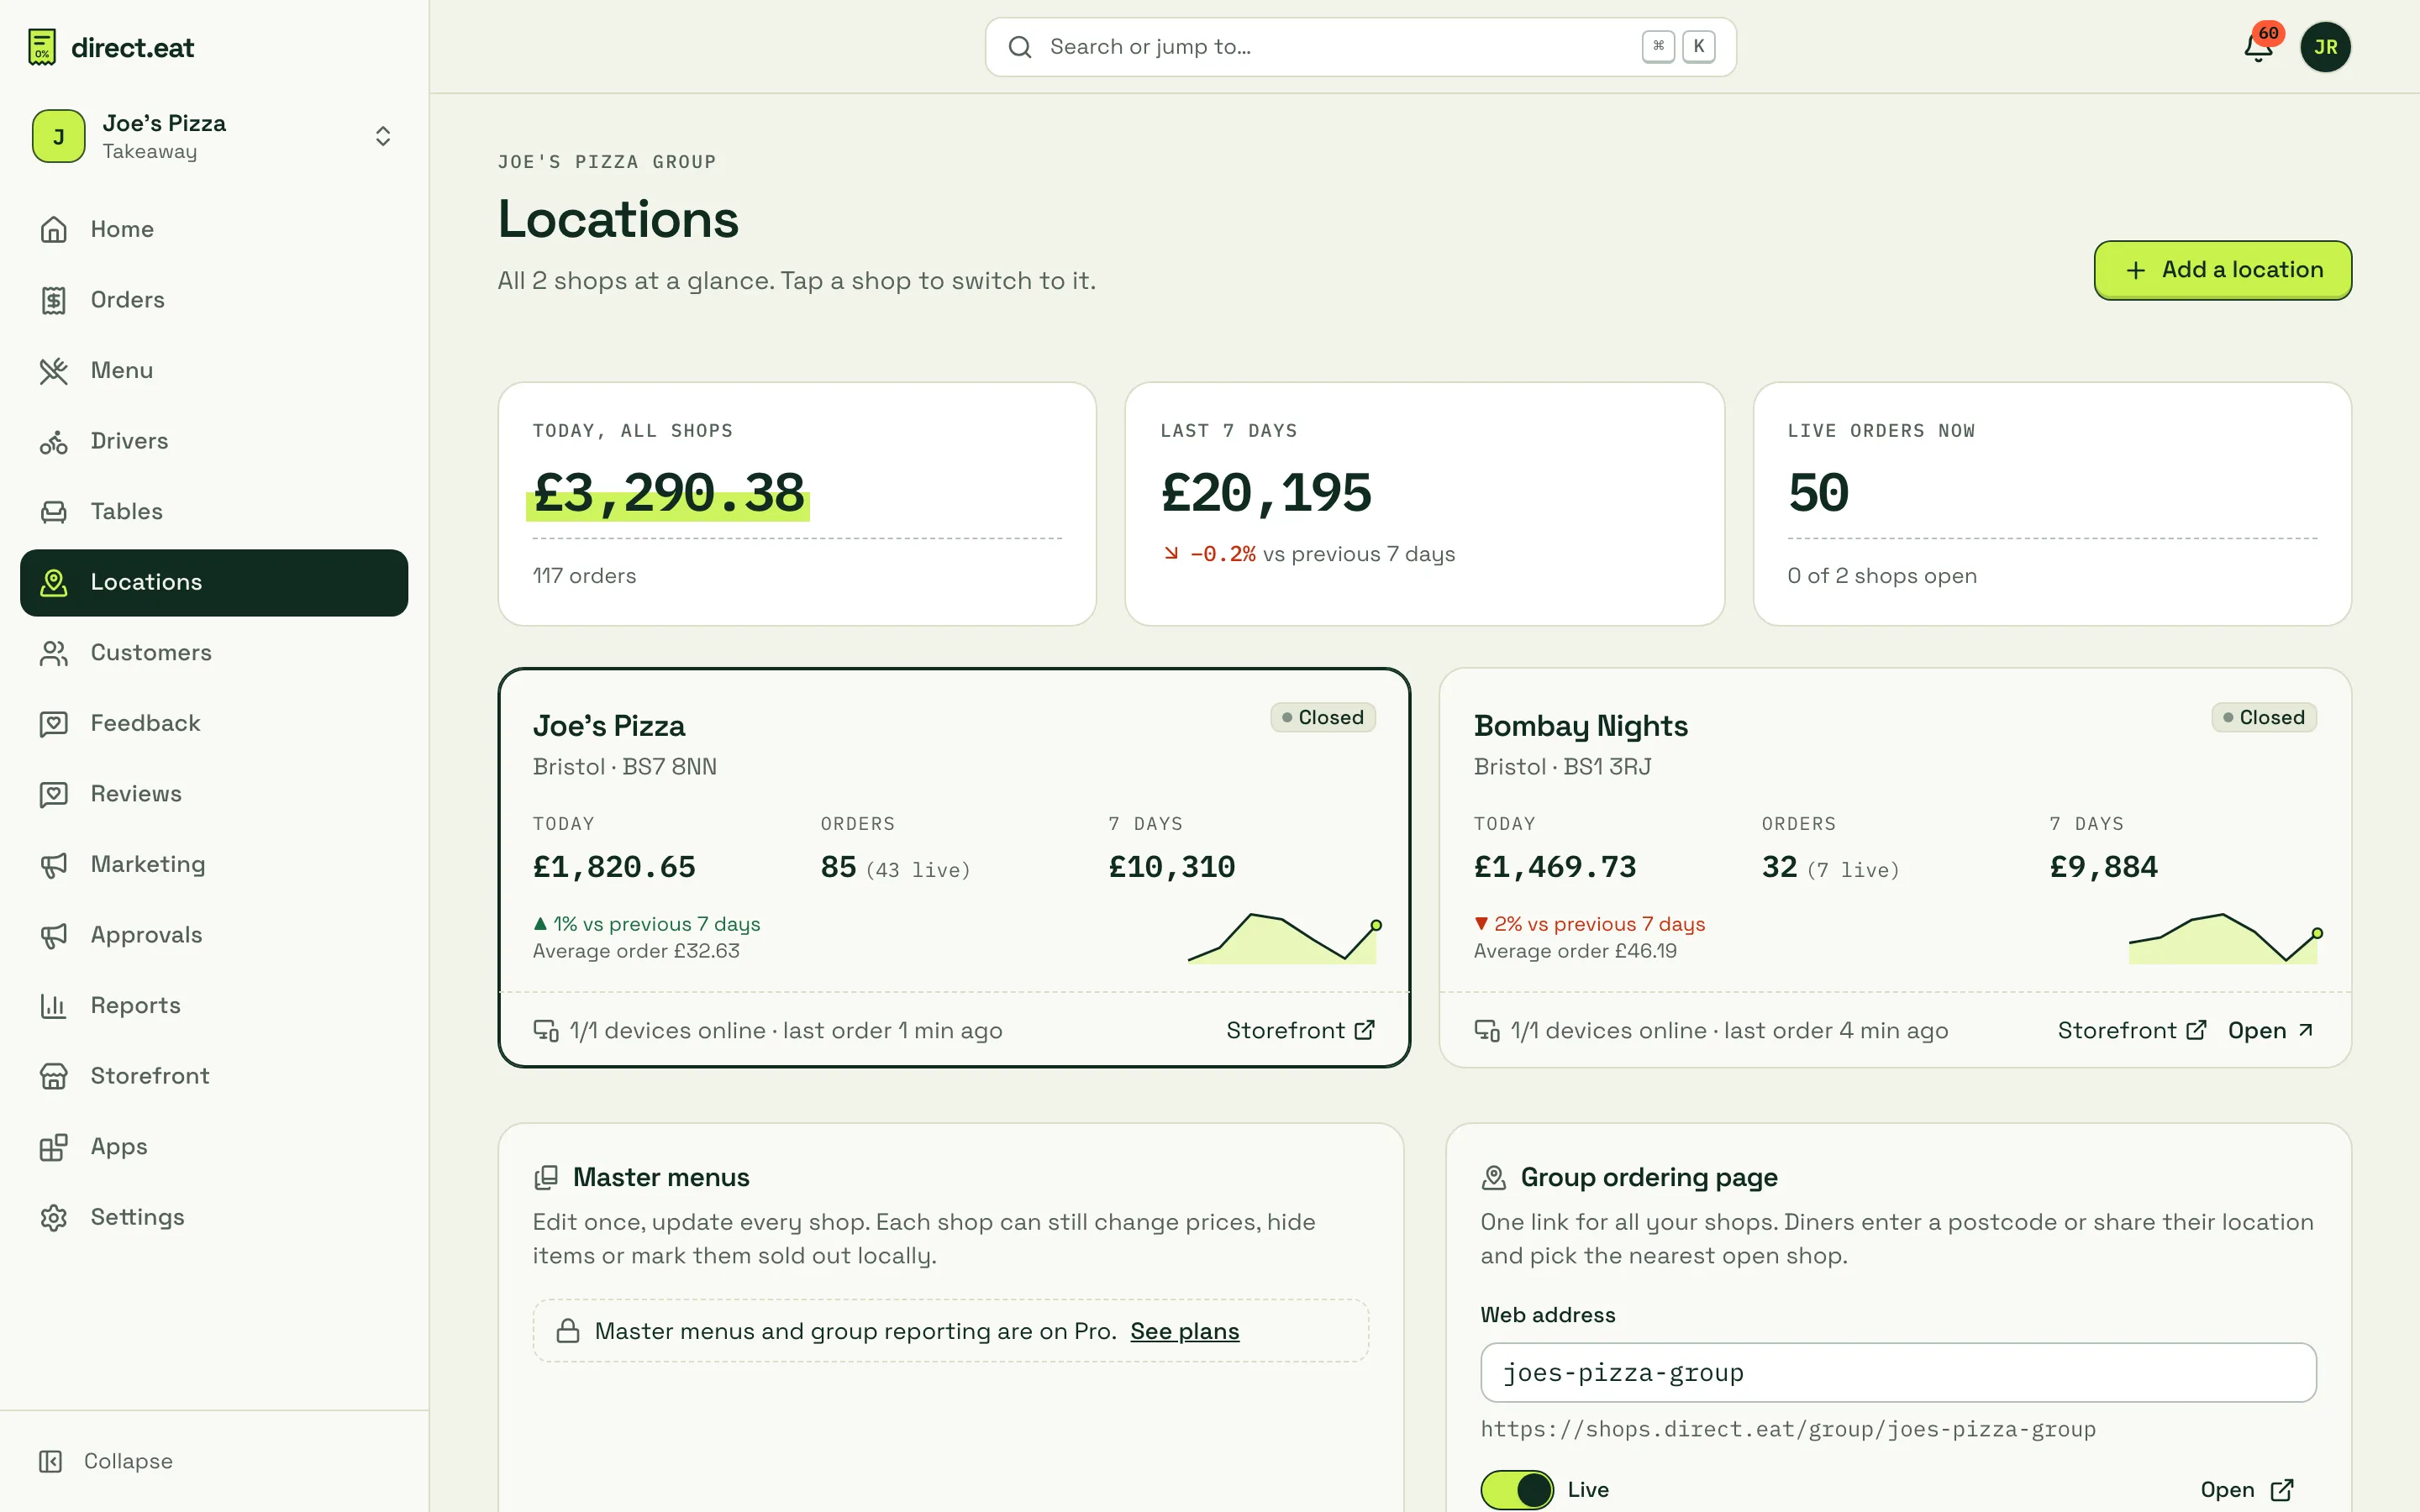
Section titled “The Locations overview”Click Locations in the sidebar (or press G then L).
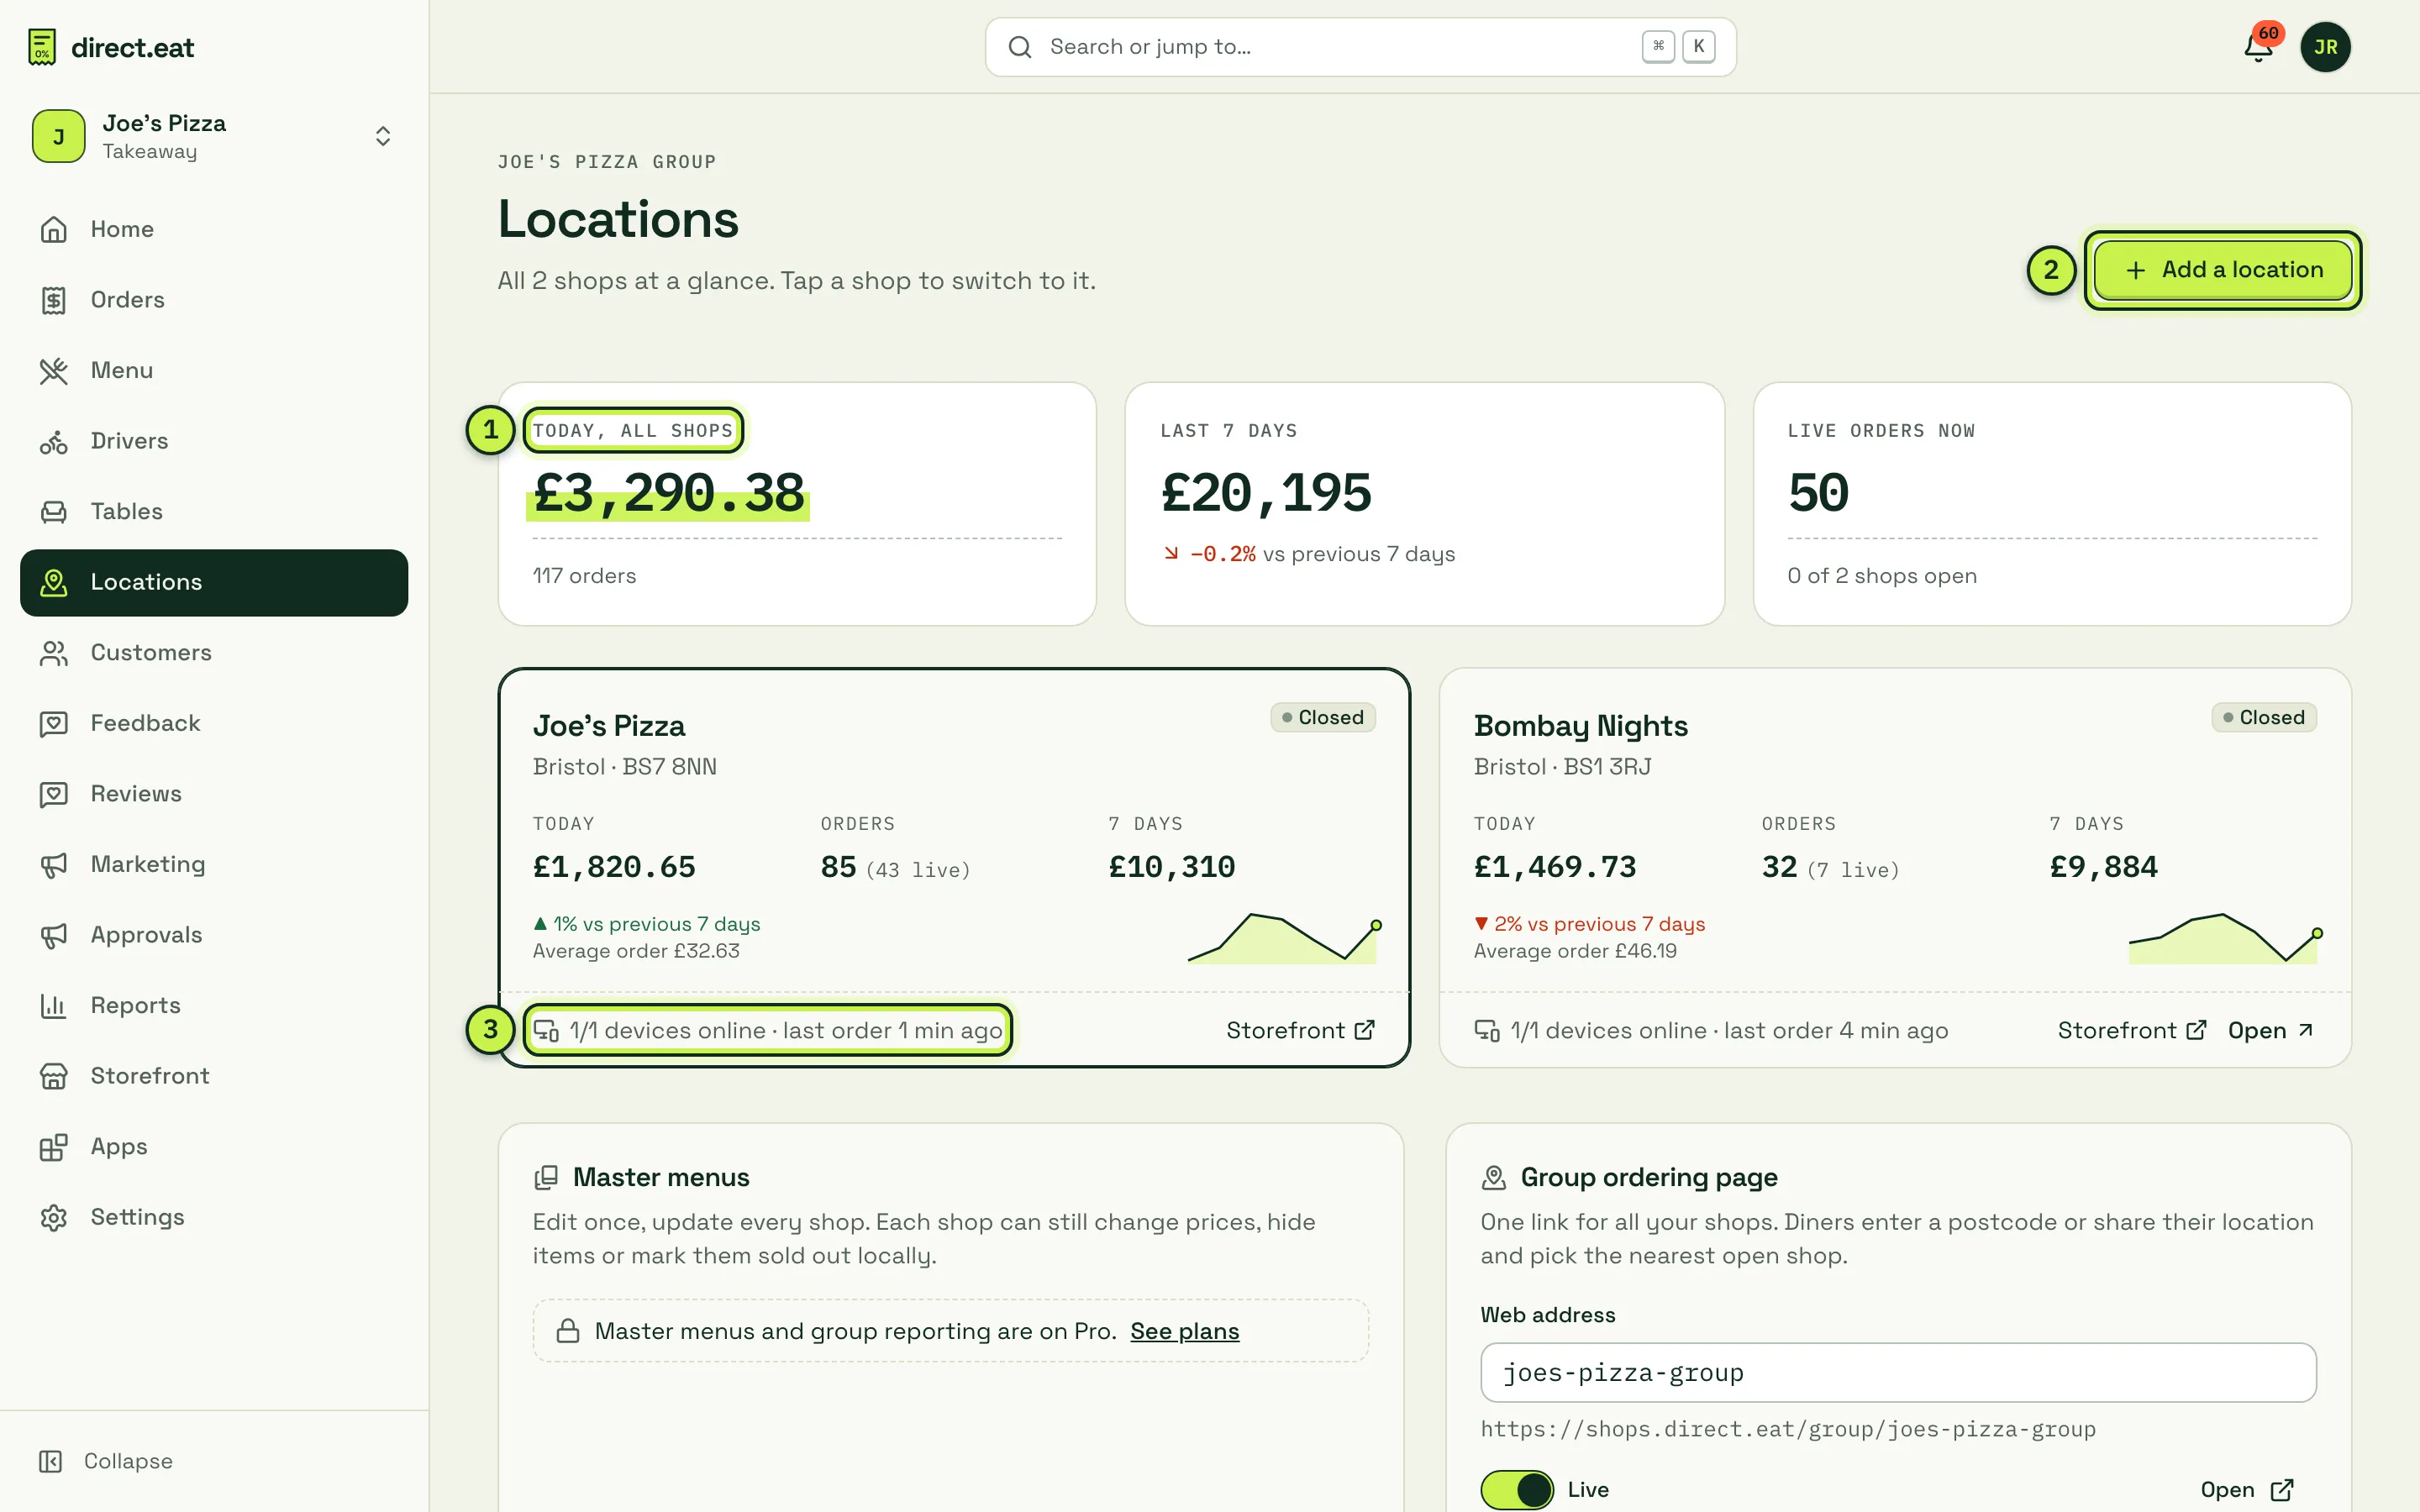
- Group totals: today’s takings and orders across all shops, the last 7 days against the 7 before, and live orders right now with how many shops are open.
- Add a location.
- Shop cards: each shop’s live state (open, busy, paused or closed), today’s takings and orders, 7-day takings with a sparkline, average order, devices online and when the last order came in. A red flag appears if a shop is open with no kitchen device online. Click a card to switch to that shop, or Storefront to open its ordering site.
Add a location
Section titled “Add a location”-
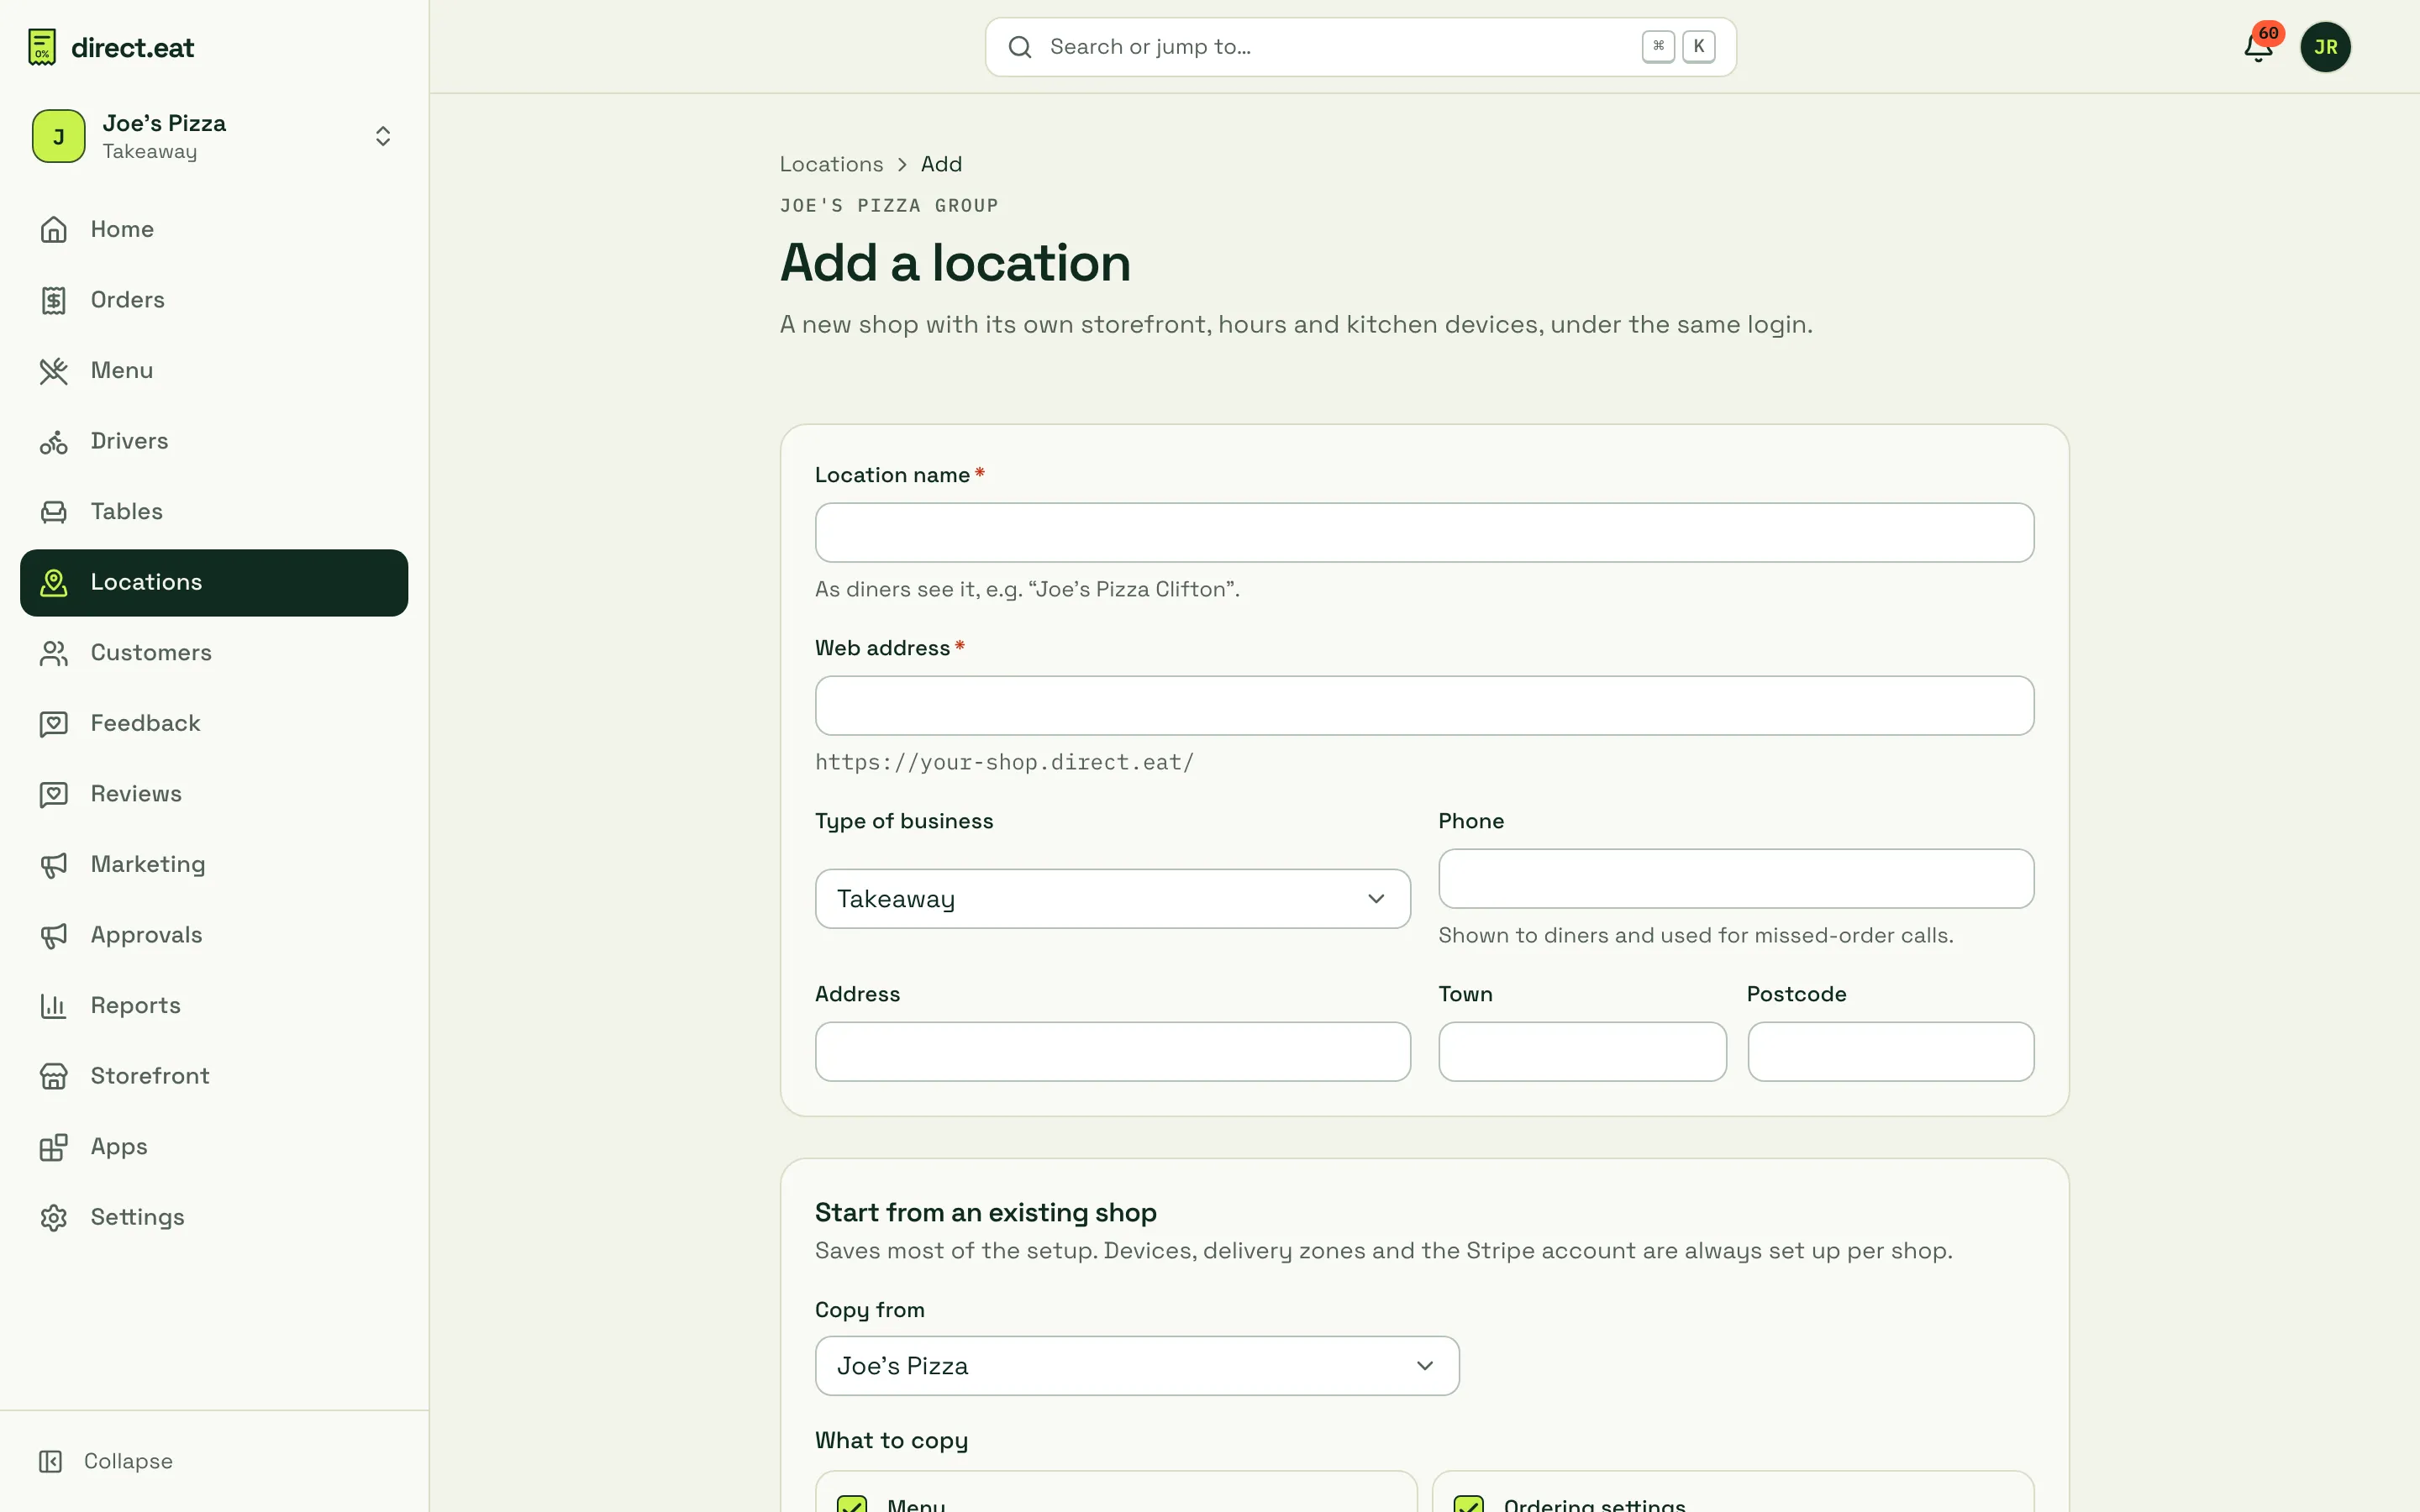
On Locations, click Add a location.
-
Enter the Location name as diners see it, for example “Joe’s Pizza Clifton”.
-
Choose its Web address. You’ll see straight away if it’s taken. Shop and group addresses share one list, so each must be unique.
-
Pick the Type of business, and add the Phone (shown to diners and used for missed-order calls), Address, Town and Postcode.
-
Under Start from an existing shop, choose a shop to Copy from, or Start from scratch.
-
Tick What to copy:
- Menu: categories, items, prices and allergens. Shared organisation items stay linked, so editing them updates both shops.
- Ordering settings: prep times, slots, payments, tips, delivery settings and alert sounds.
- Opening hours: a starting point to adjust.
- Look and feel: colours, fonts, logo and cover photo.
-
Check the price note and click Add location.
The new shop starts as a draft with its own menu published from the copy. You’re charged only for the rest of this billing period, then £29 a month. Close the shop any time and the charge stops.
Never copied, because they must be set up per shop:
- Kitchen devices and printers: pair them at the new site. See Devices and printers.
- Delivery zones: draw them for the new address. See Zones and fees.
- Stripe account: connect one for the new shop before it takes card payments. See Payments.
- Escalation phone numbers: add on-call contacts for the new site in Settings → Alerts.
Then work through Go live for the new shop.
Giving your team access
Section titled “Giving your team access”Owners and admins get every shop automatically. For managers and staff, open Settings → Team, click ••• → Change role or shops and tick the new shop. See Team and permissions.
Master menus
Section titled “Master menus”A master menu is edited once and used by several shops. Each shop can still change prices, hide items or mark them sold out locally.
On Locations → Master menus:
- Create a master menu from an existing shop’s menu.
- Assign it to the shops that should use it and save. Shops update the next time the menu is published.
On Growth, the section shows “Master menus and group reporting are on Pro.”
Group ordering page
Section titled “Group ordering page”One link for all your shops. Diners enter a postcode or tap Use my location, see your shops sorted by distance with whether each is open, busy, paused or closed and when it next opens, and tap See the menu to order from the right one.
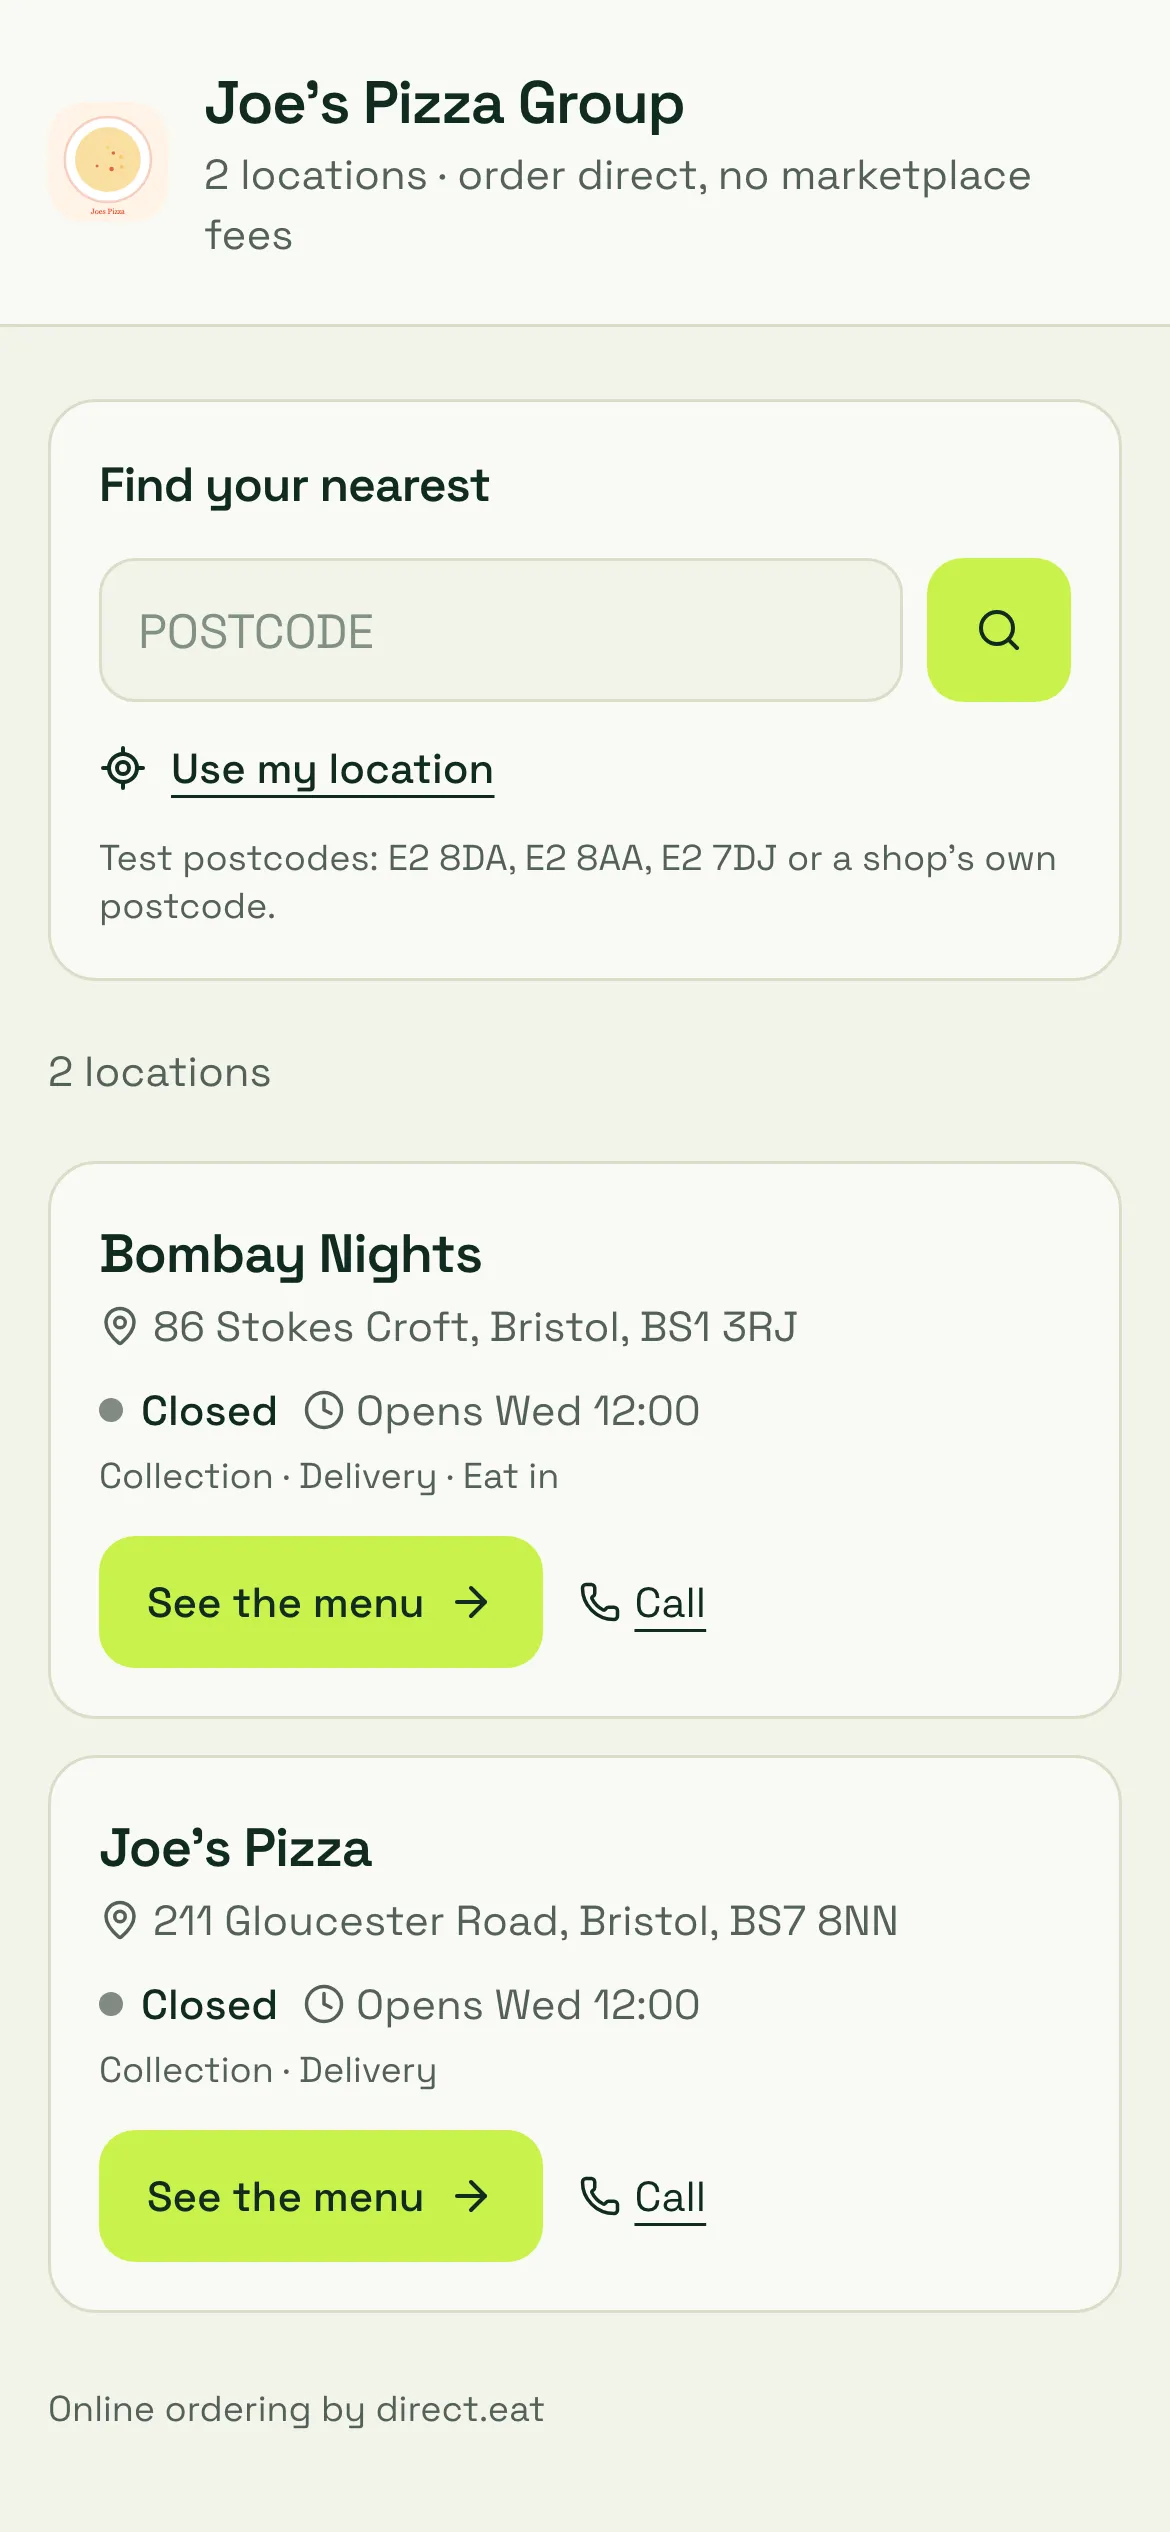
To set it up, go to Locations → Group ordering page, choose the Web address (for example joes-pizza-group), and switch it to Live. Click Open to see it.
Put the link on your social profiles, Google Business Profile or printed menus when you want diners to choose their nearest branch.
Transfer a shop
Section titled “Transfer a shop”Selling a branch? You can transfer a shop to another direct.eat owner. The menu, settings, theme and (optionally) the domain move to the new owner. Your order history and your Stripe account stay with you.
-
On Locations → Shop transfers, click Transfer a shop.
-
Choose the Shop, enter the New owner’s email, pick the Cut-over time (at least 24 hours away) and add a Note for the buyer if you like.
-
Enter Your password and confirm.
The buyer accepts from their own direct.eat account, chooses which organisation to add it to and enters their password. If the sale includes customer data, they must confirm the purchase lawfully includes it; otherwise they start with an empty customer list. They need to connect their own Stripe account before the shop can take card payments again.
Until the cut-over, either side can Cancel transfer. At the cut-over, ordering moves to the new owner.
Reporting across shops
Section titled “Reporting across shops”Locations gives you the group view for today and the last 7 days. In Reports, you can switch between This shop and All shops for exports. See Reports.
Related
Section titled “Related”Was this page helpful?