

Go live and share your link
Going live switches your storefront on so anyone with the link can order. Then the real work starts: telling people. Every order that comes through your own link instead of a marketplace is one you keep in full.
Time: 2 minutes to go live, then 20 to 30 minutes to put your link everywhere.
1. Clear the go-live checklist
Section titled “1. Clear the go-live checklist”Open the setup wizard and click the last step, Go live (from Home, the Finish setting up card takes you there). The page is called Ready to go live?.
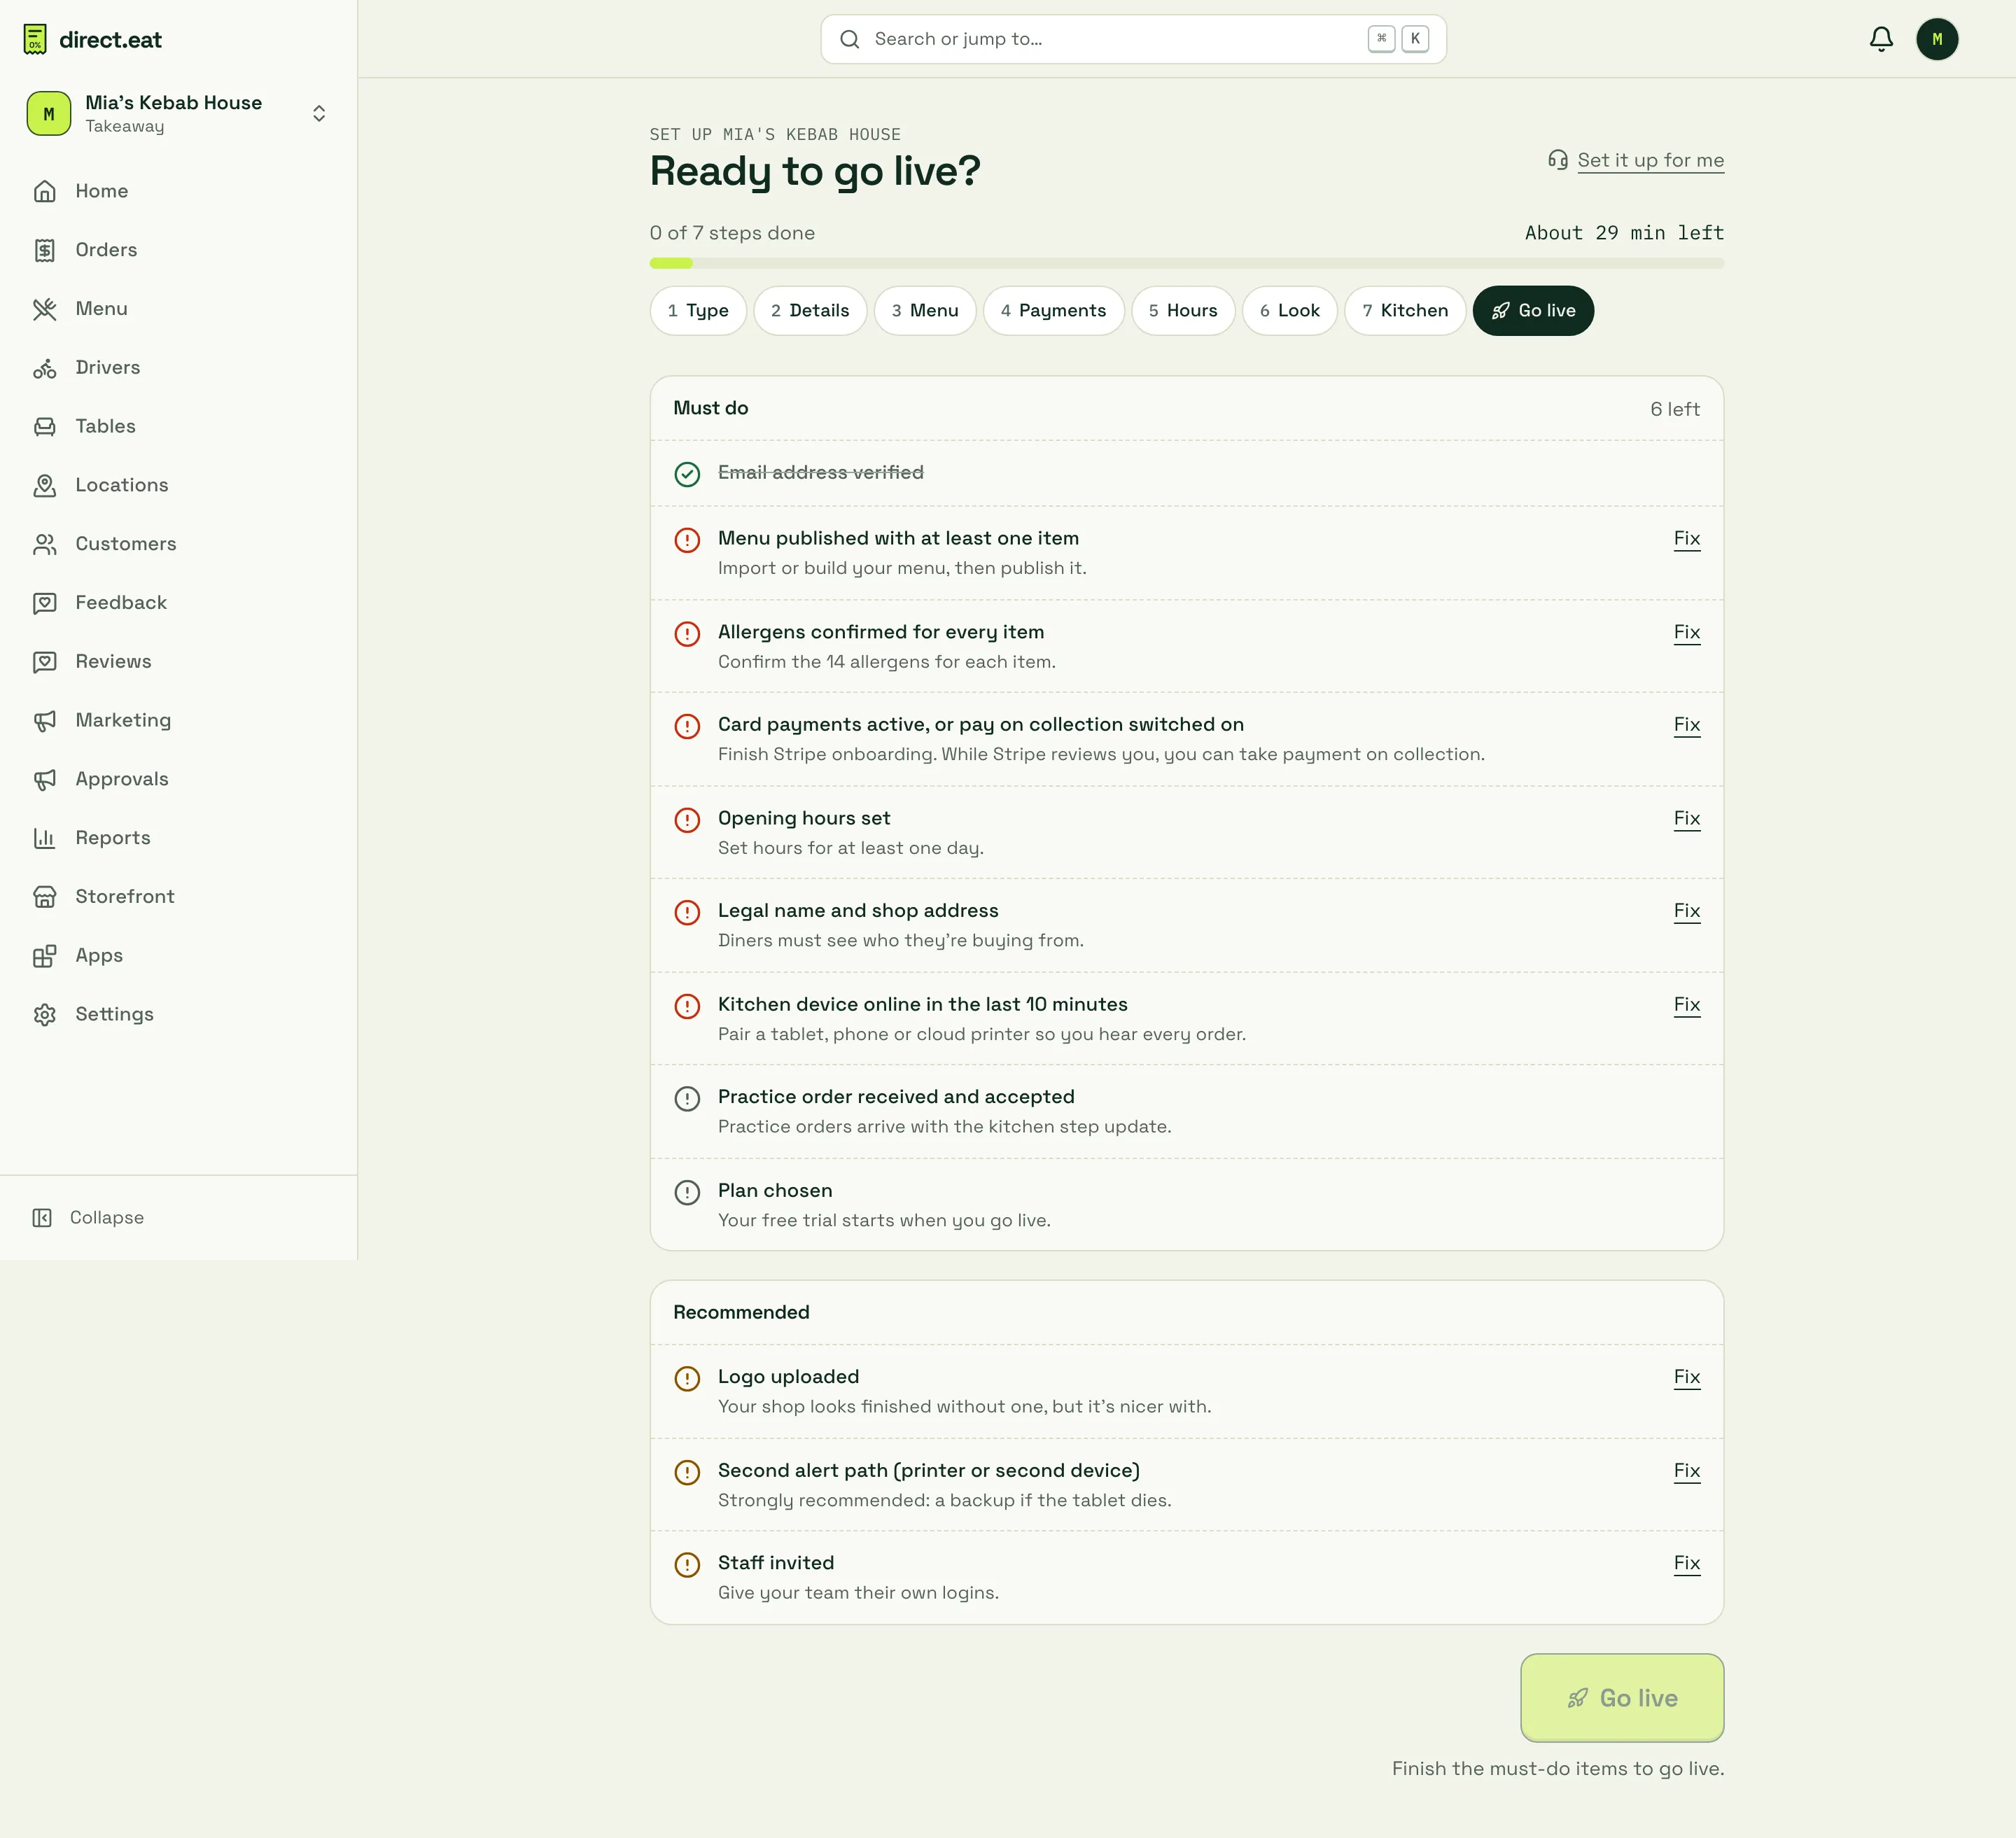
Must do items have to be green before the Go live button works. Each has a Fix link that takes you to the right place:
| Must do | Where it’s done |
|---|---|
| Email address verified | The link in your sign-up email |
| Menu published with at least one item | Step 3 |
| Allergens confirmed for every item | Step 4 |
| Card payments active, or pay on collection switched on | Step 6 |
| Opening hours set | Step 7 |
| Legal name and shop address | Step 2 |
| Kitchen device online in the last 10 minutes | Step 9 |
The last one is deliberate: you can’t go live without a working way to hear orders. Have the kitchen app open on your tablet when you press the button.
Recommended items don’t block you, but do them soon: Logo uploaded, Second alert path (printer or second device) and Staff invited.
The list also shows Practice order received and accepted and Plan chosen. These don’t block go-live yet: practice orders before go-live aren’t available, so you’ll do your test order straight after pressing the button.
-
Work down the Must do list until it says 0 left.
-
Only the owner can press Go live. Click it.
-
Your menu is published, your storefront starts taking orders and you see the share card.
-
Before you share the link, place your test order from your phone. You couldn’t do it earlier, because the storefront only takes orders once it’s live.
2. Your link
Section titled “2. Your link”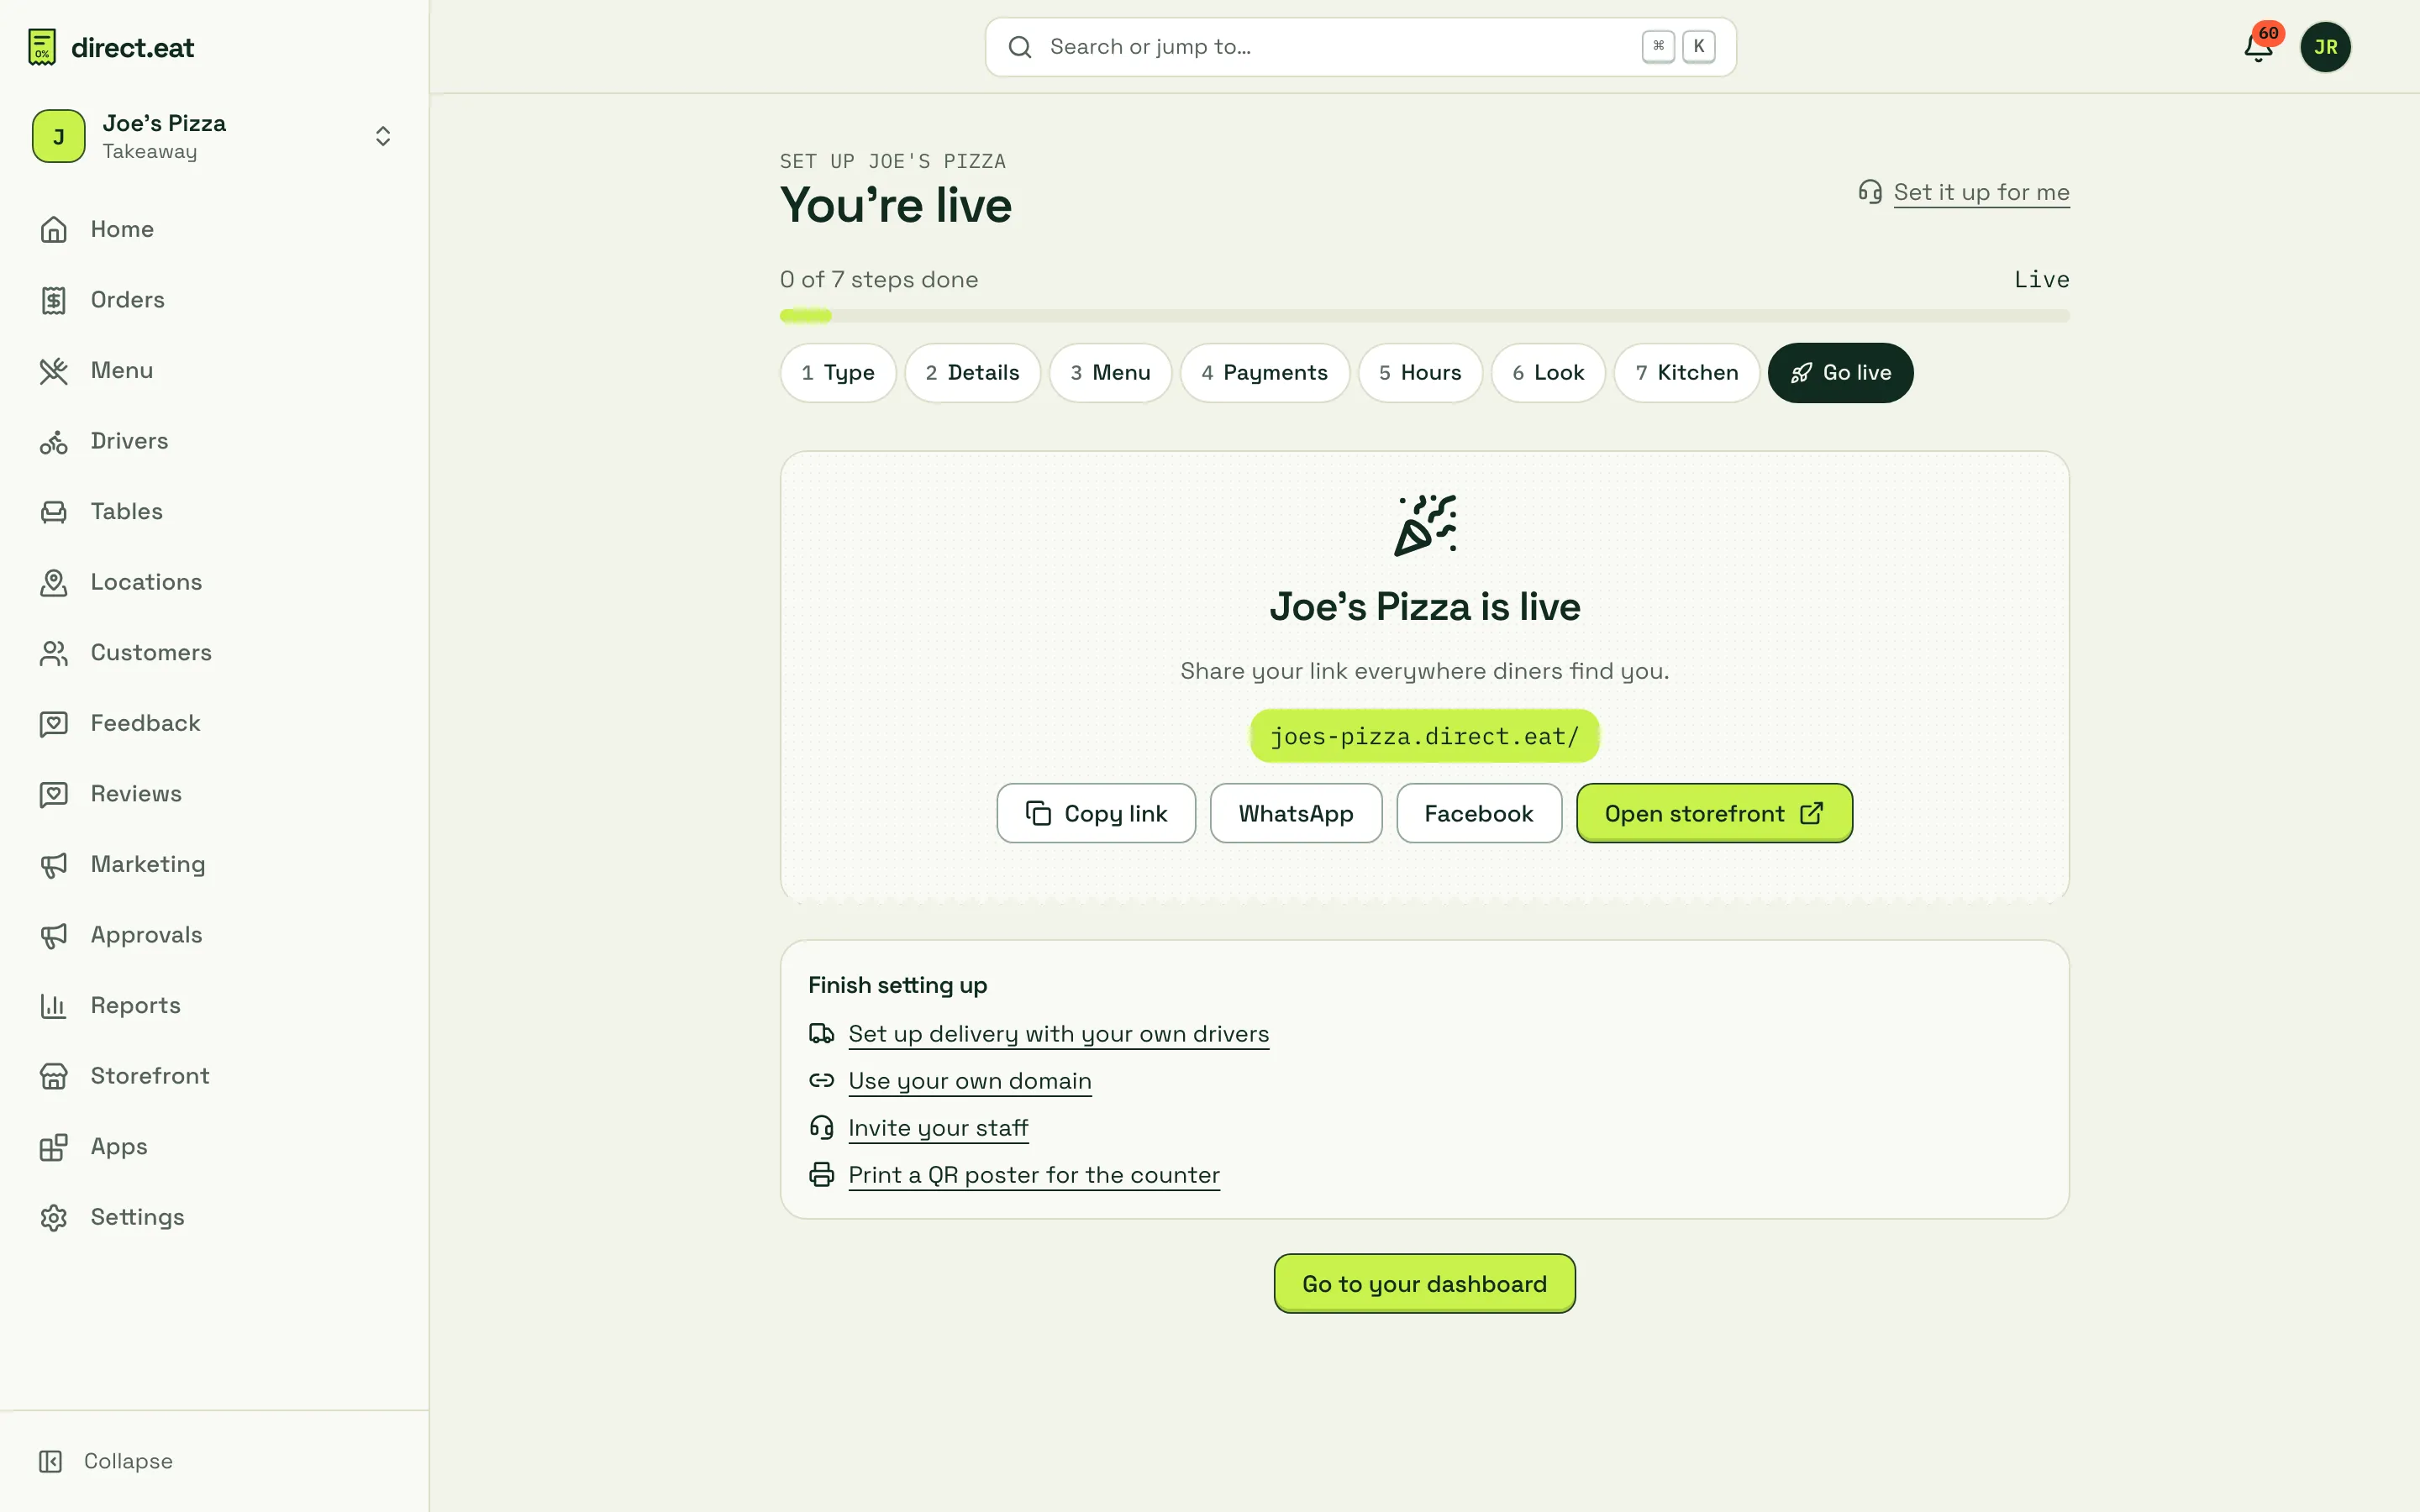
Your shop’s address is https://{your-slug}.direct.eat, for example https://joes-pizza.direct.eat. It works straight away, with a secure padlock, on any phone or computer. Use the buttons to Copy link or share it on WhatsApp or Facebook.
Want your own web address, such as order.yourshop.co.uk? See Connect your domain. You can do that any time; your direct.eat link keeps working.
3. Add “Order online” to Google
Section titled “3. Add “Order online” to Google”If your Google Business Profile has an Order online button, it often points at a marketplace. Point it at your own link instead.
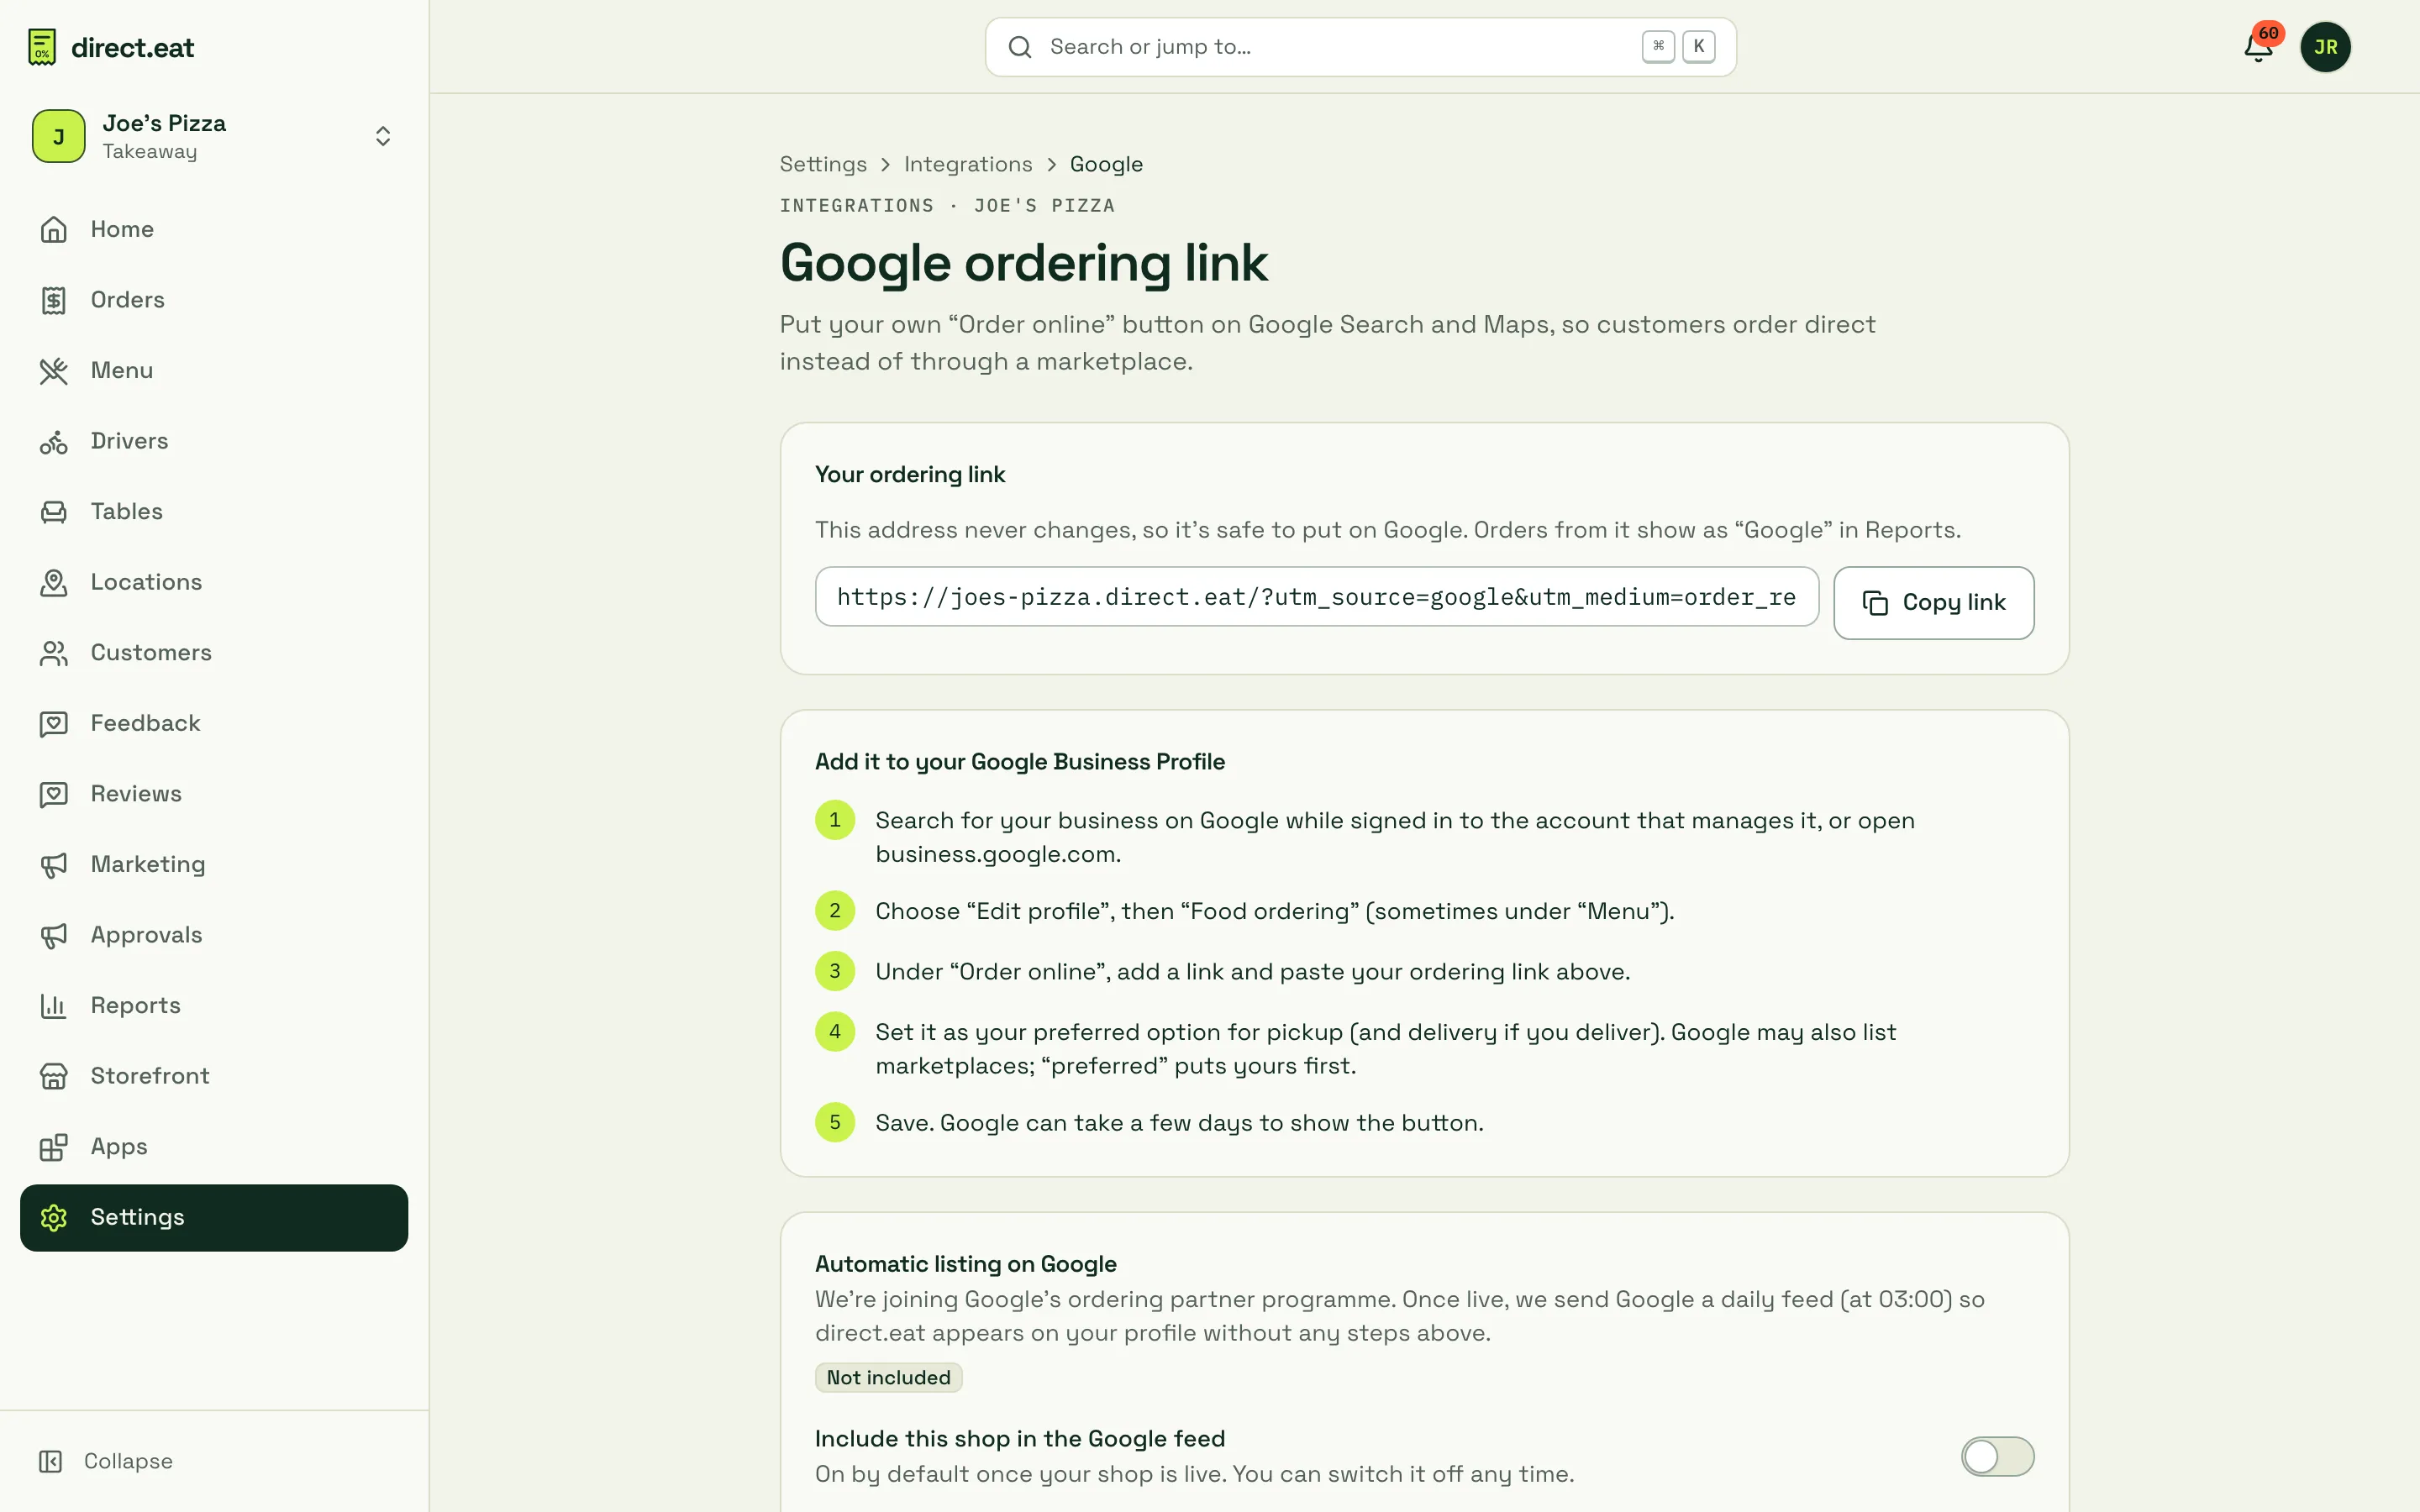
Go to Settings → Integrations and open Google ordering link.
-
Click Copy link. This link never changes, and orders from it show as “Google” in your reports.
-
On Google, search for your business while signed in to the account that manages it, or open business.google.com.
-
Choose Edit profile, then Food ordering (sometimes under Menu).
-
Under Order online, add a link and paste your ordering link.
-
Set it as your preferred option for pickup (and delivery if you deliver). Google may still list marketplaces; “preferred” puts yours first.
-
Save. Google can take a few days to show the button.
4. QR codes, posters and bag inserts Growth plan and above
Section titled “4. QR codes, posters and bag inserts ”Put a QR code wherever your customers already are: the counter, the window, every bag that leaves the shop.
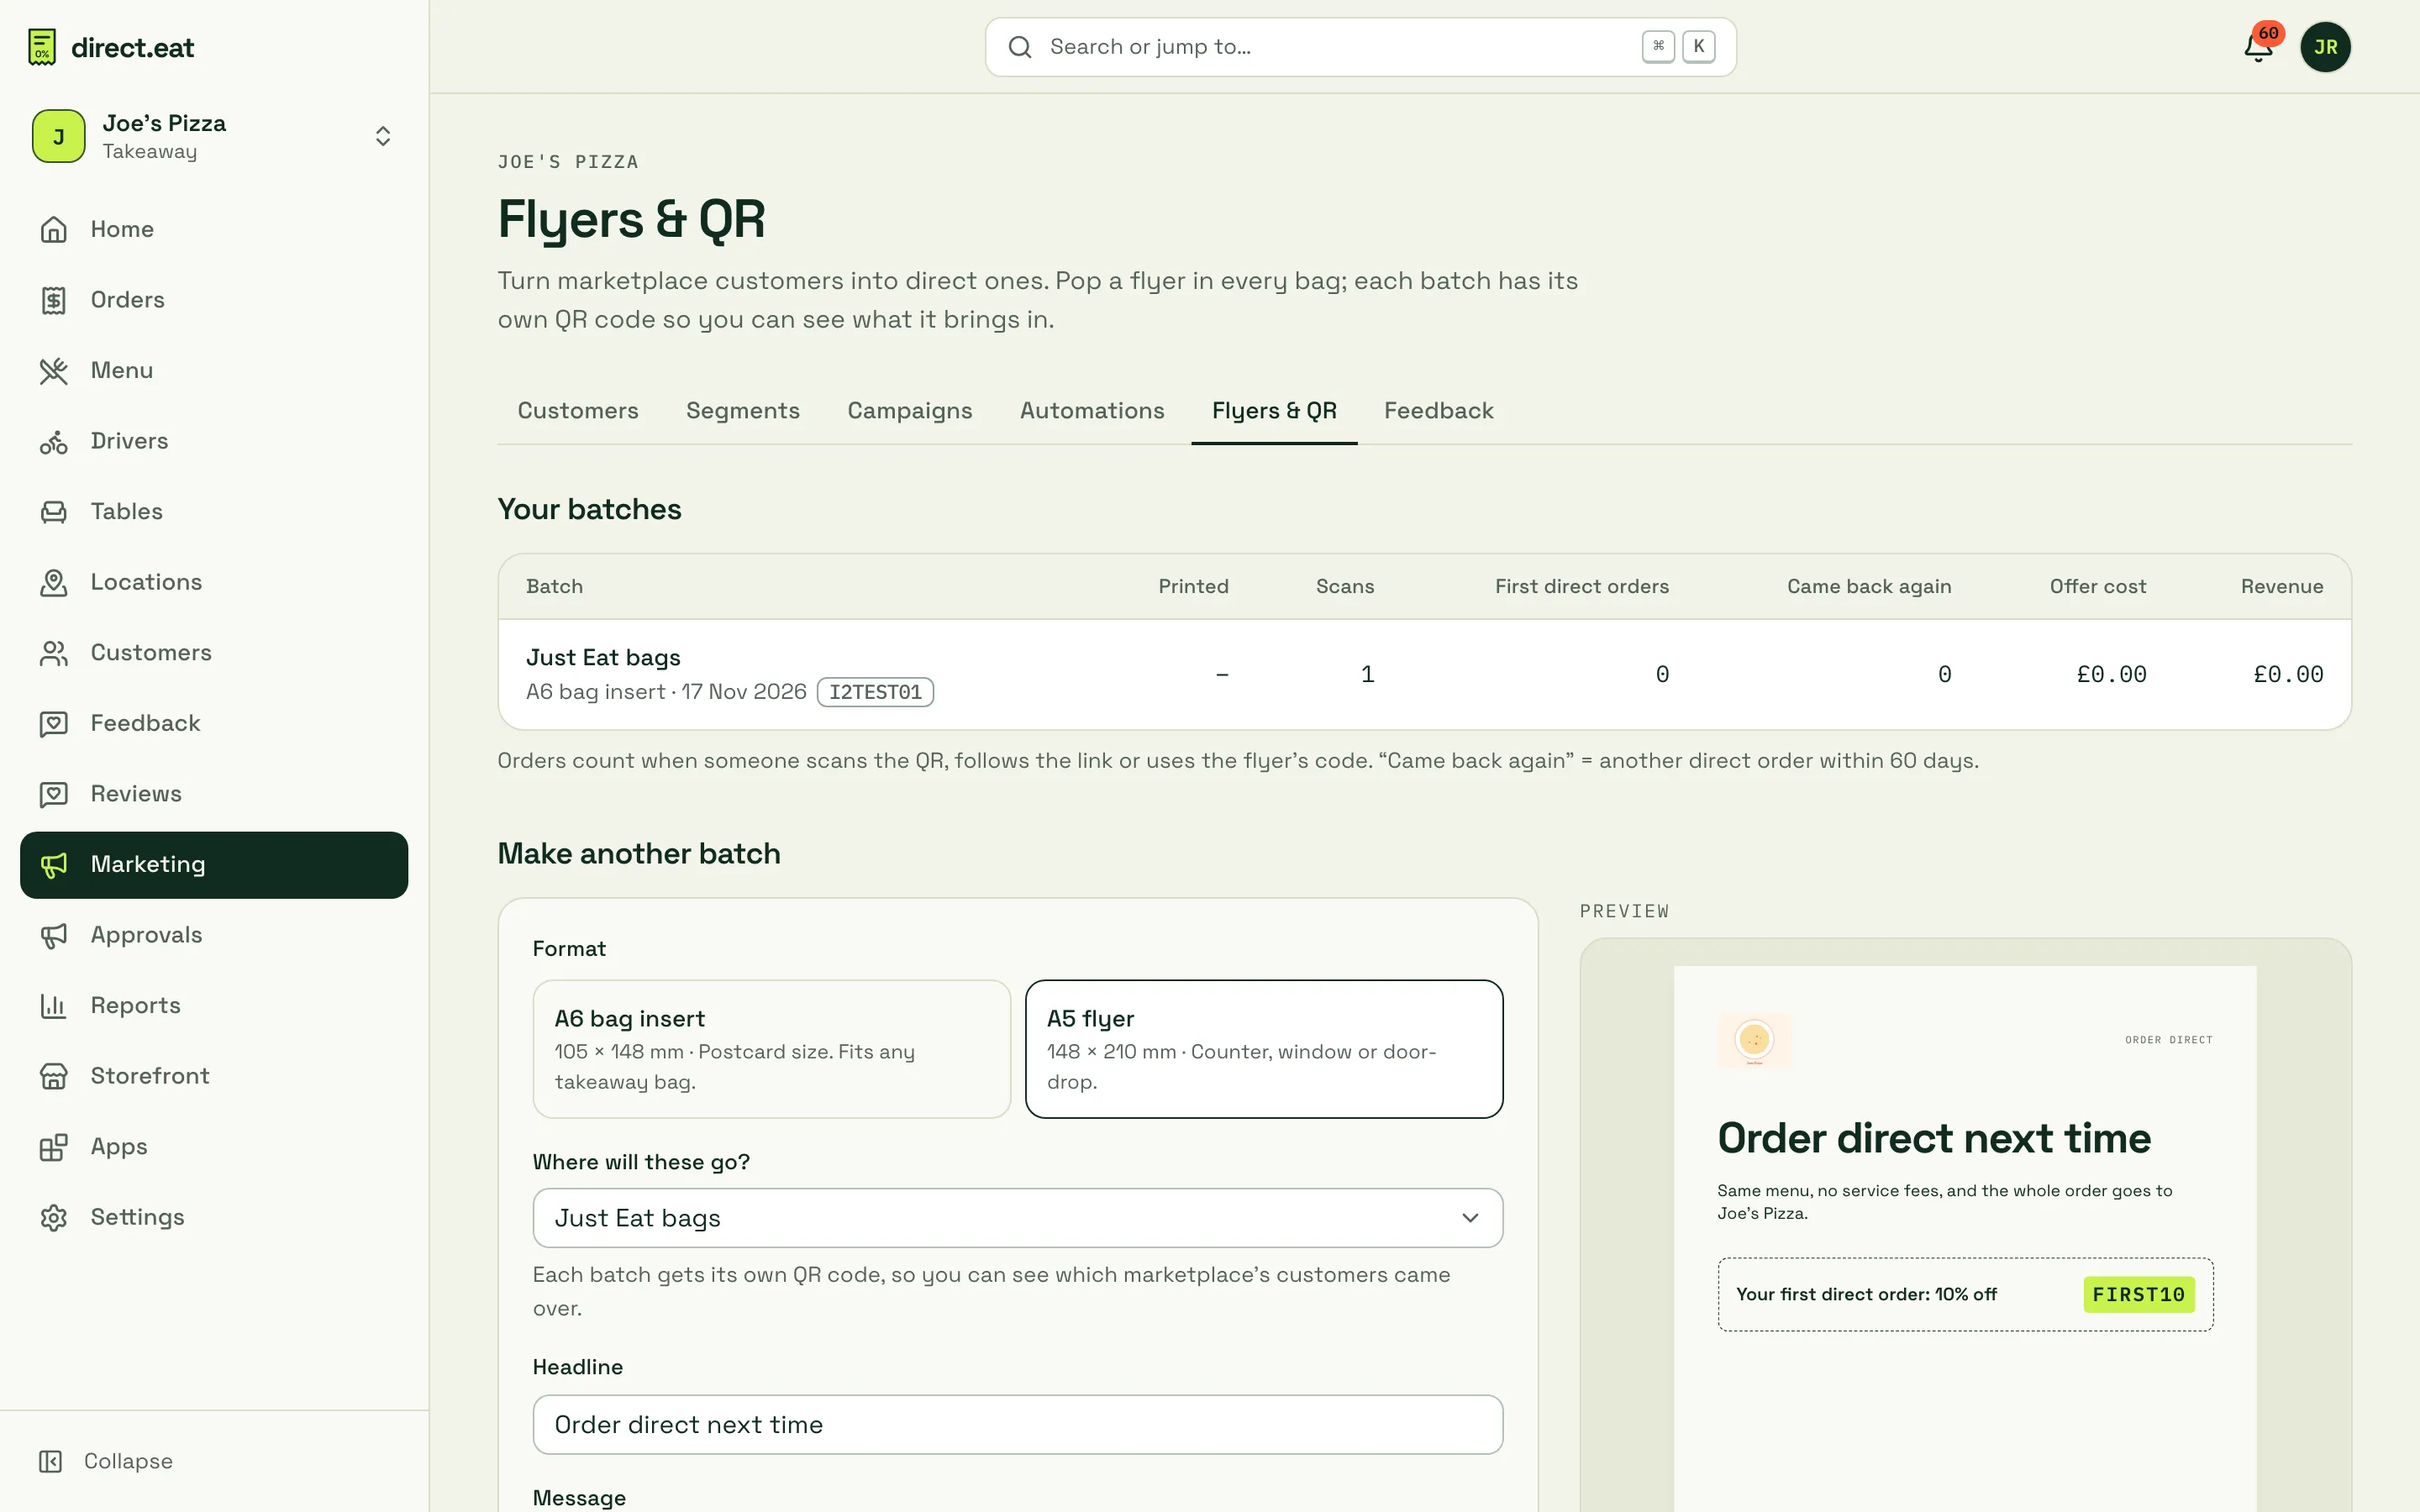
Go to Marketing → Flyers & QR.
-
Under Make another batch, pick a Format: A6 bag insert (postcard size, fits any bag) or A5 flyer (counter, window or door drop).
-
Choose Where will these go?: for example Just Eat bags, Deliveroo bags, Your own bags or Counter / window. Each batch gets its own QR code, so you can see which one brings orders in.
-
Write a short Headline and Message, and optionally add a First-order offer with a code.
-
Click Create print-ready flyer, then print it or save it as a PDF for your printer. The sheet is the exact size, with bleed and crop marks.
The batch table then shows scans, first direct orders and repeat orders for each batch.
Flyers and QR batches are part of the Growth plan and above (included in your trial). See Bag inserts and print for more.
5. Everywhere else
Section titled “5. Everywhere else”- Discover: once you’re live, turn on your free listing in Settings → Discover listing so you appear on discover.direct.eat, where diners search independent restaurants and order direct. See Your Discover listing.
- Instagram, Facebook and TikTok: put your link in your bio and pin a post saying you now take orders direct.
- WhatsApp: send the link to any customer groups you already have, and set it as your WhatsApp Business link.
- Your website: add a big Order online button that links to your storefront.
- Phone orders: when regulars ring, tell them they can order online next time and skip the queue.
- Your regulars in person: a word at the counter goes a long way. “Order direct next time: same menu, no service fee.”
Next step
Section titled “Next step”13. Your first Friday night: what to check before a busy service.
Related
Section titled “Related”Was this page helpful?