

Branding, logo and theme
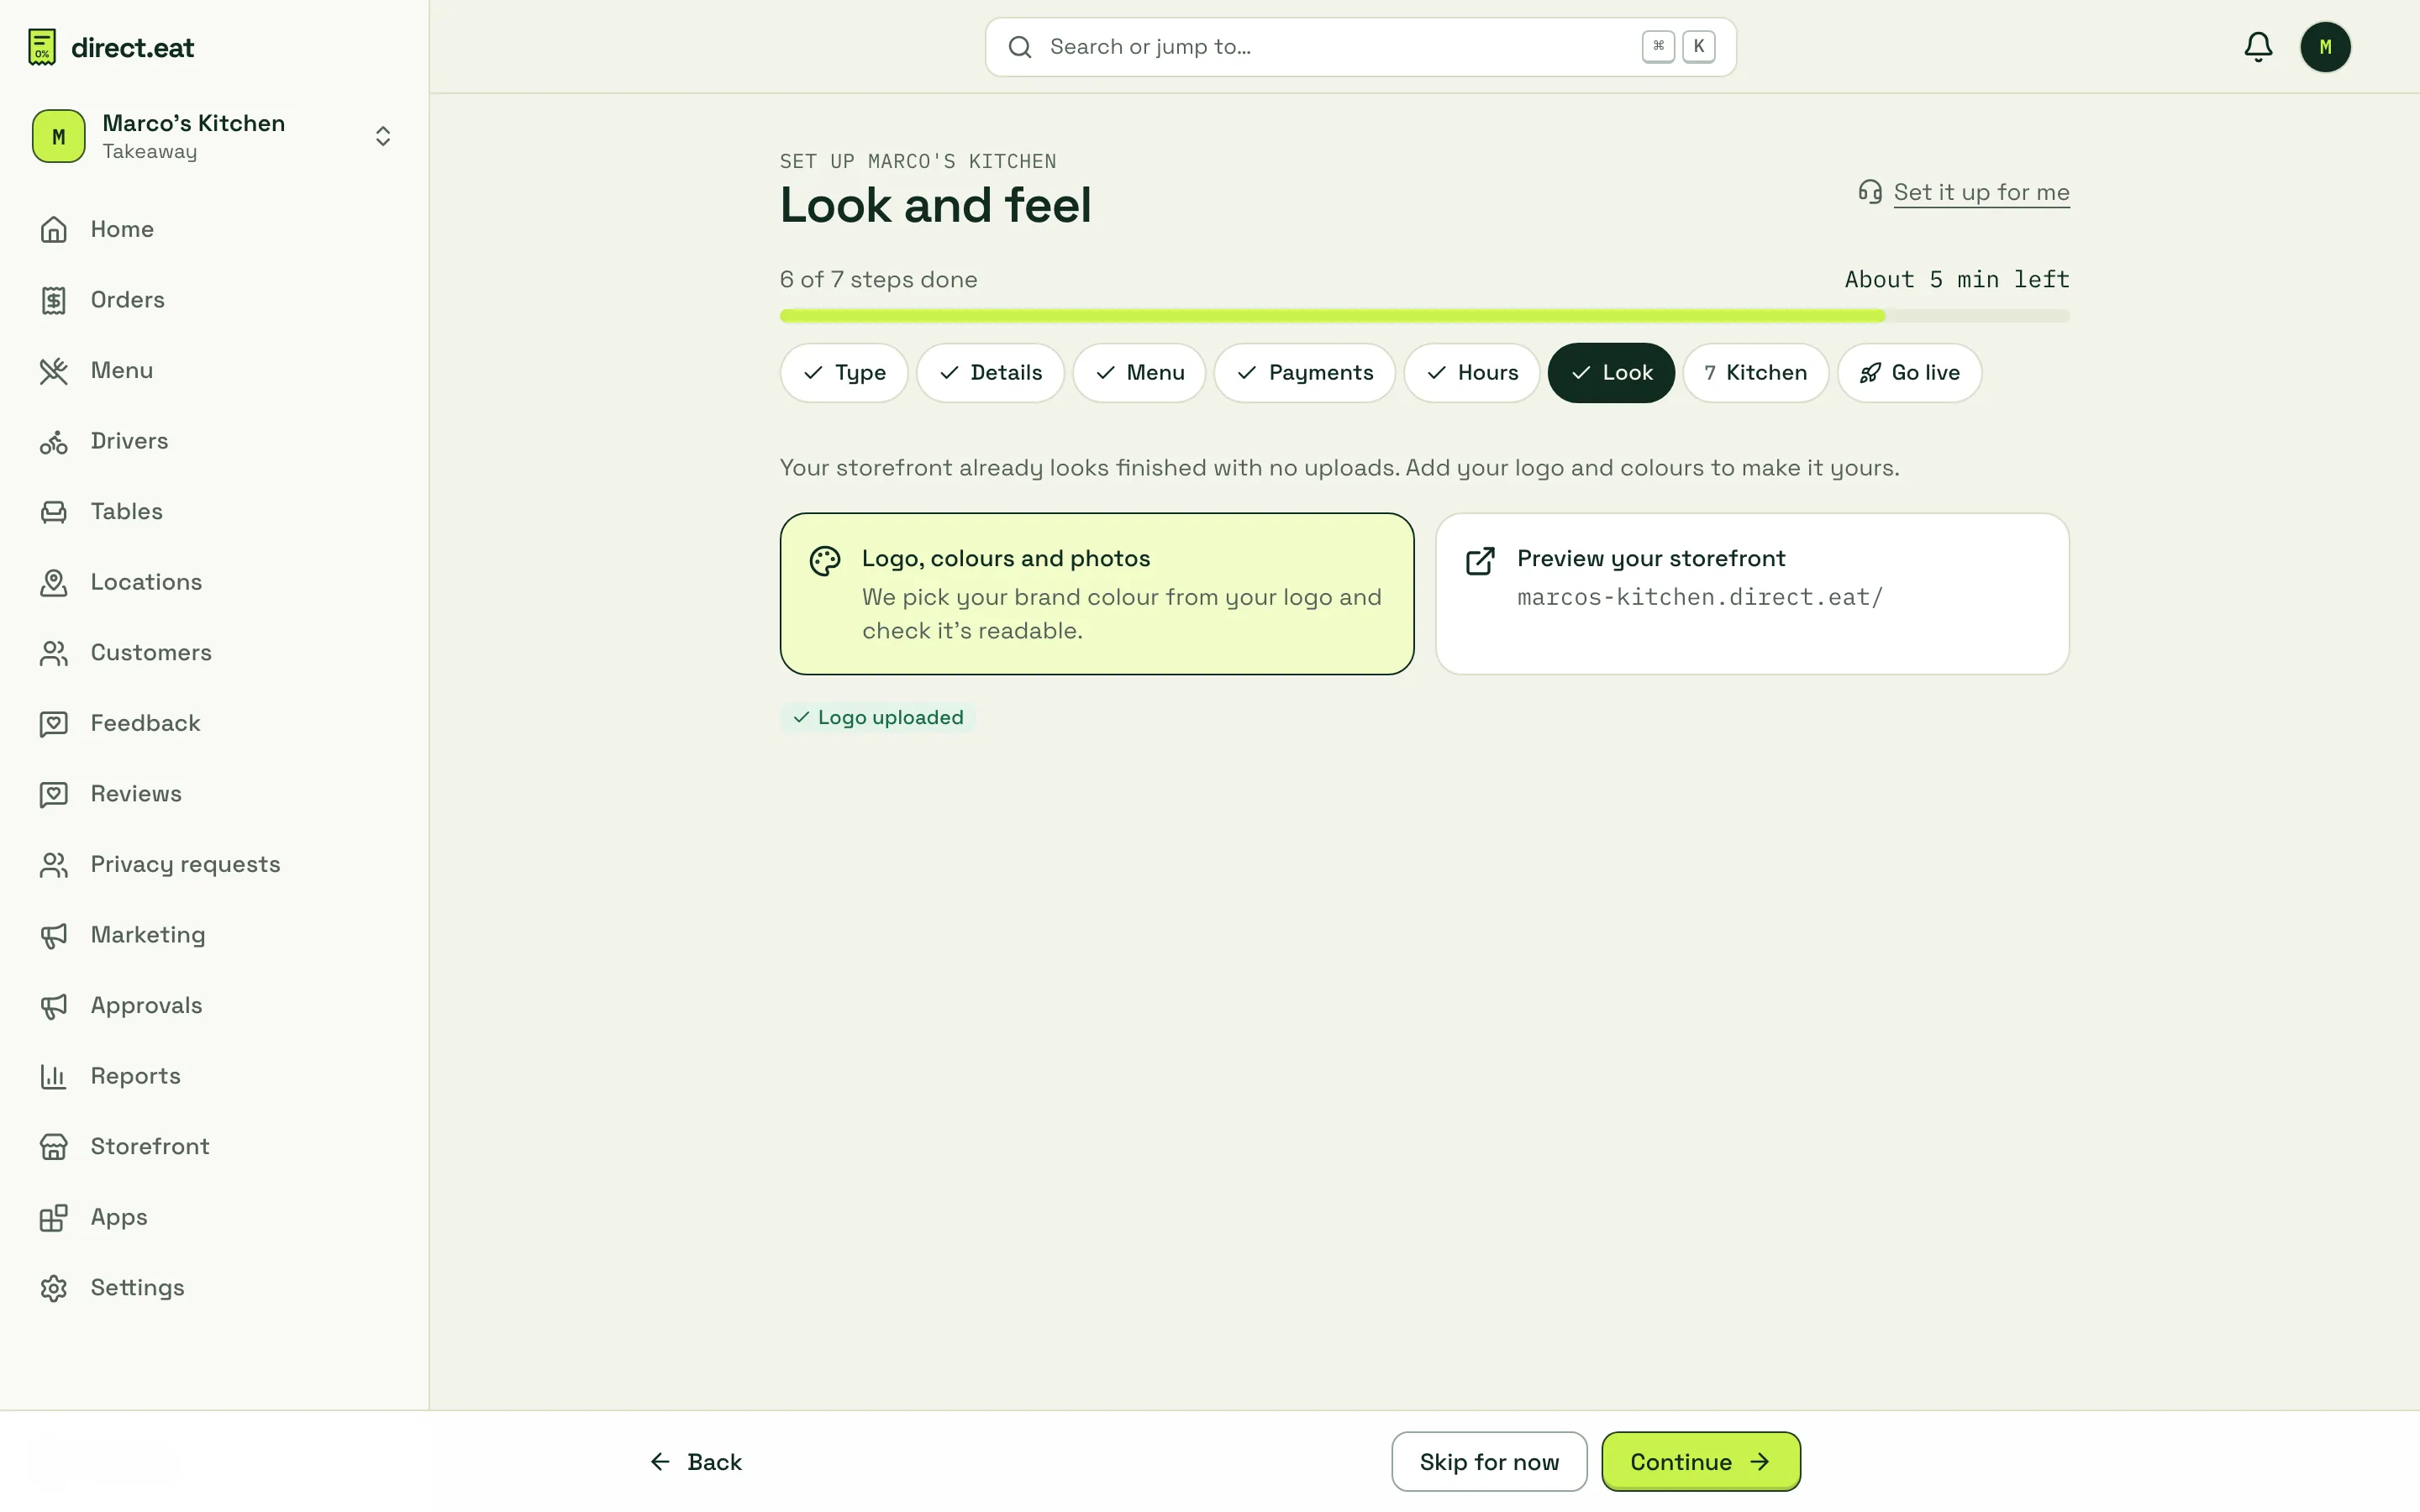
Your storefront is your own ordering site at your-shop.direct.eat. It already works with no uploads at all, using the theme suggested for your business type and your shop name. This step makes it look like your shop: a theme suited to your food, your logo, a photo and your colours.
Rough time: 5 to 10 minutes. Who can do this: the owner and admins (anyone with branding permission). Others can look at the design but not change it. You need: your logo (PNG, JPG or WebP; a transparent PNG looks best) and, ideally, a wide photo of your food or shop.
Where to start
Section titled “Where to start”In the setup wizard, the Look step has two shortcuts: Logo, colours and photos, which opens Settings → Storefront design, and Preview your storefront. Later, go to Storefront → Themes, or Storefront → Edit design to open the editor on your live theme.
Settings → Storefront design shows your Live theme with two buttons: Theme library and Customise.
Pick a theme from the library
Section titled “Pick a theme from the library”Open Storefront → Themes. Every theme in the library is rendered live with your own menu, photos and opening hours, so what you see is what your customers would see. Trying a theme never changes your live shop.
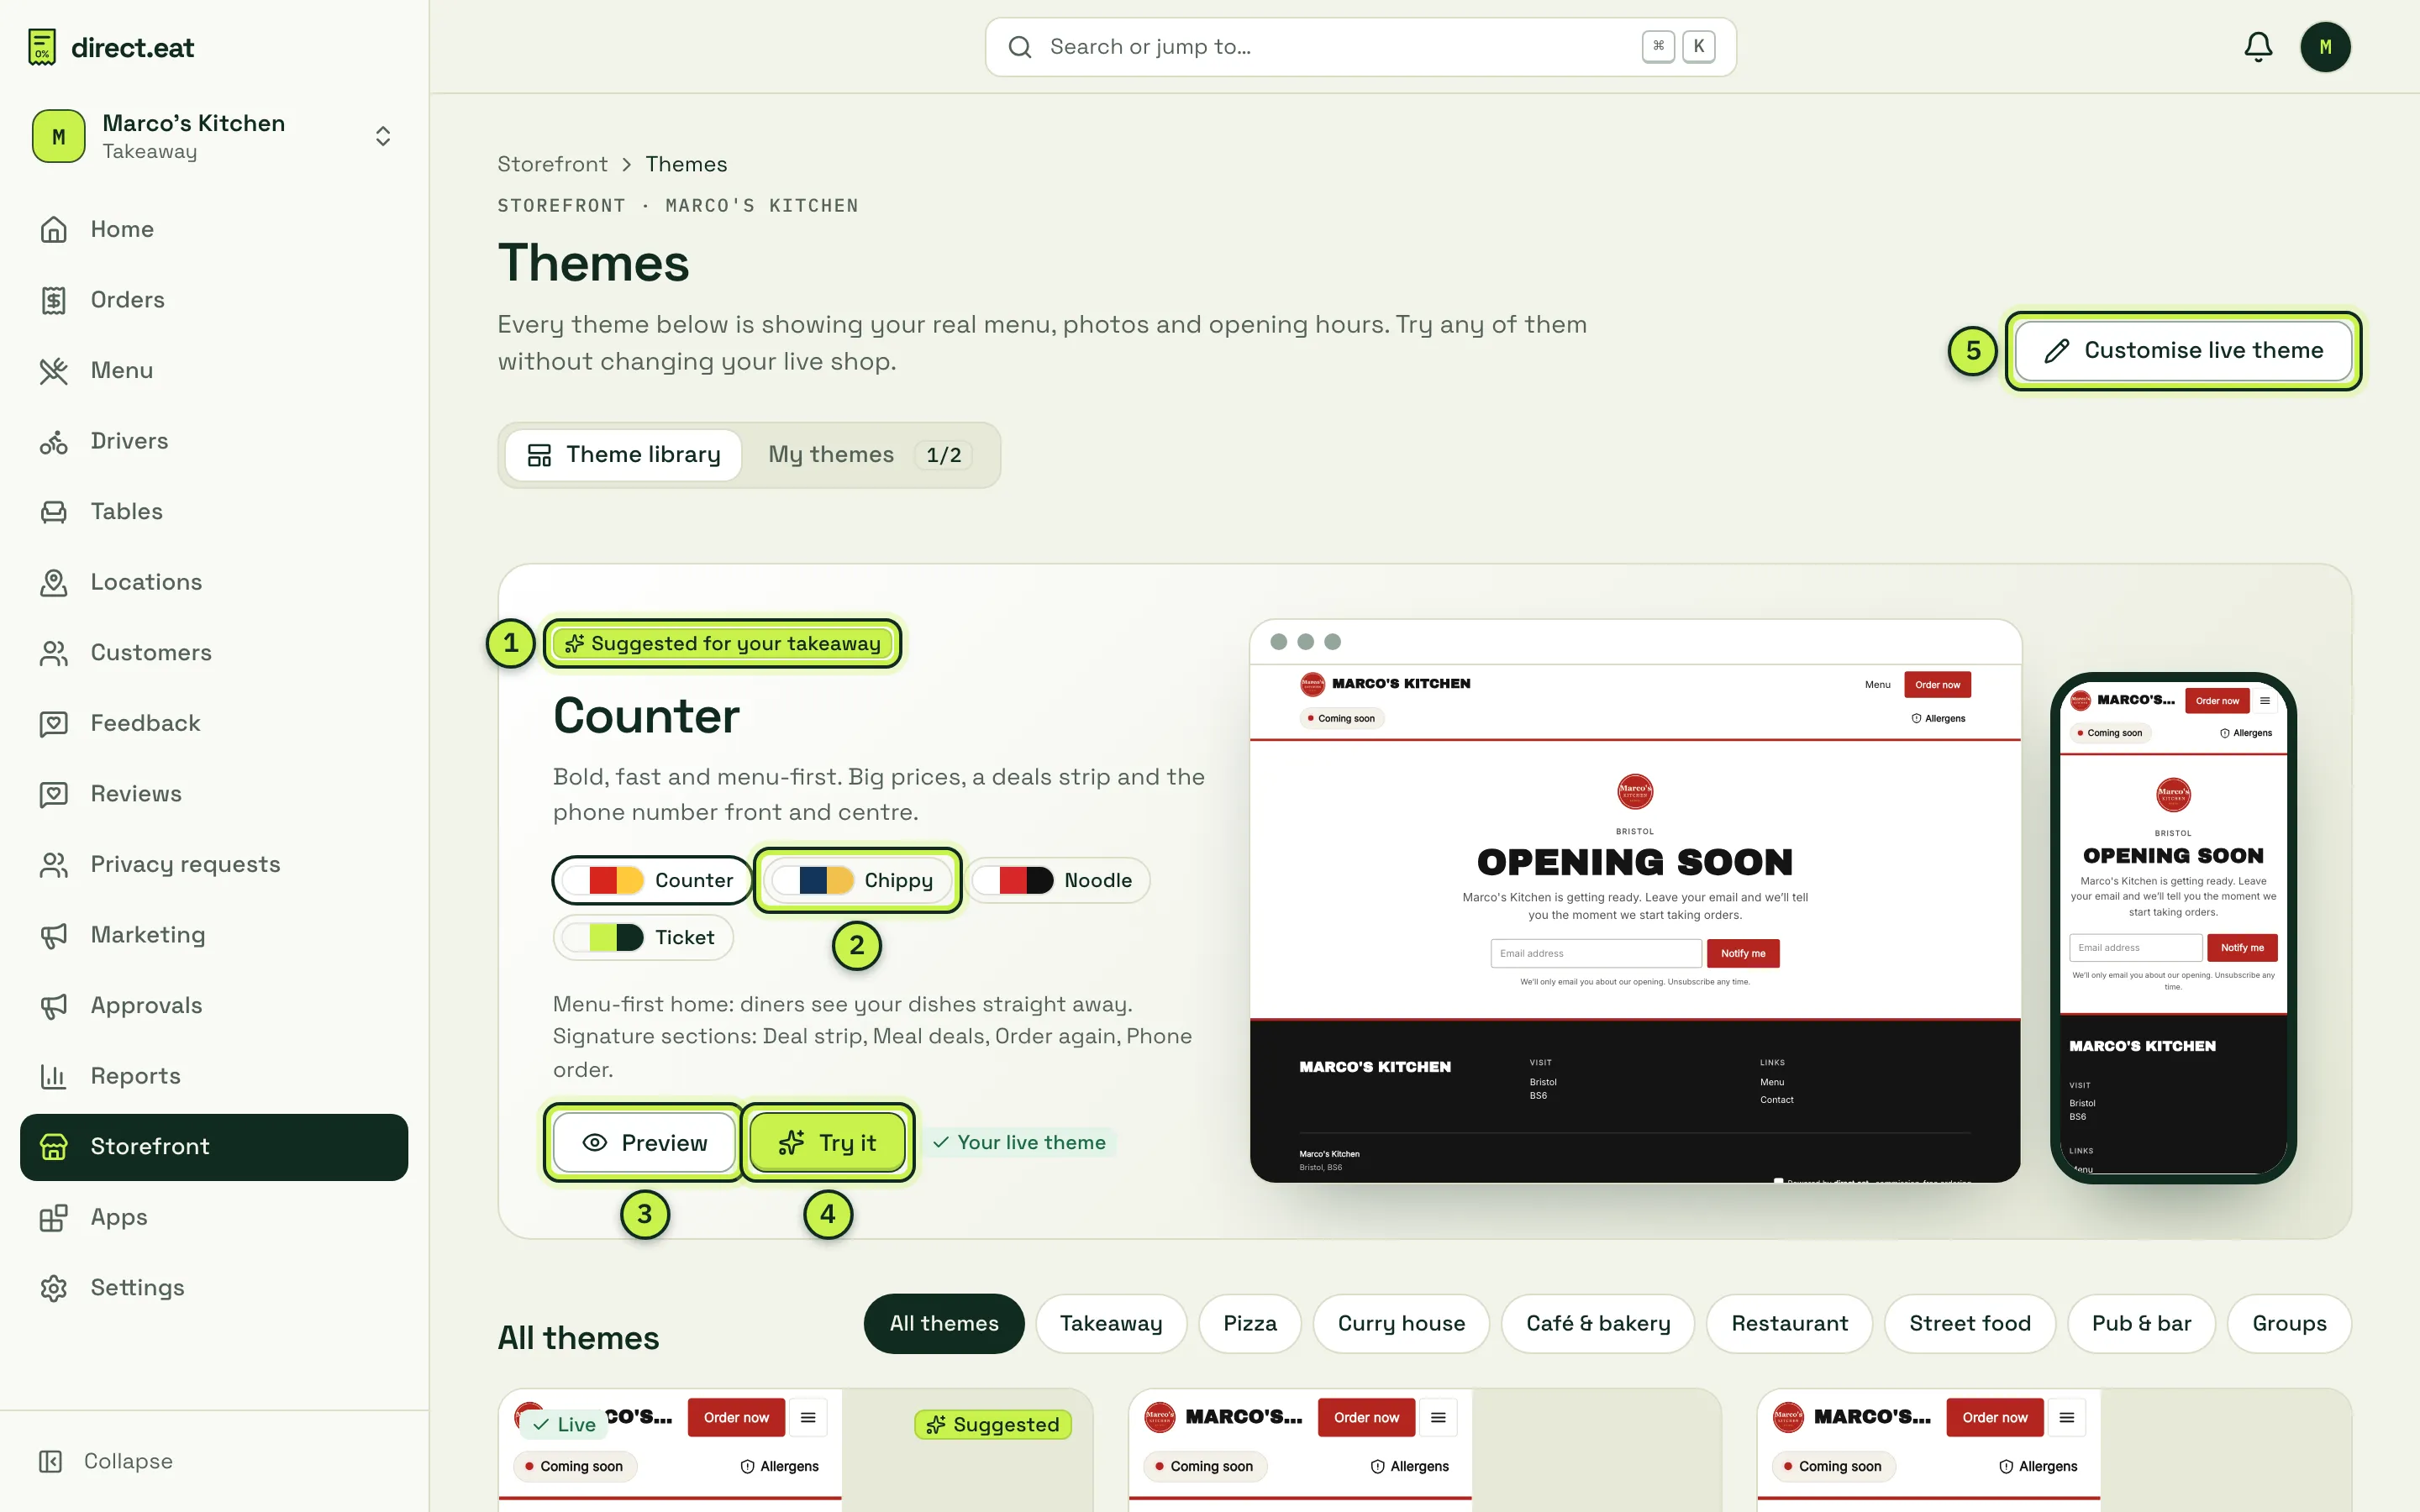
- Suggested for your takeaway: the theme that fits your business type, shown on a computer and a phone.
- Styles: each theme has 3 or 4 styles. A style swaps the whole colour and type palette; click one and the preview changes straight away.
- Preview: opens the theme full screen.
- Try it: adds a copy to My themes and opens it in the editor.
- Customise live theme: opens the editor on the theme your customers see now.
Below the suggestion, All themes shows all 8 themes (Counter, Slice, Spice, Bakehouse, Tasting, Street, Pub and Hub), with filters for Takeaway, Pizza, Curry house, Café & bakery, Restaurant, Street food, Pub & bar and Groups. Themes and the storefront editor describes each one.
Preview full screen
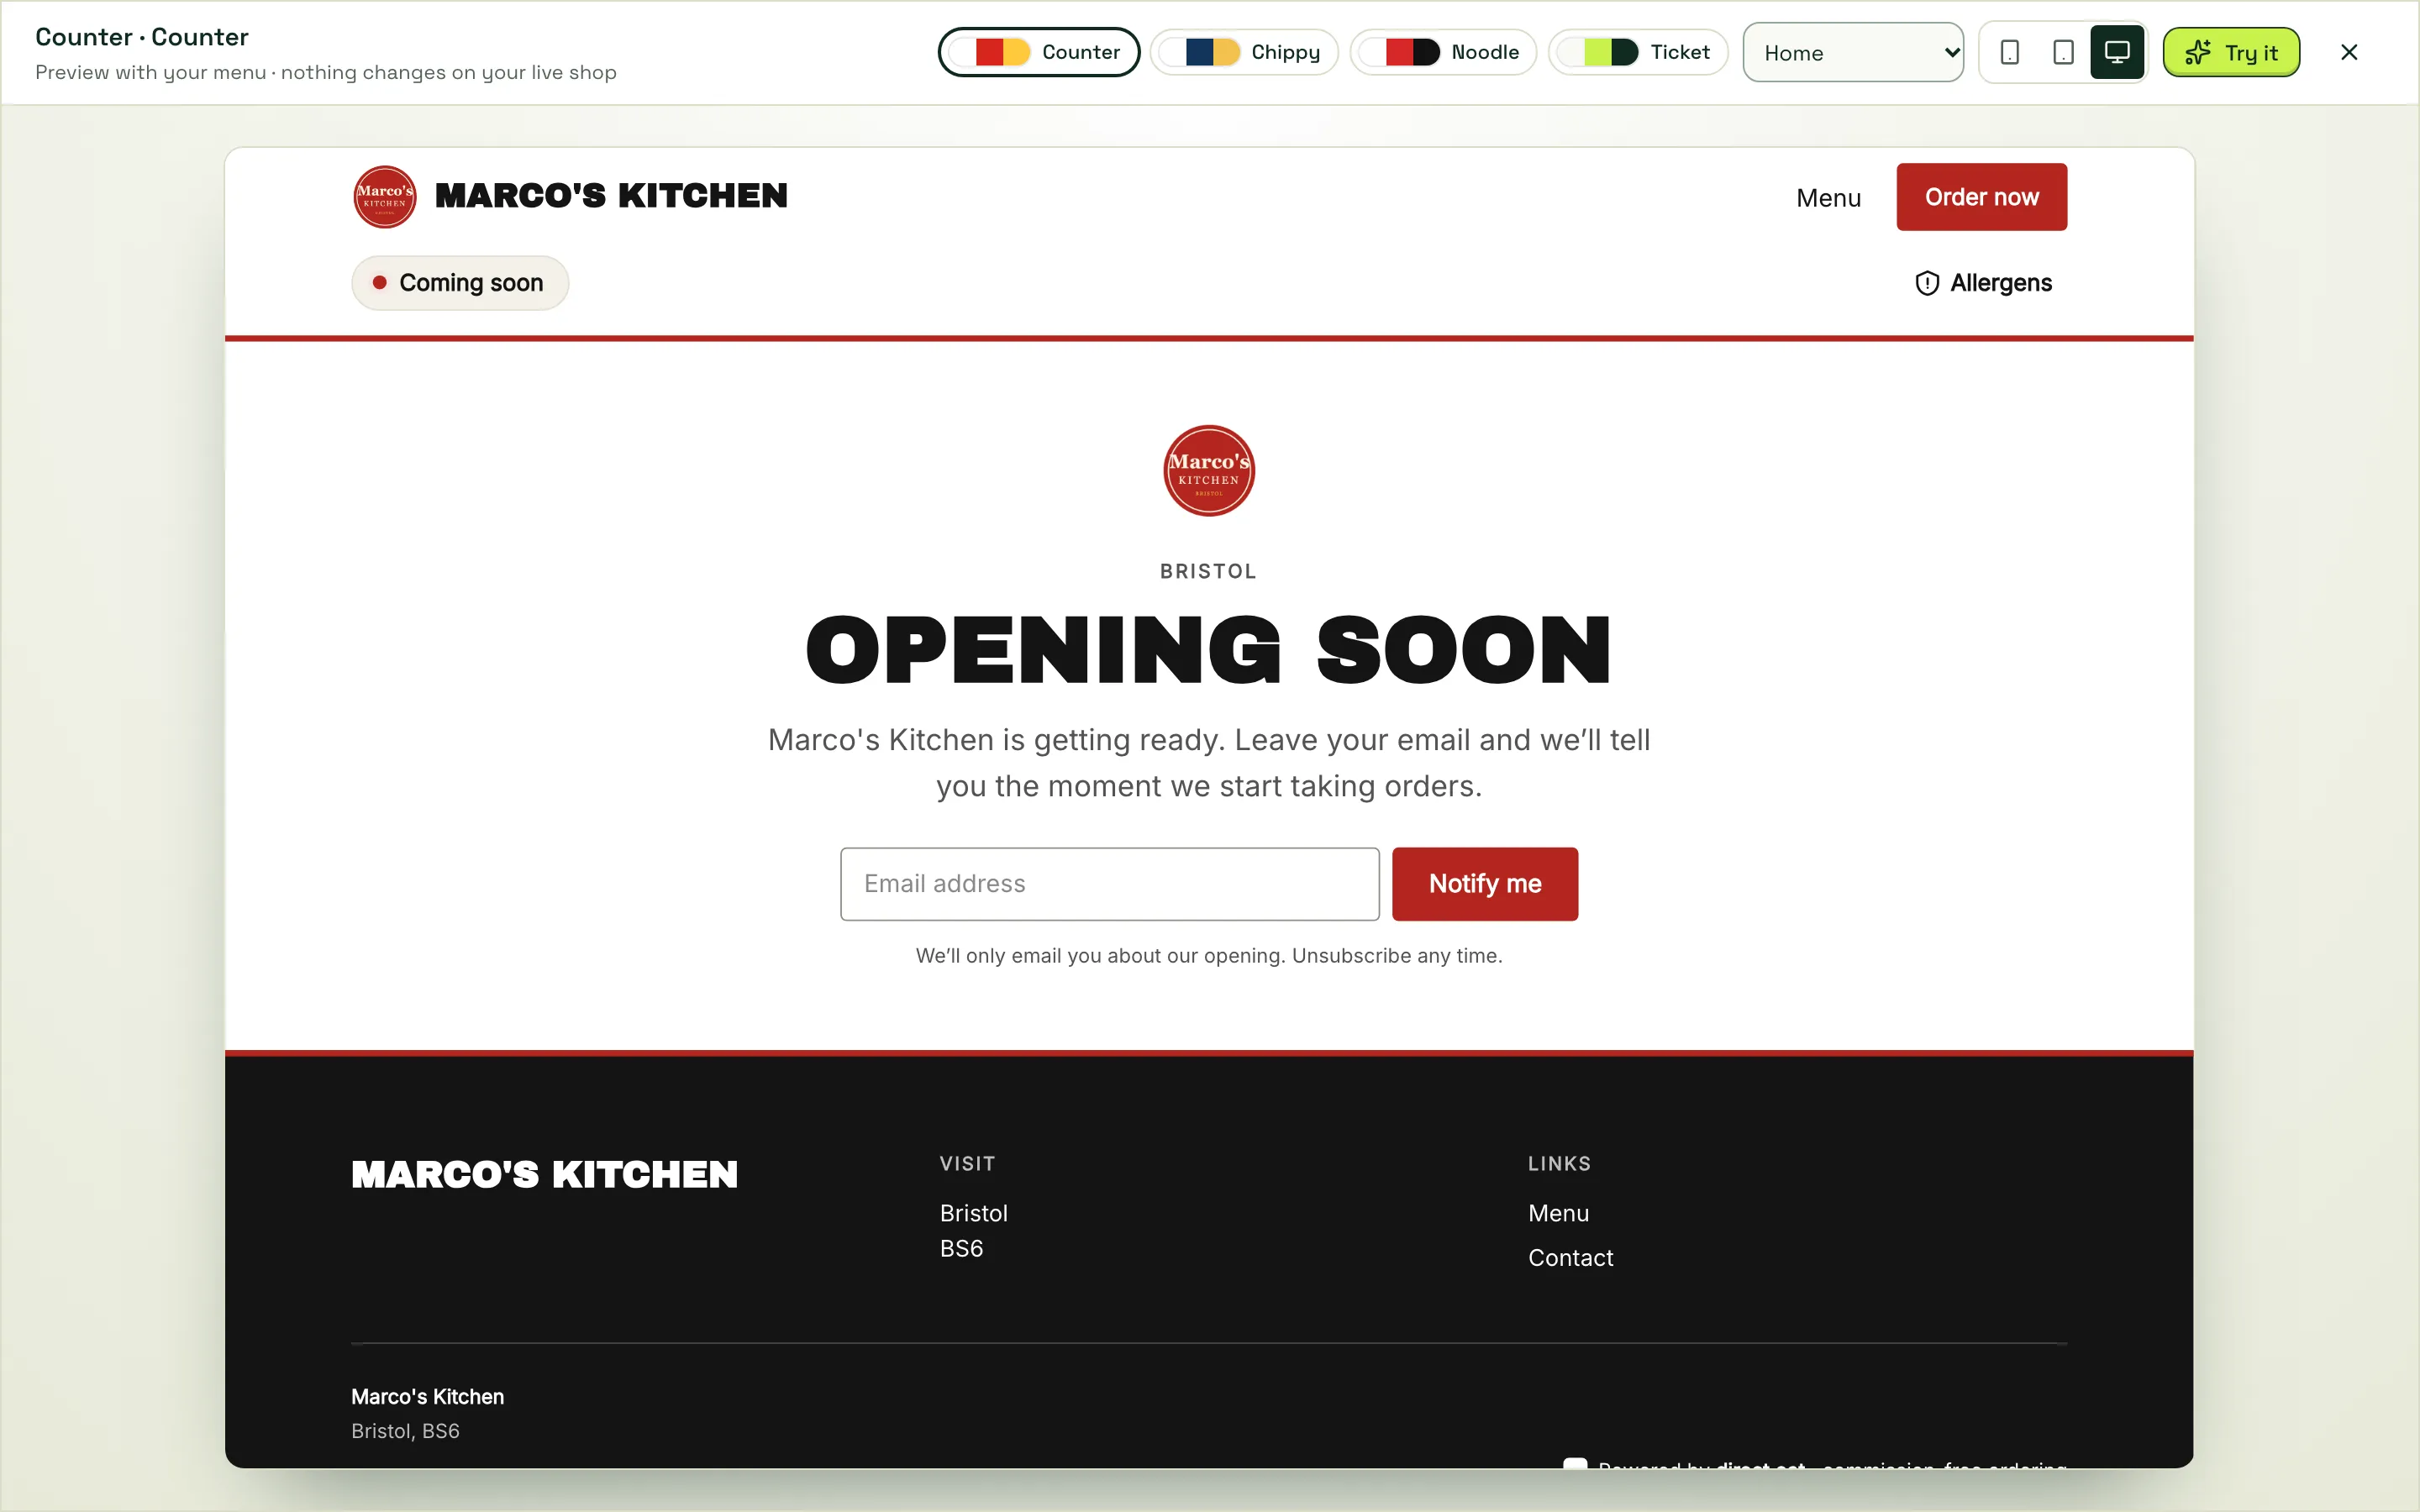
Section titled “Preview full screen”Preview shows the theme full screen. Along the top you can switch style, switch page (home, menu, a dish, contact and so on), and view it at Phone, Tablet or Desktop width. Try it is there too.
Try it
Section titled “Try it”Try it explains what happens before anything changes: we add an unpublished copy to My themes and open it in the editor, and your live shop stays as it is until you publish.
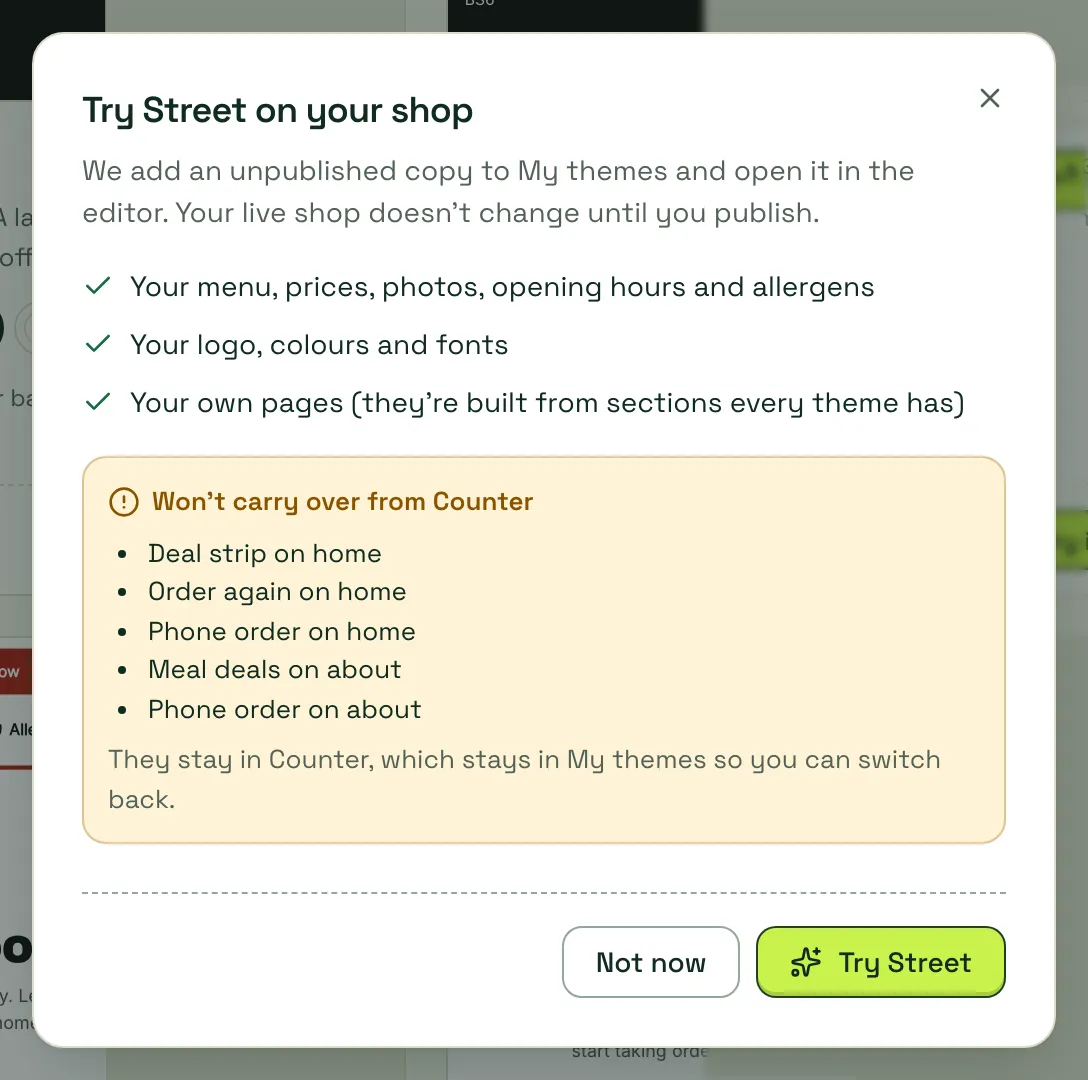
The dialog lists what carries over (your menu, prices, photos, hours, allergens, logo, colours, fonts and your own pages) and anything that won’t carry over, such as sections the new theme doesn’t have. Those stay in the old theme, which stays in My themes, so you can switch back. You can keep 2 themes on Starter, 5 on Growth and 20 on Pro.
Customise it in the editor
Section titled “Customise it in the editor”The editor shows your real storefront in the middle. Click anything on it to change it.
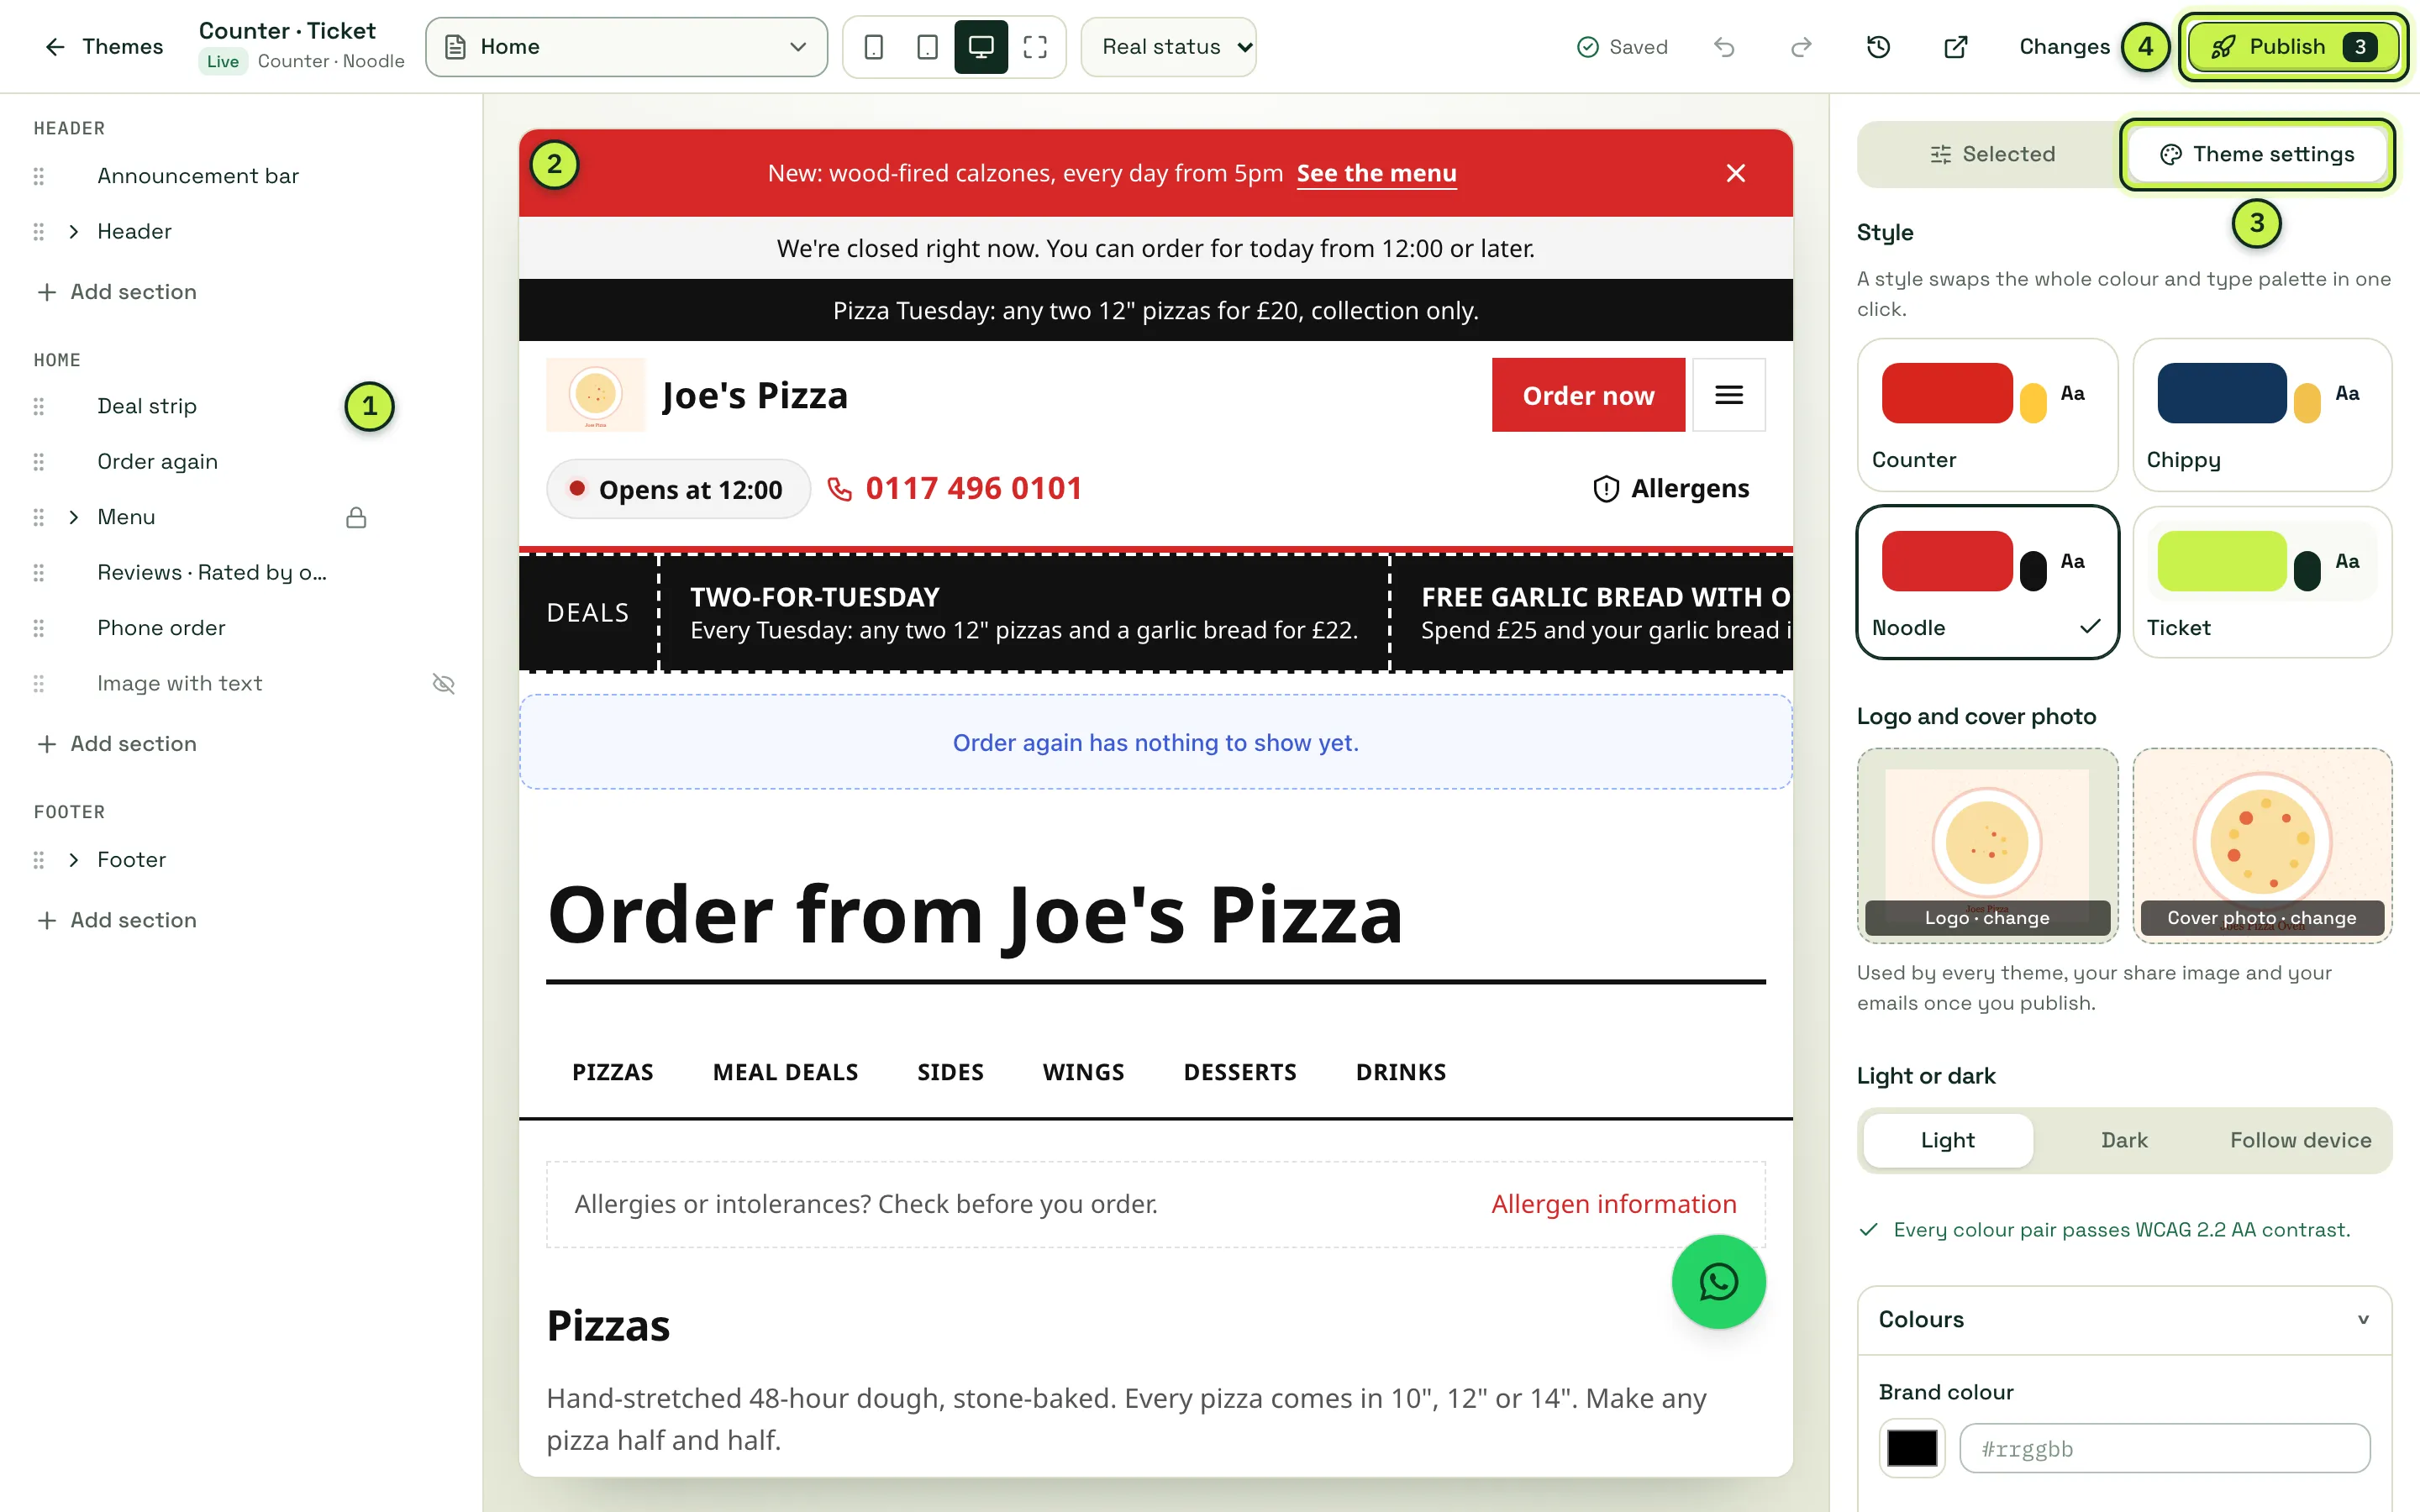
- Page outline: every section on this page, grouped Header, the page itself and Footer. Drag a section by its handle to move it, or use Alt + ↑/↓.
- Your storefront: click a section, heading or photo to select it.
- Selected and Theme settings: settings for what you clicked, or for the whole theme.
- Changes and Publish: what isn’t live yet, and the button to put it live.
Everything saves as a draft as you go (“Saved”). Undo is Ctrl+Z.
Edit text and photos in place
Section titled “Edit text and photos in place”Double-click any text on the storefront to type straight onto it. Headings and short text are plain; longer text can have bold, italic and links. A counter shows how much room is left.
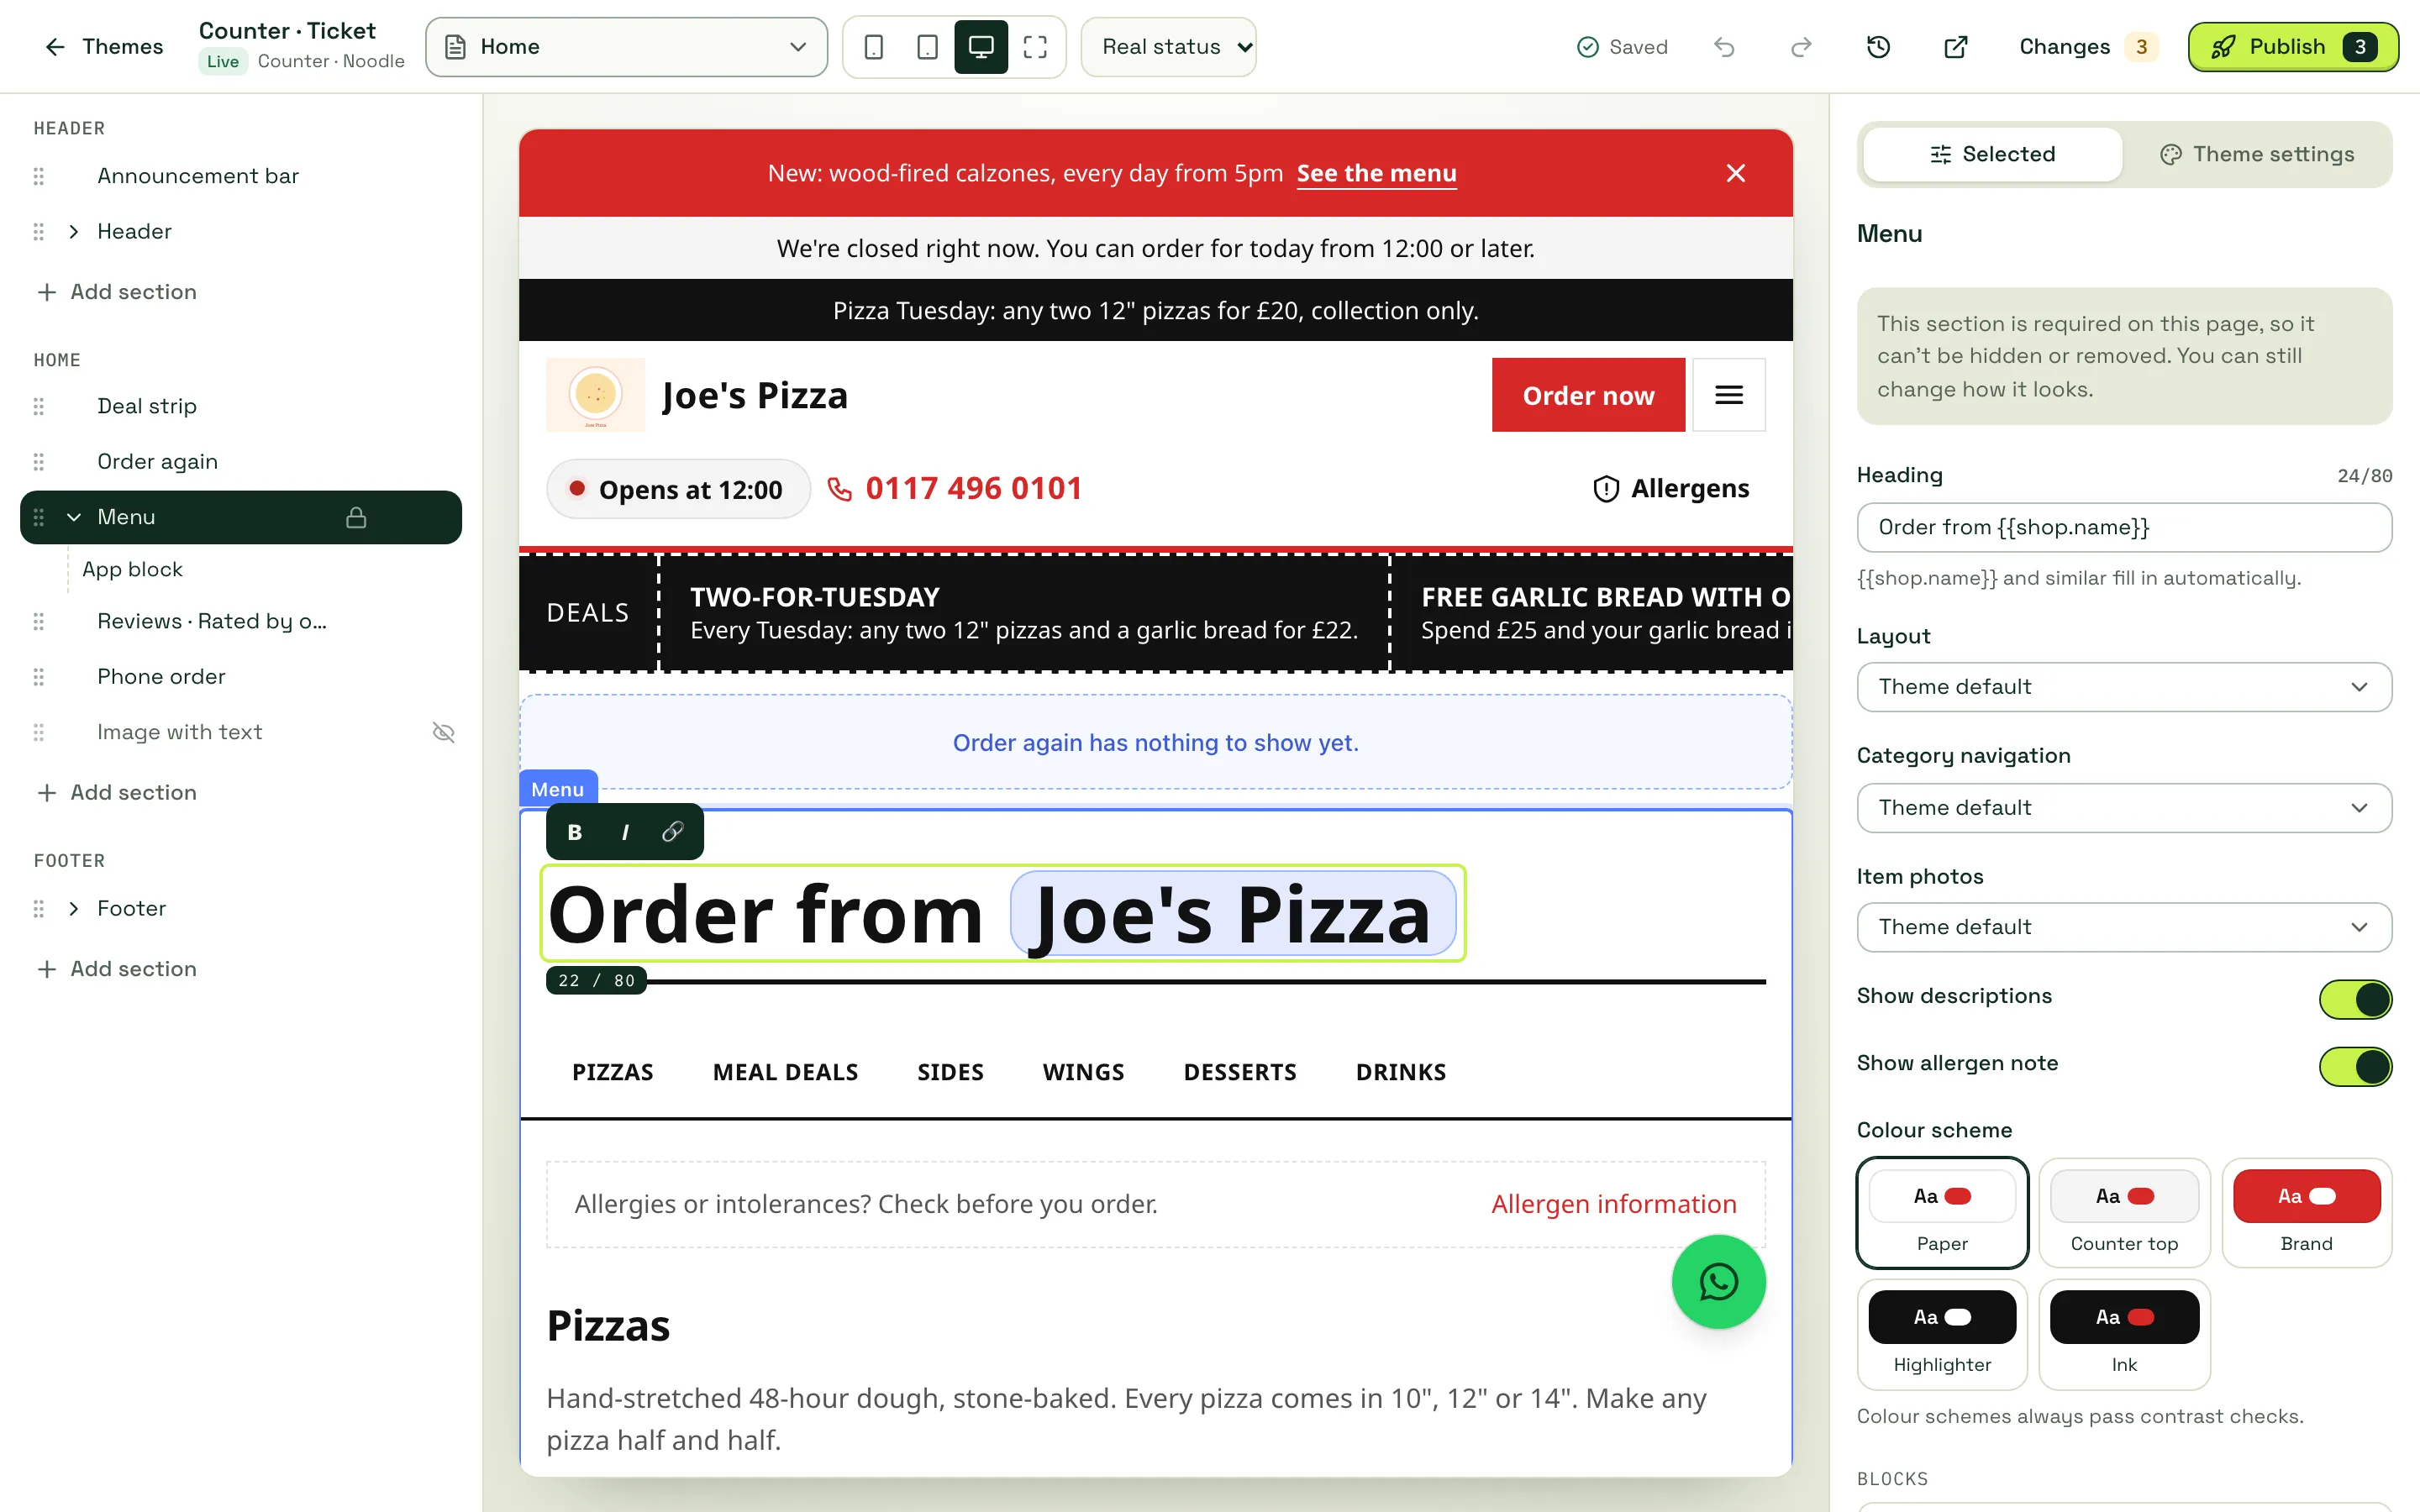
When you select a section, a toolbar appears on it: a grip to drag it to a new place, move up or down, edit text, replace an image, duplicate, hide, delete, add a section below, and settings. Add section opens a library of sections that fill themselves from your shop (menu, photos, hours and reviews). Required sections, such as the menu and allergen information, show a lock: you can change how they look but not remove them.
Style, logo, cover photo and colours
Section titled “Style, logo, cover photo and colours”Open Theme settings on the right.
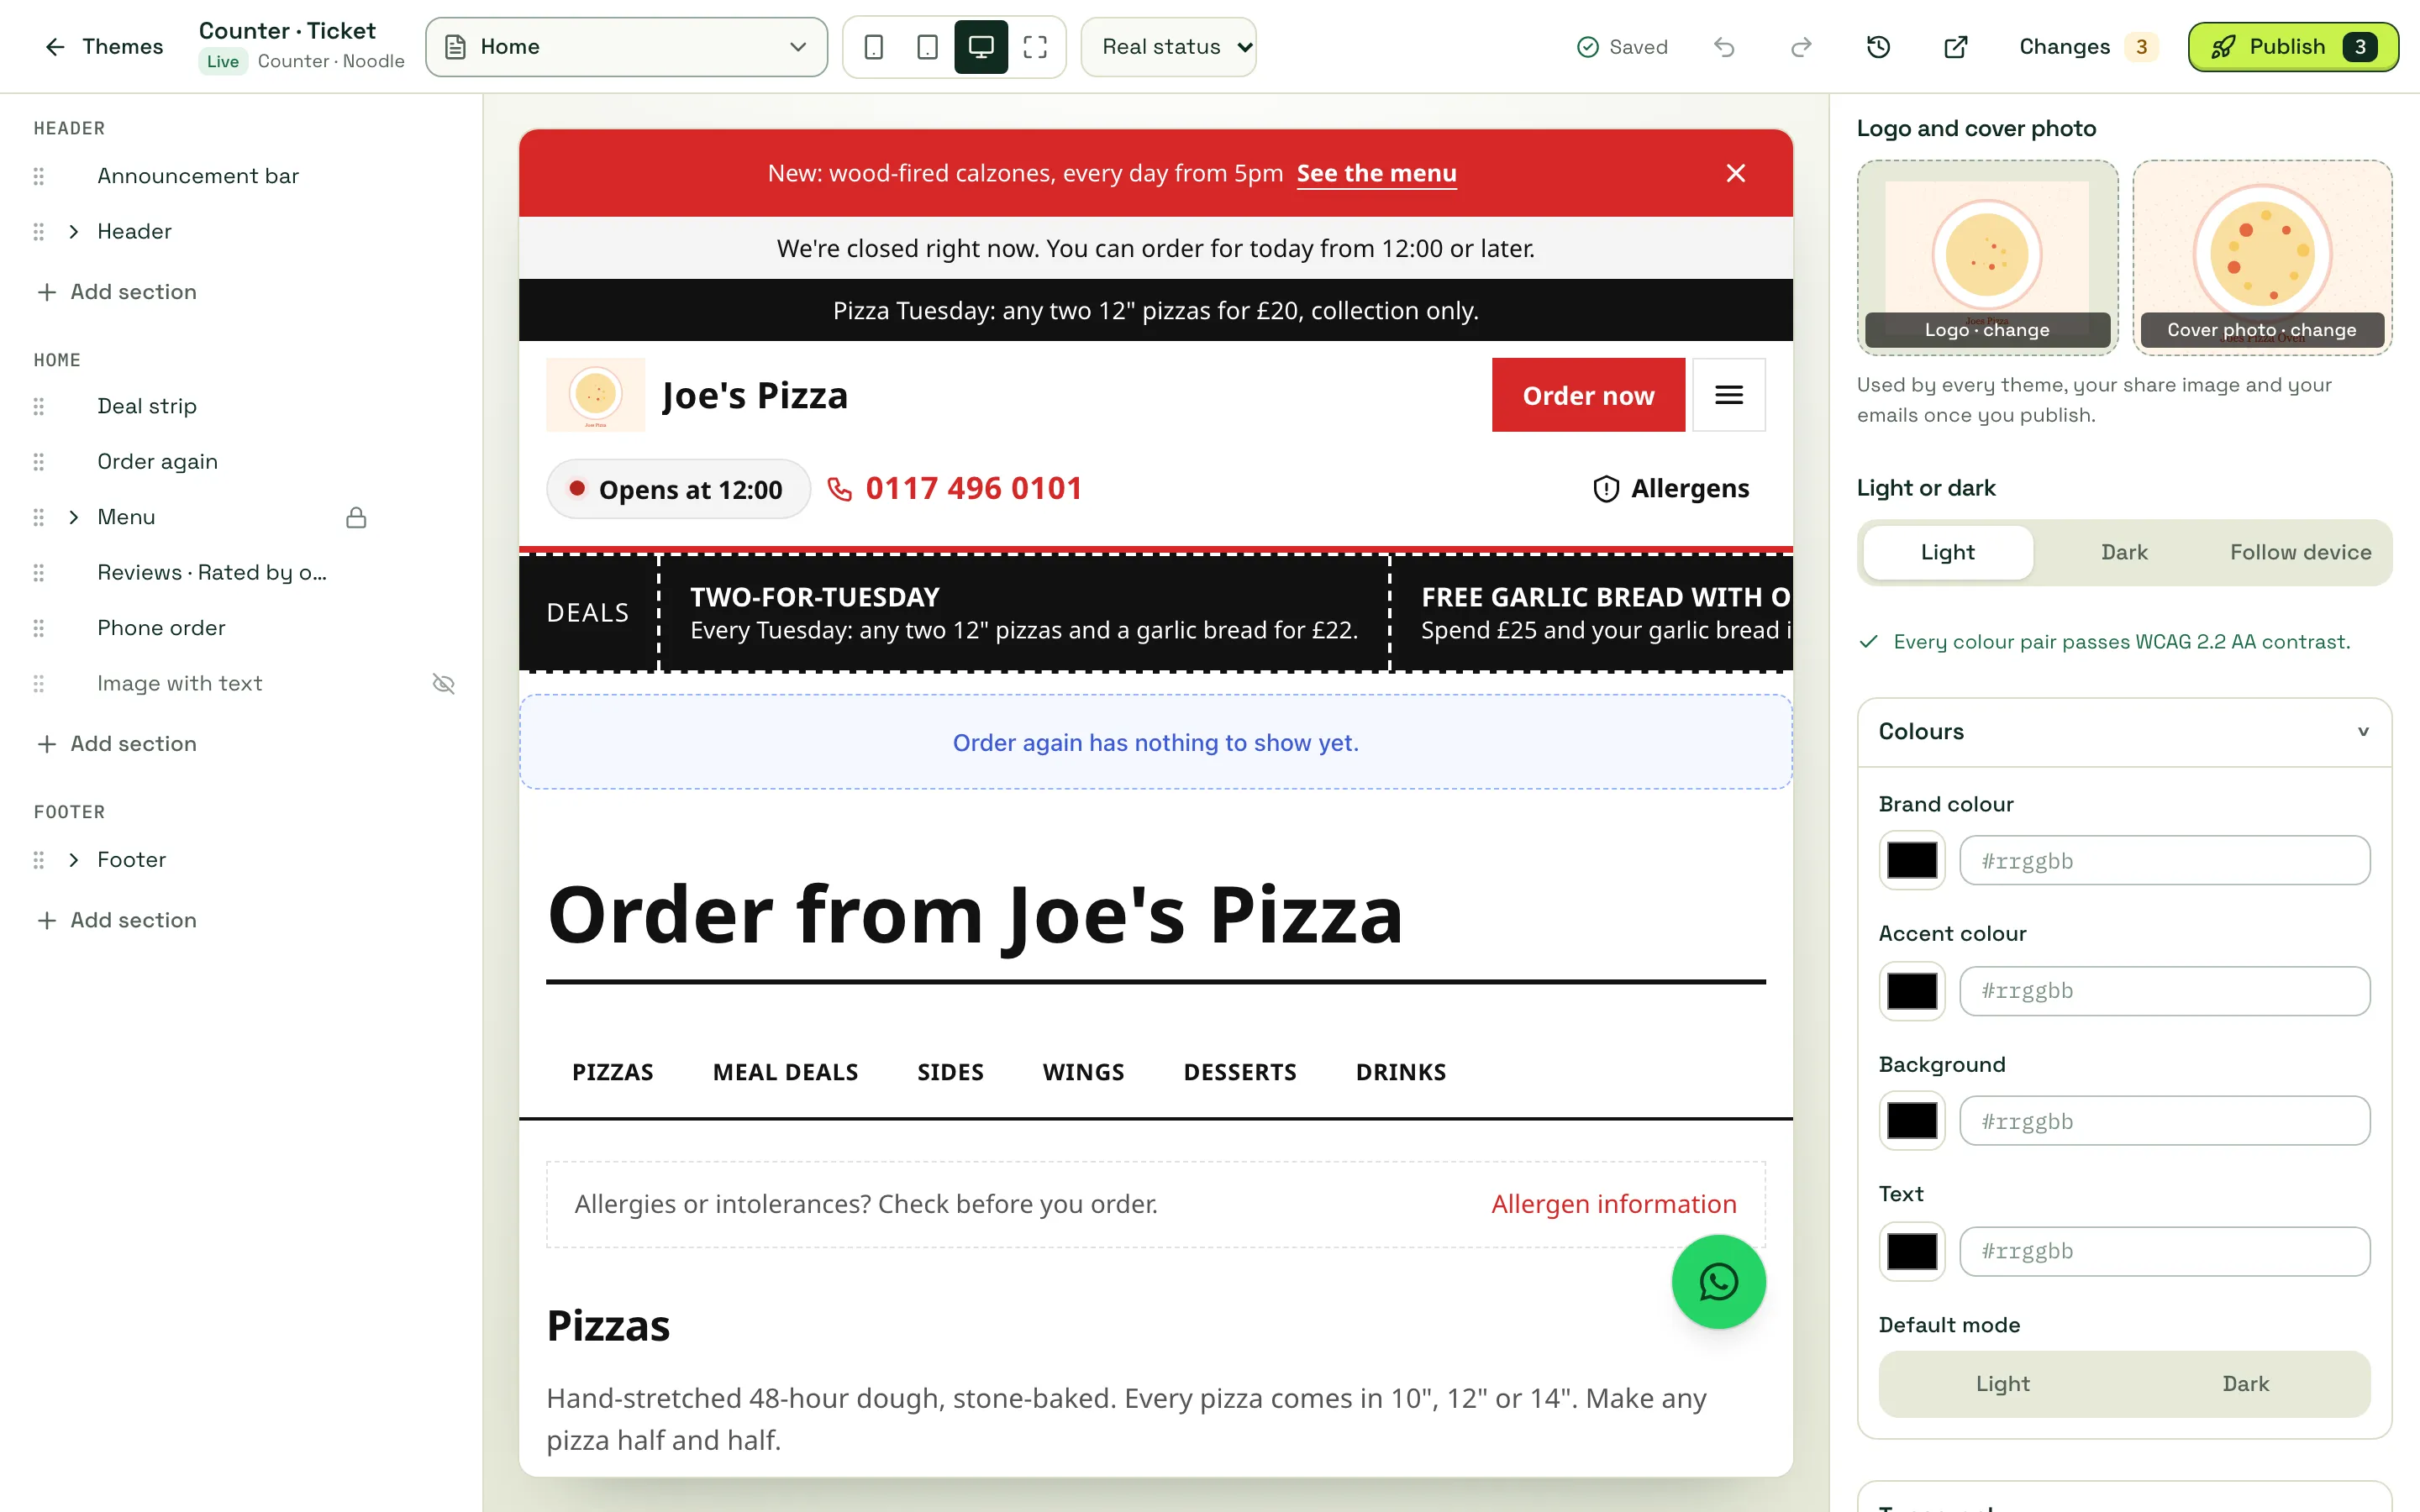
- Style: swap the palette in one click. Use the style’s colours clears any colours of your own.
- Logo and cover photo: used by every theme, by your share image and, once you publish, by your emails.
- Light or dark: Light, Dark or Follow device.
- Colours: Brand colour (buttons, links and highlights), Accent colour, Background and Text. Leave them empty to use the style’s colours.
Every colour pair is checked as you go. When they all pass you see “Every colour pair passes WCAG 2.2 AA contrast”; if one doesn’t, the editor tells you which and you can’t publish until it’s readable.
Add your logo and cover photo
Section titled “Add your logo and cover photo”-
Under Logo and cover photo, click Logo · change.
-
Choose Upload a photo, or pick one you’ve already uploaded (Your photos, Logo and cover, Menu photos).
-
Fill in Description for screen readers, for example “Marco’s Kitchen logo”. It’s needed to publish; Suggest offers a starting point.
-
Click Use this photo.
-
Do the same for Cover photo · change. On Crop and focus, click the most important part of the photo so every crop keeps it in view.
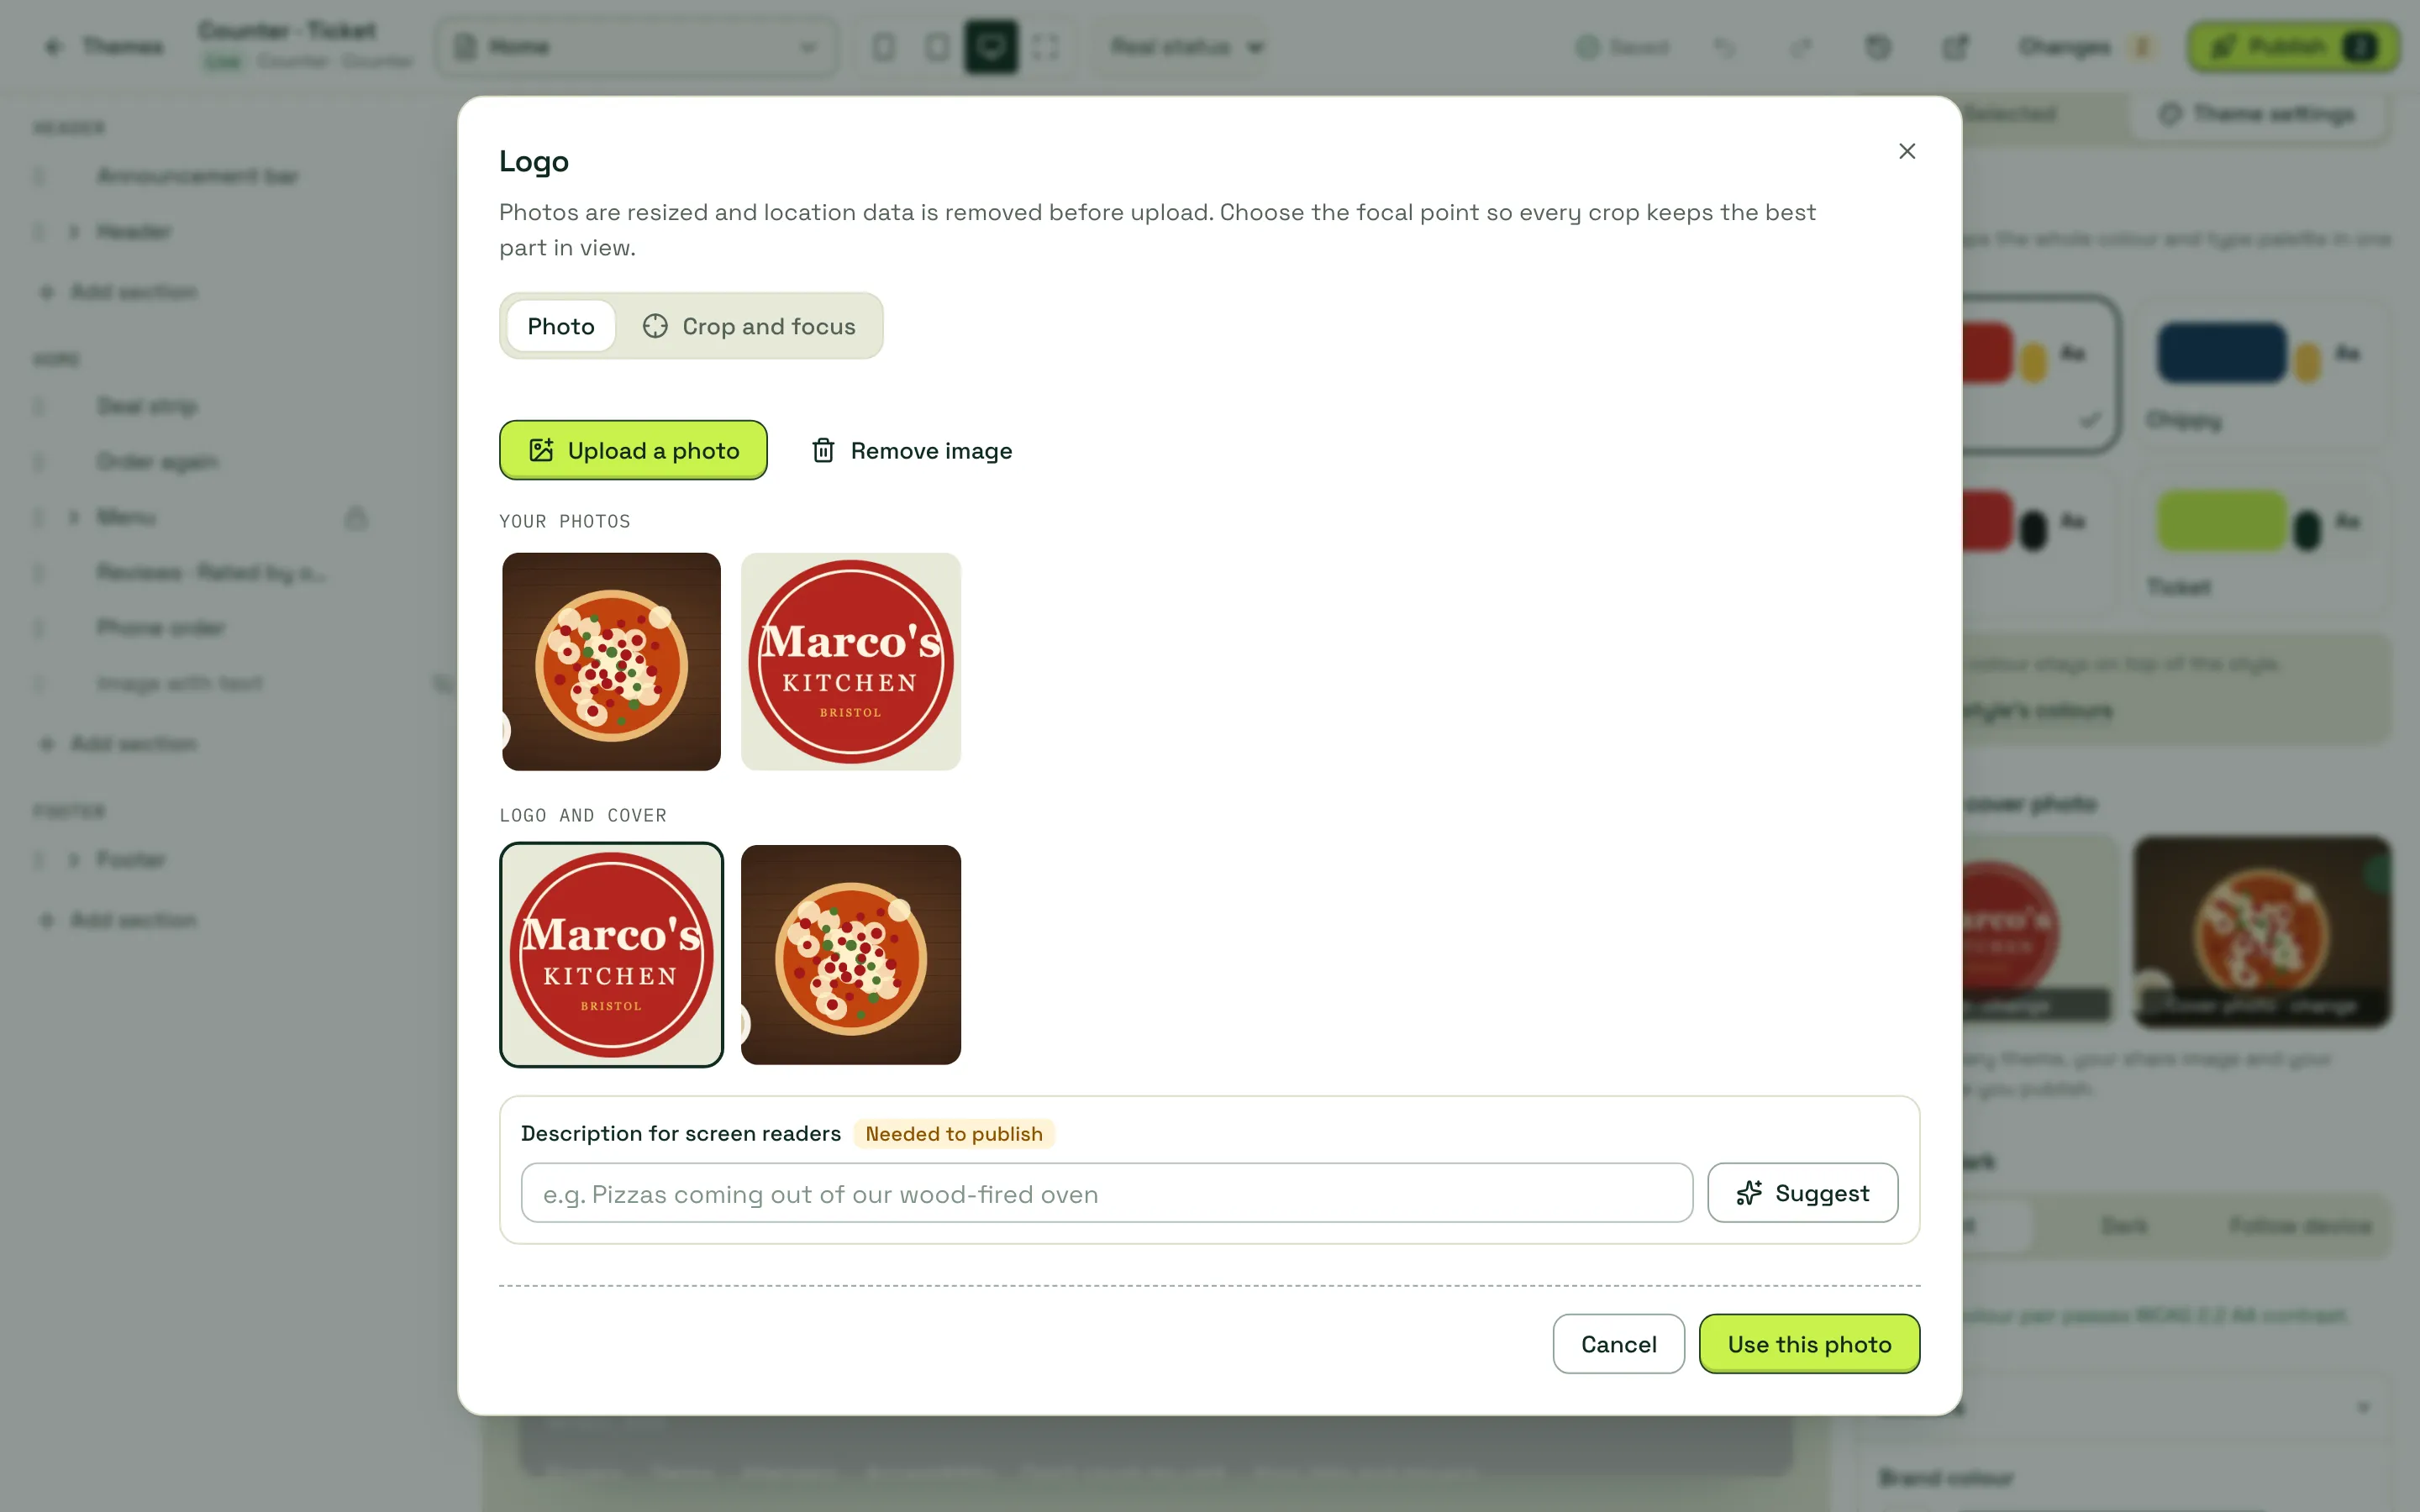
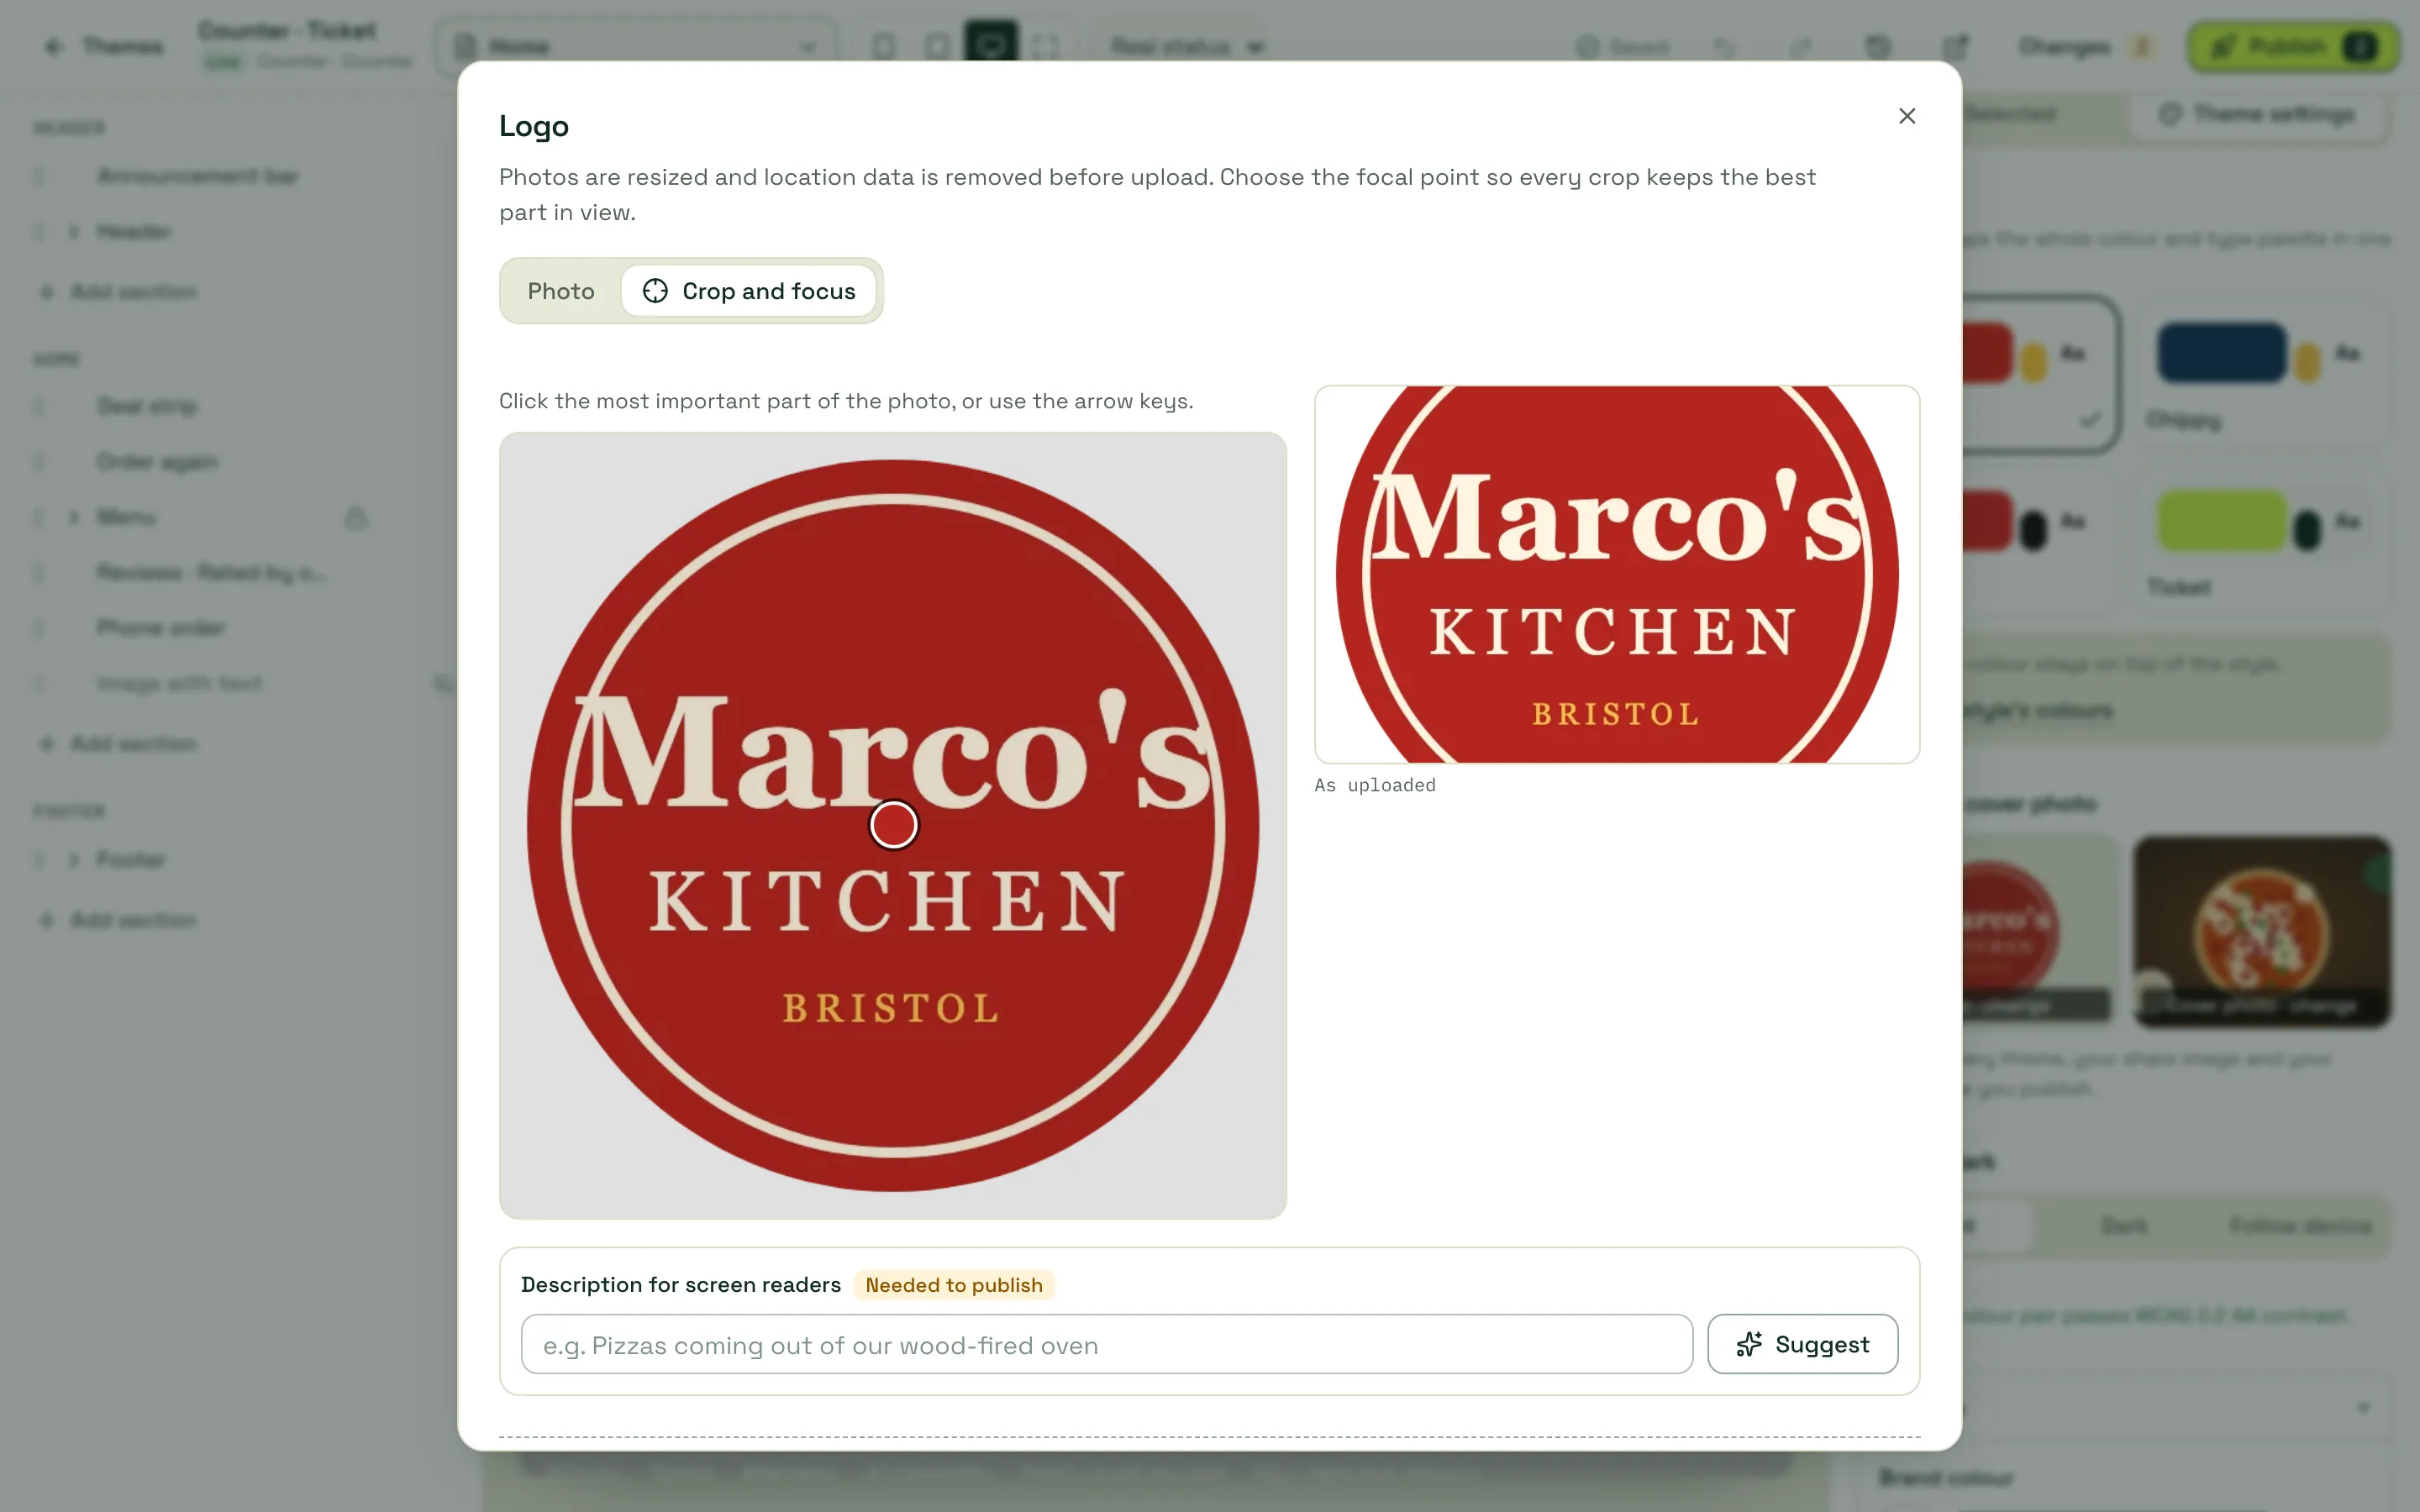
We resize photos, save them in a web-friendly format and remove hidden location data before upload. SVG files aren’t accepted.
Publish
Section titled “Publish”-
Click Changes to see what’s waiting in your draft.
-
Click Publish. We check every page for readability, allergen access and speed first.
-
Fix anything under Must fix (Show me takes you to it). We fixed these for you lists small automatic fixes, such as a darker photo overlay so a heading stays readable; Worth a look is advice.
-
Add a name in Name this version (optional), for example “Christmas colours”, and click Publish now.
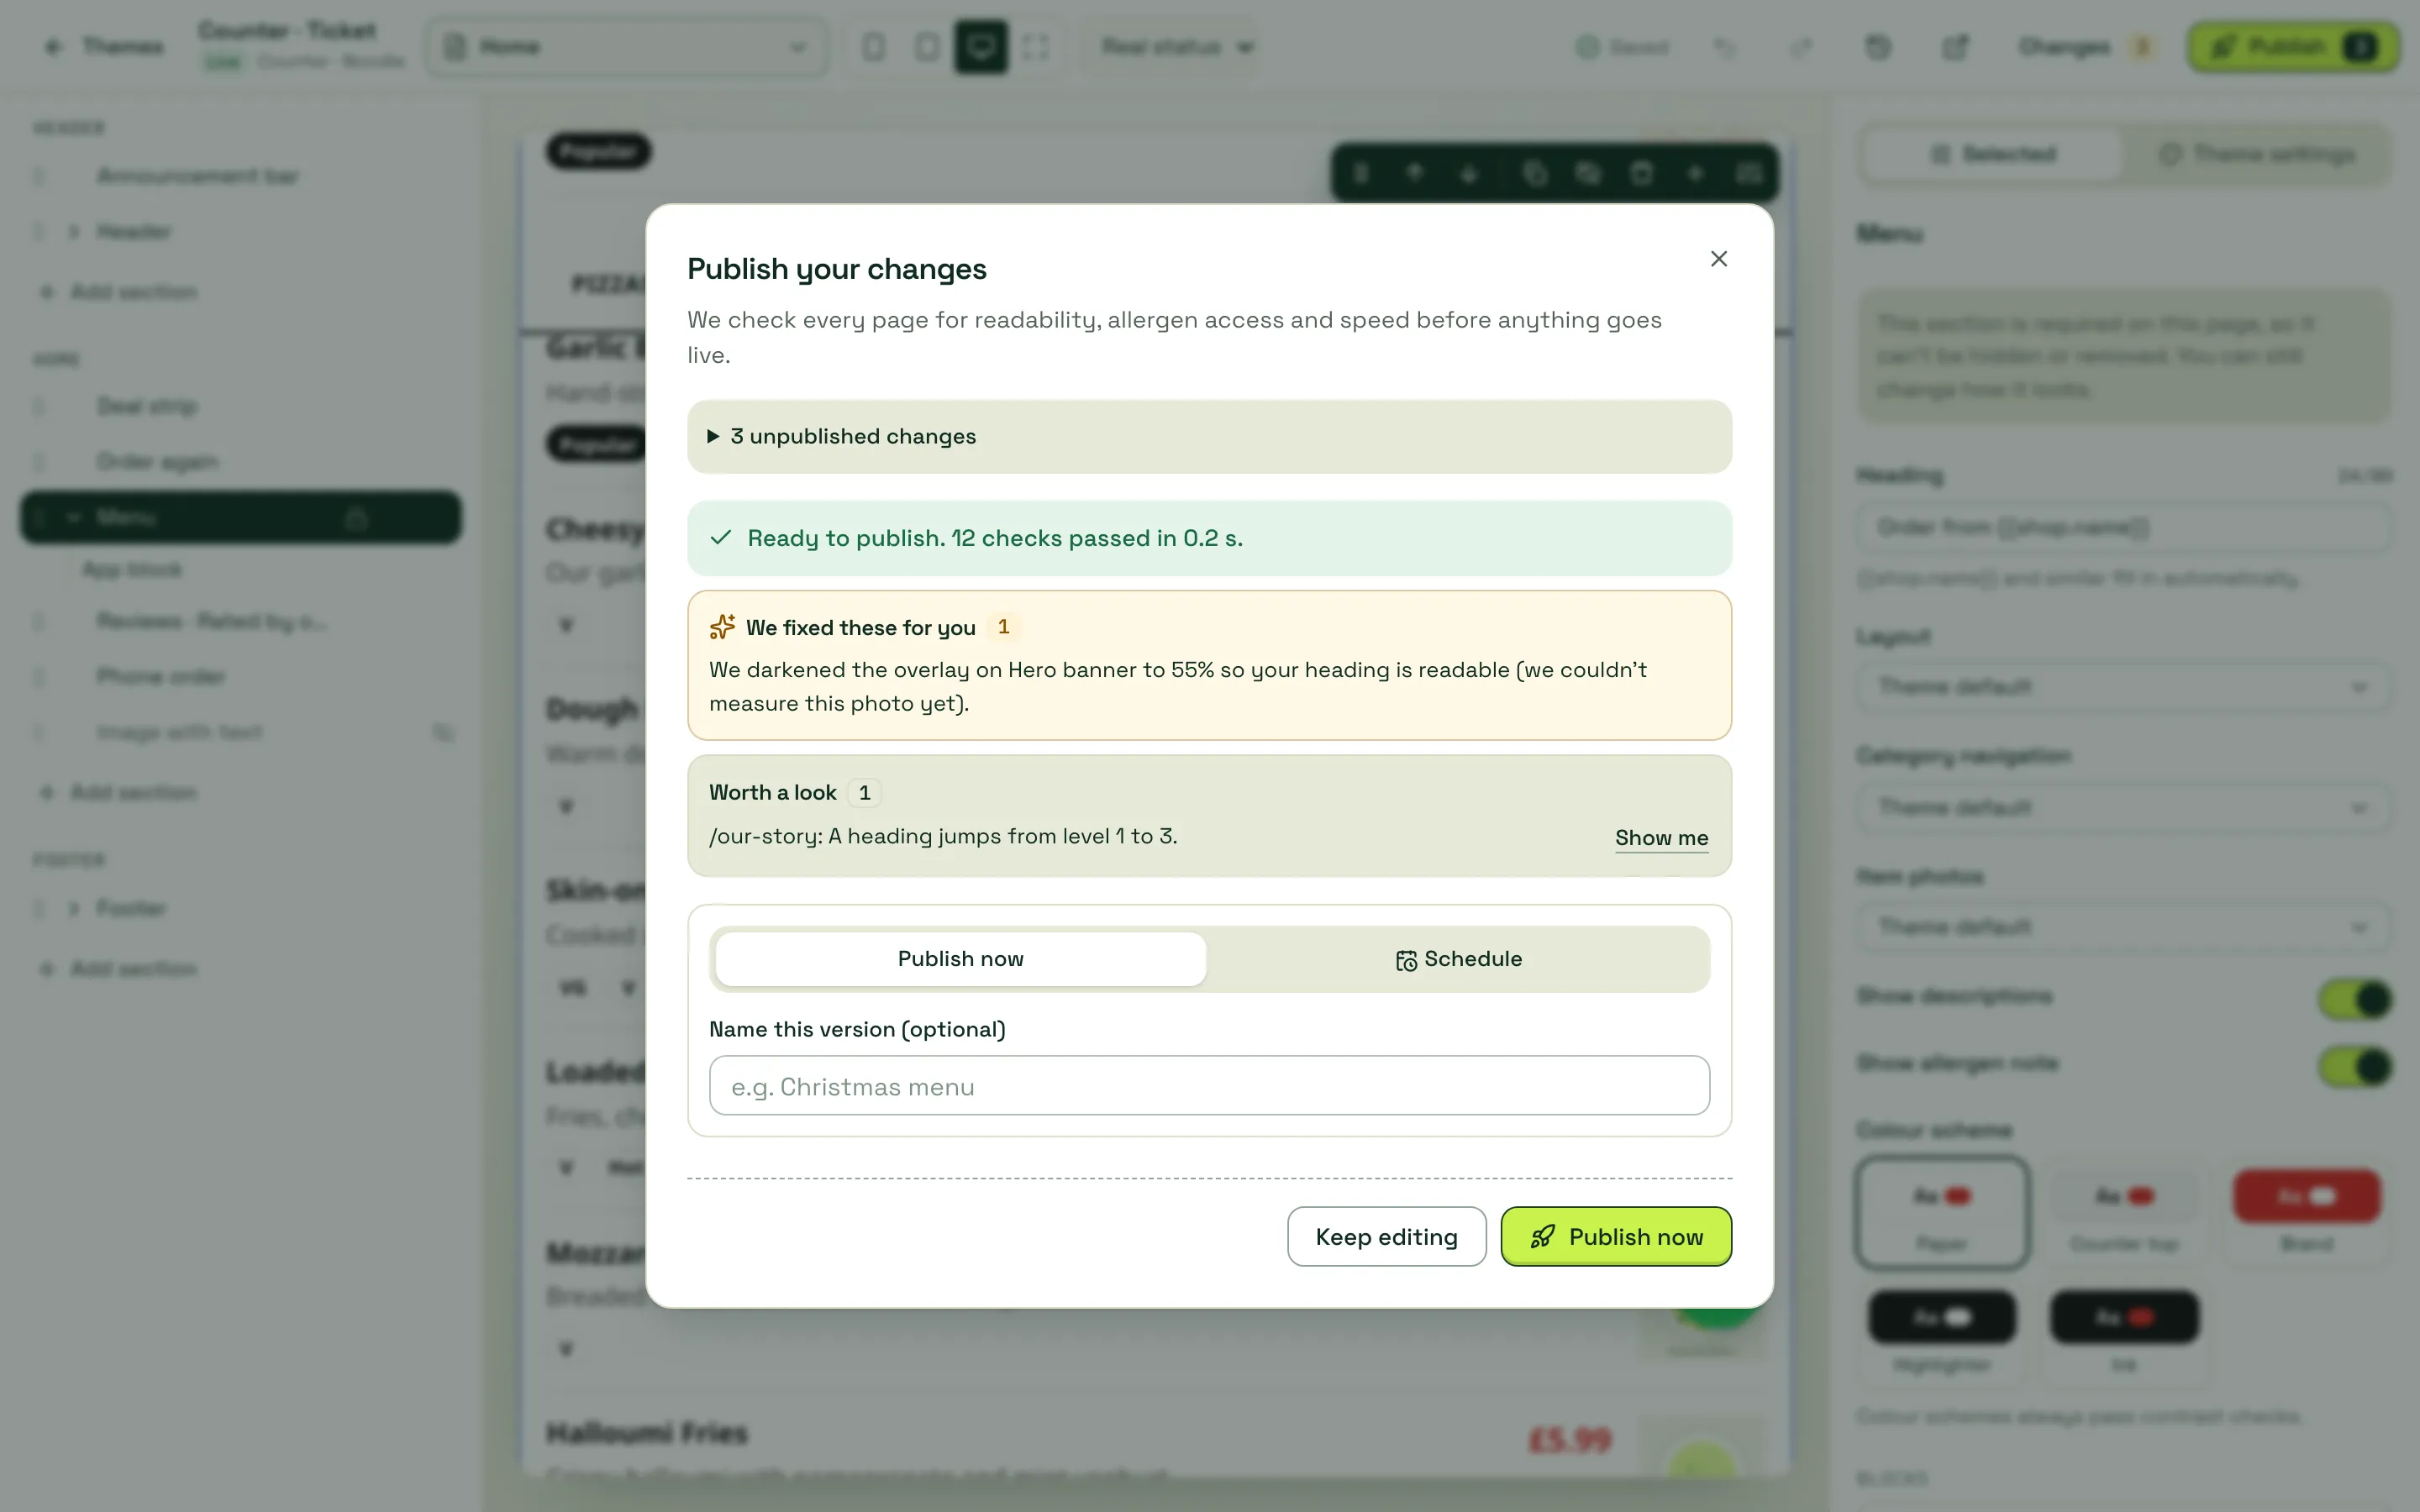
Diners see the new design straight away. On Growth and Pro you can Schedule the publish for a later time instead.
Go back to an earlier version
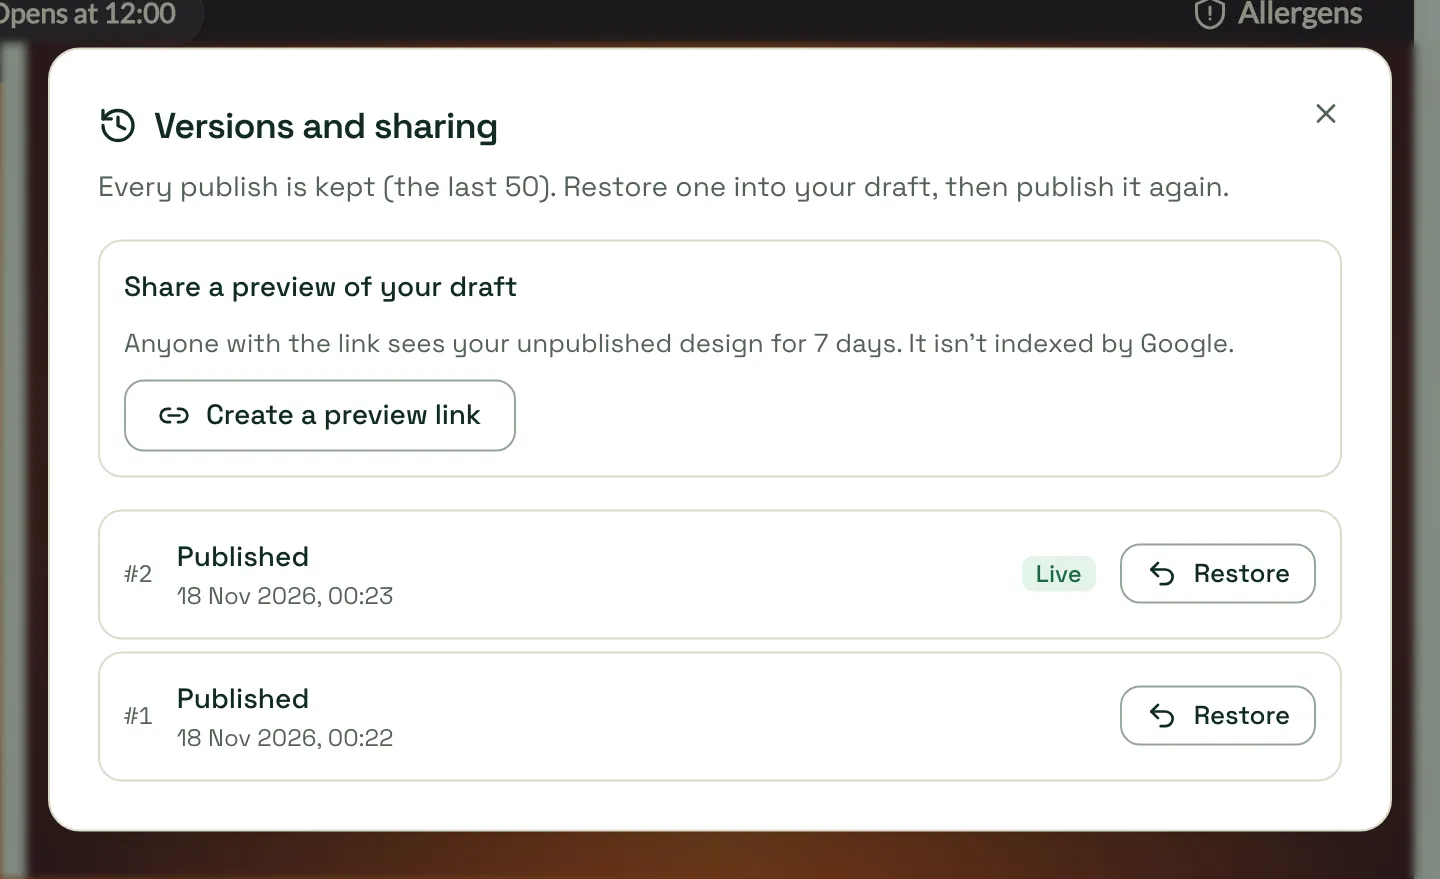
Section titled “Go back to an earlier version”The clock button in the top bar opens Versions and sharing. Every publish is kept (the last 50): Restore puts a version into your draft, and nothing changes for customers until you publish it again. Create a preview link makes a private link to your unpublished design that works for 7 days and isn’t indexed by Google.
- Keep the photo about the food. One great photo beats five average ones.
- Check the phone width. Most diners order on a phone: use the phone button in the top bar, and open your shop on your own phone after you go live.
- Start with a style before custom colours. Each style is already matched and checked.
Related
Section titled “Related”- Themes and the storefront editor: every theme, sections, pages, announcements and the “Powered by” badge
- Storefront settings
- Connect your domain: use your own web address
Next step
Section titled “Next step”6. Payments: connect Stripe so diners can pay by card.
Was this page helpful?